
BH — Body height
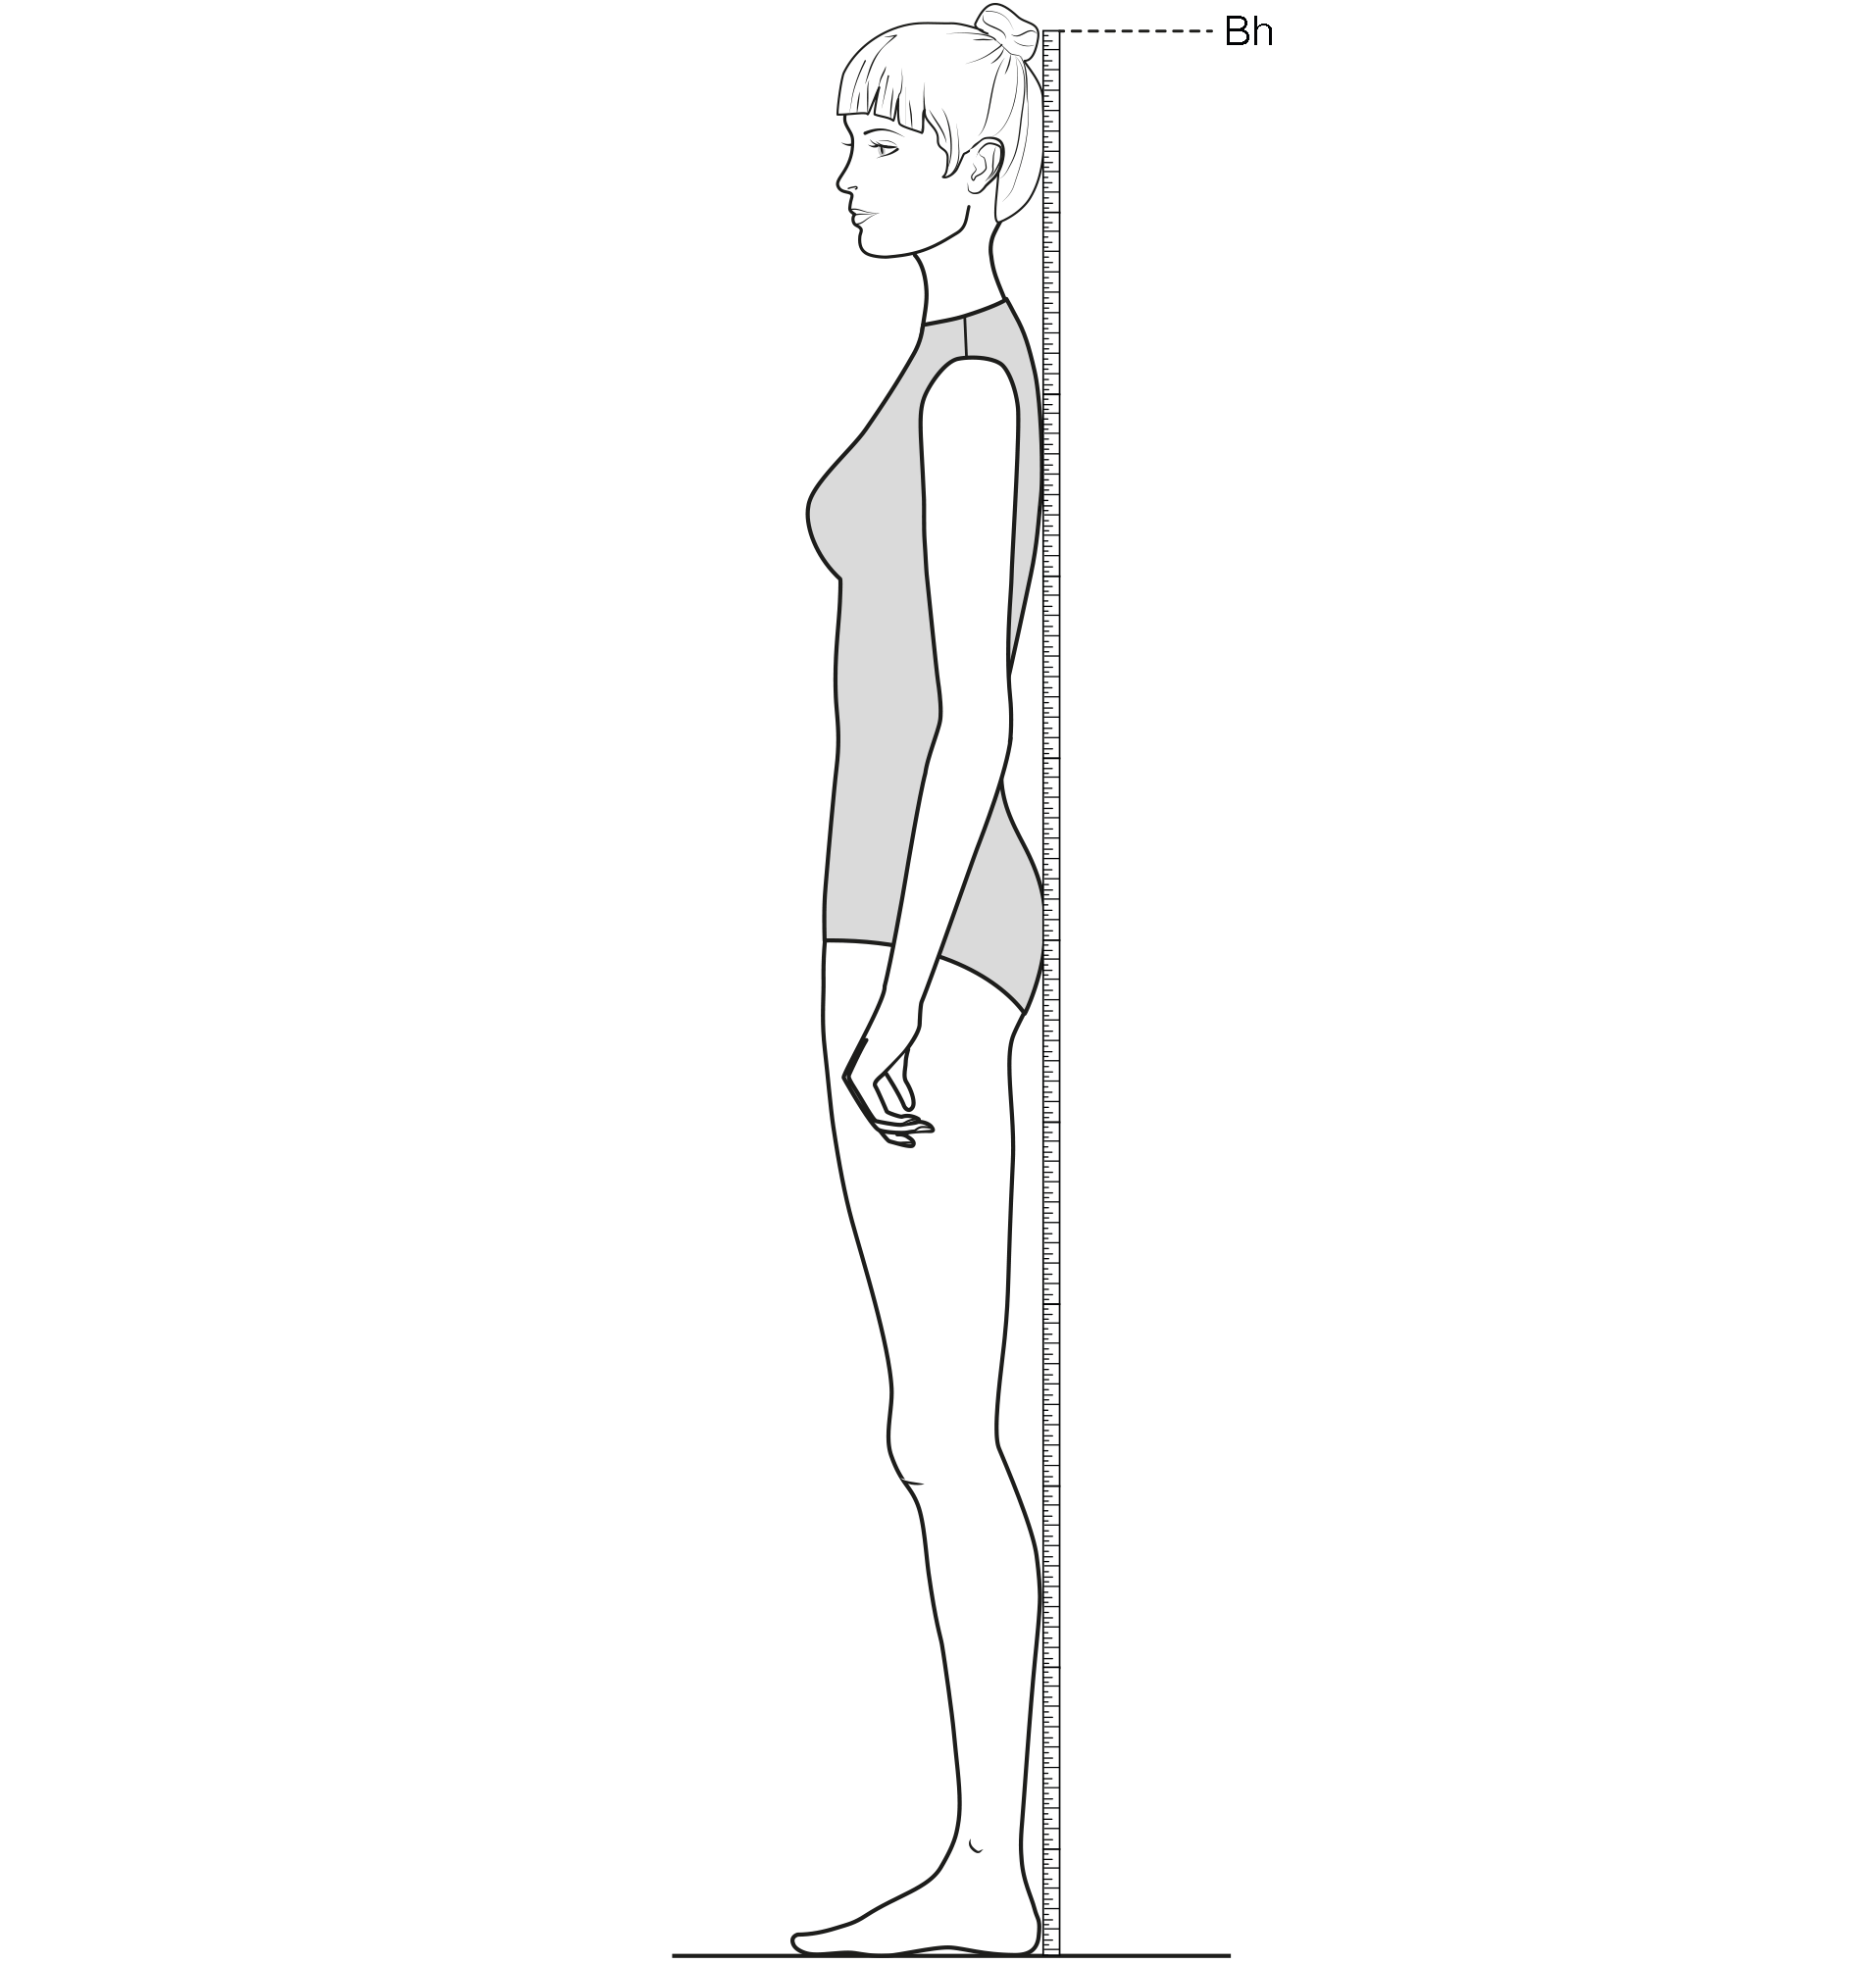
- Measure the height from the top of the head to the floor (Without shoes). The body height can be measured exactly if the client stands in front of a wall measuring strip. Mark the highest point of the head with a square.
CG—Chest girth
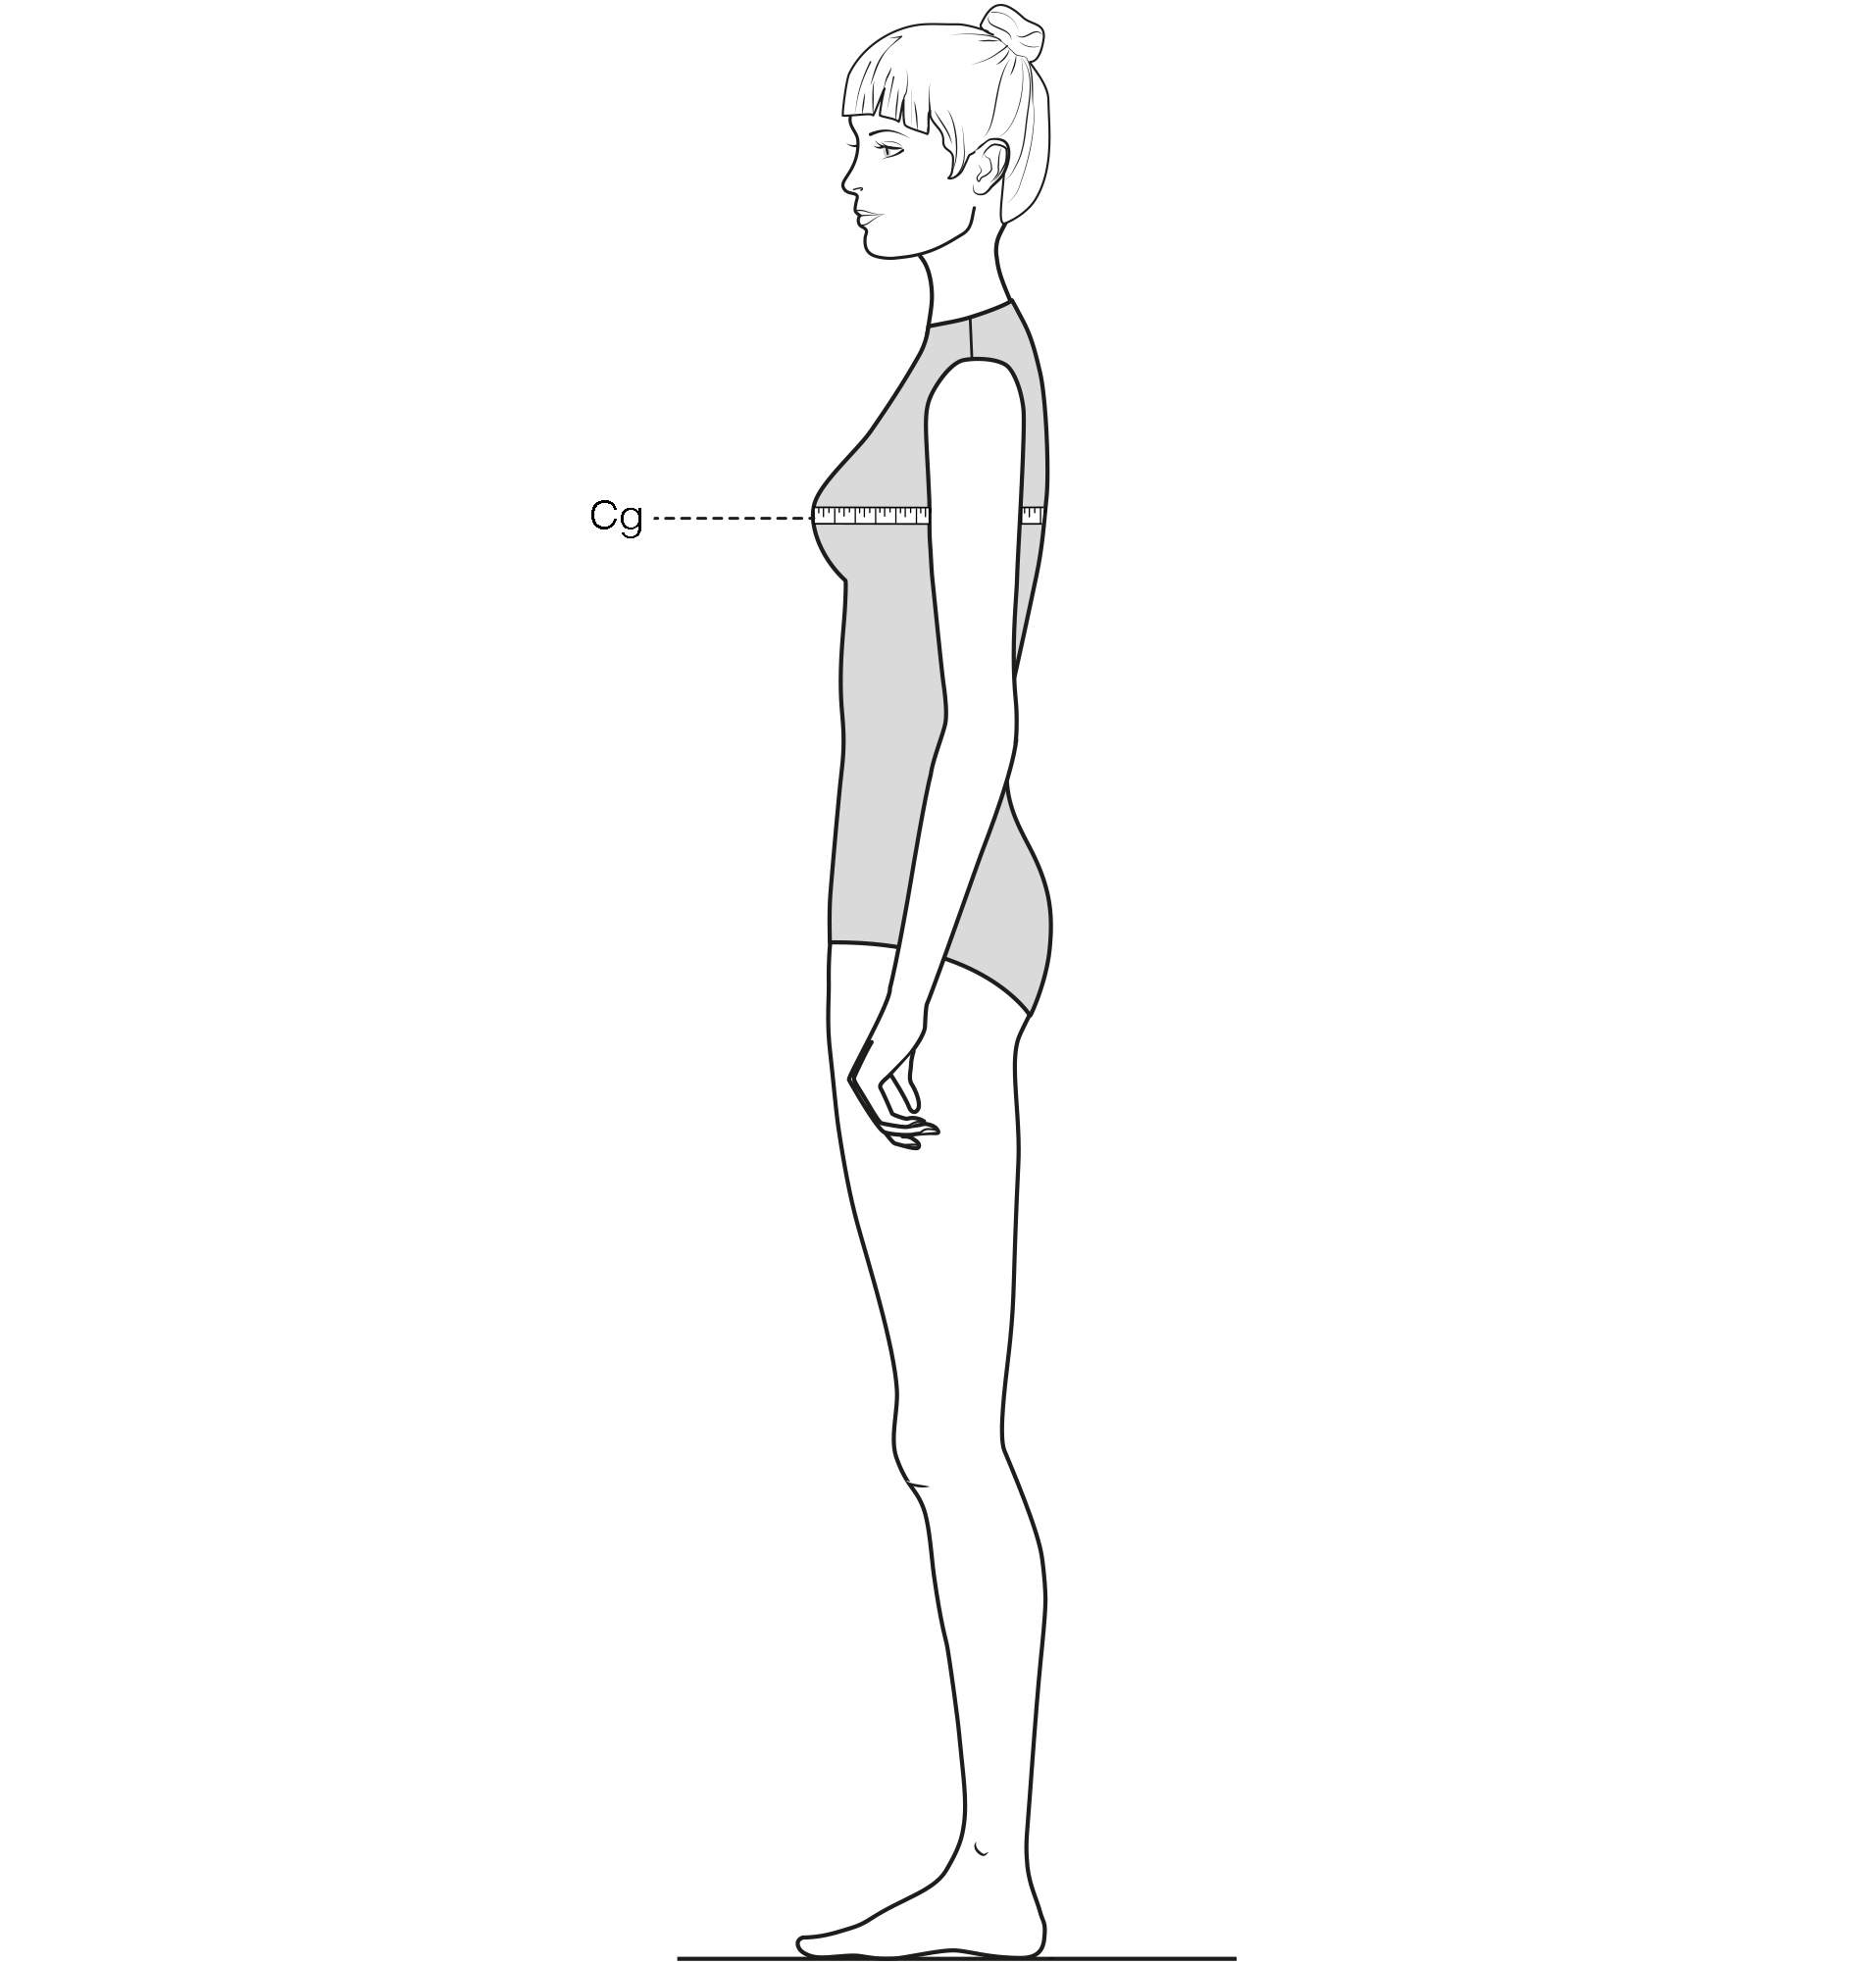
- Measure the circumference over the fullest part of the bust (bust points) and across the lower part of the shoulder blades, With the measuring tape slightly lifted at the back. Take the measurement from the back of the client.
Ubg – Under bust girth
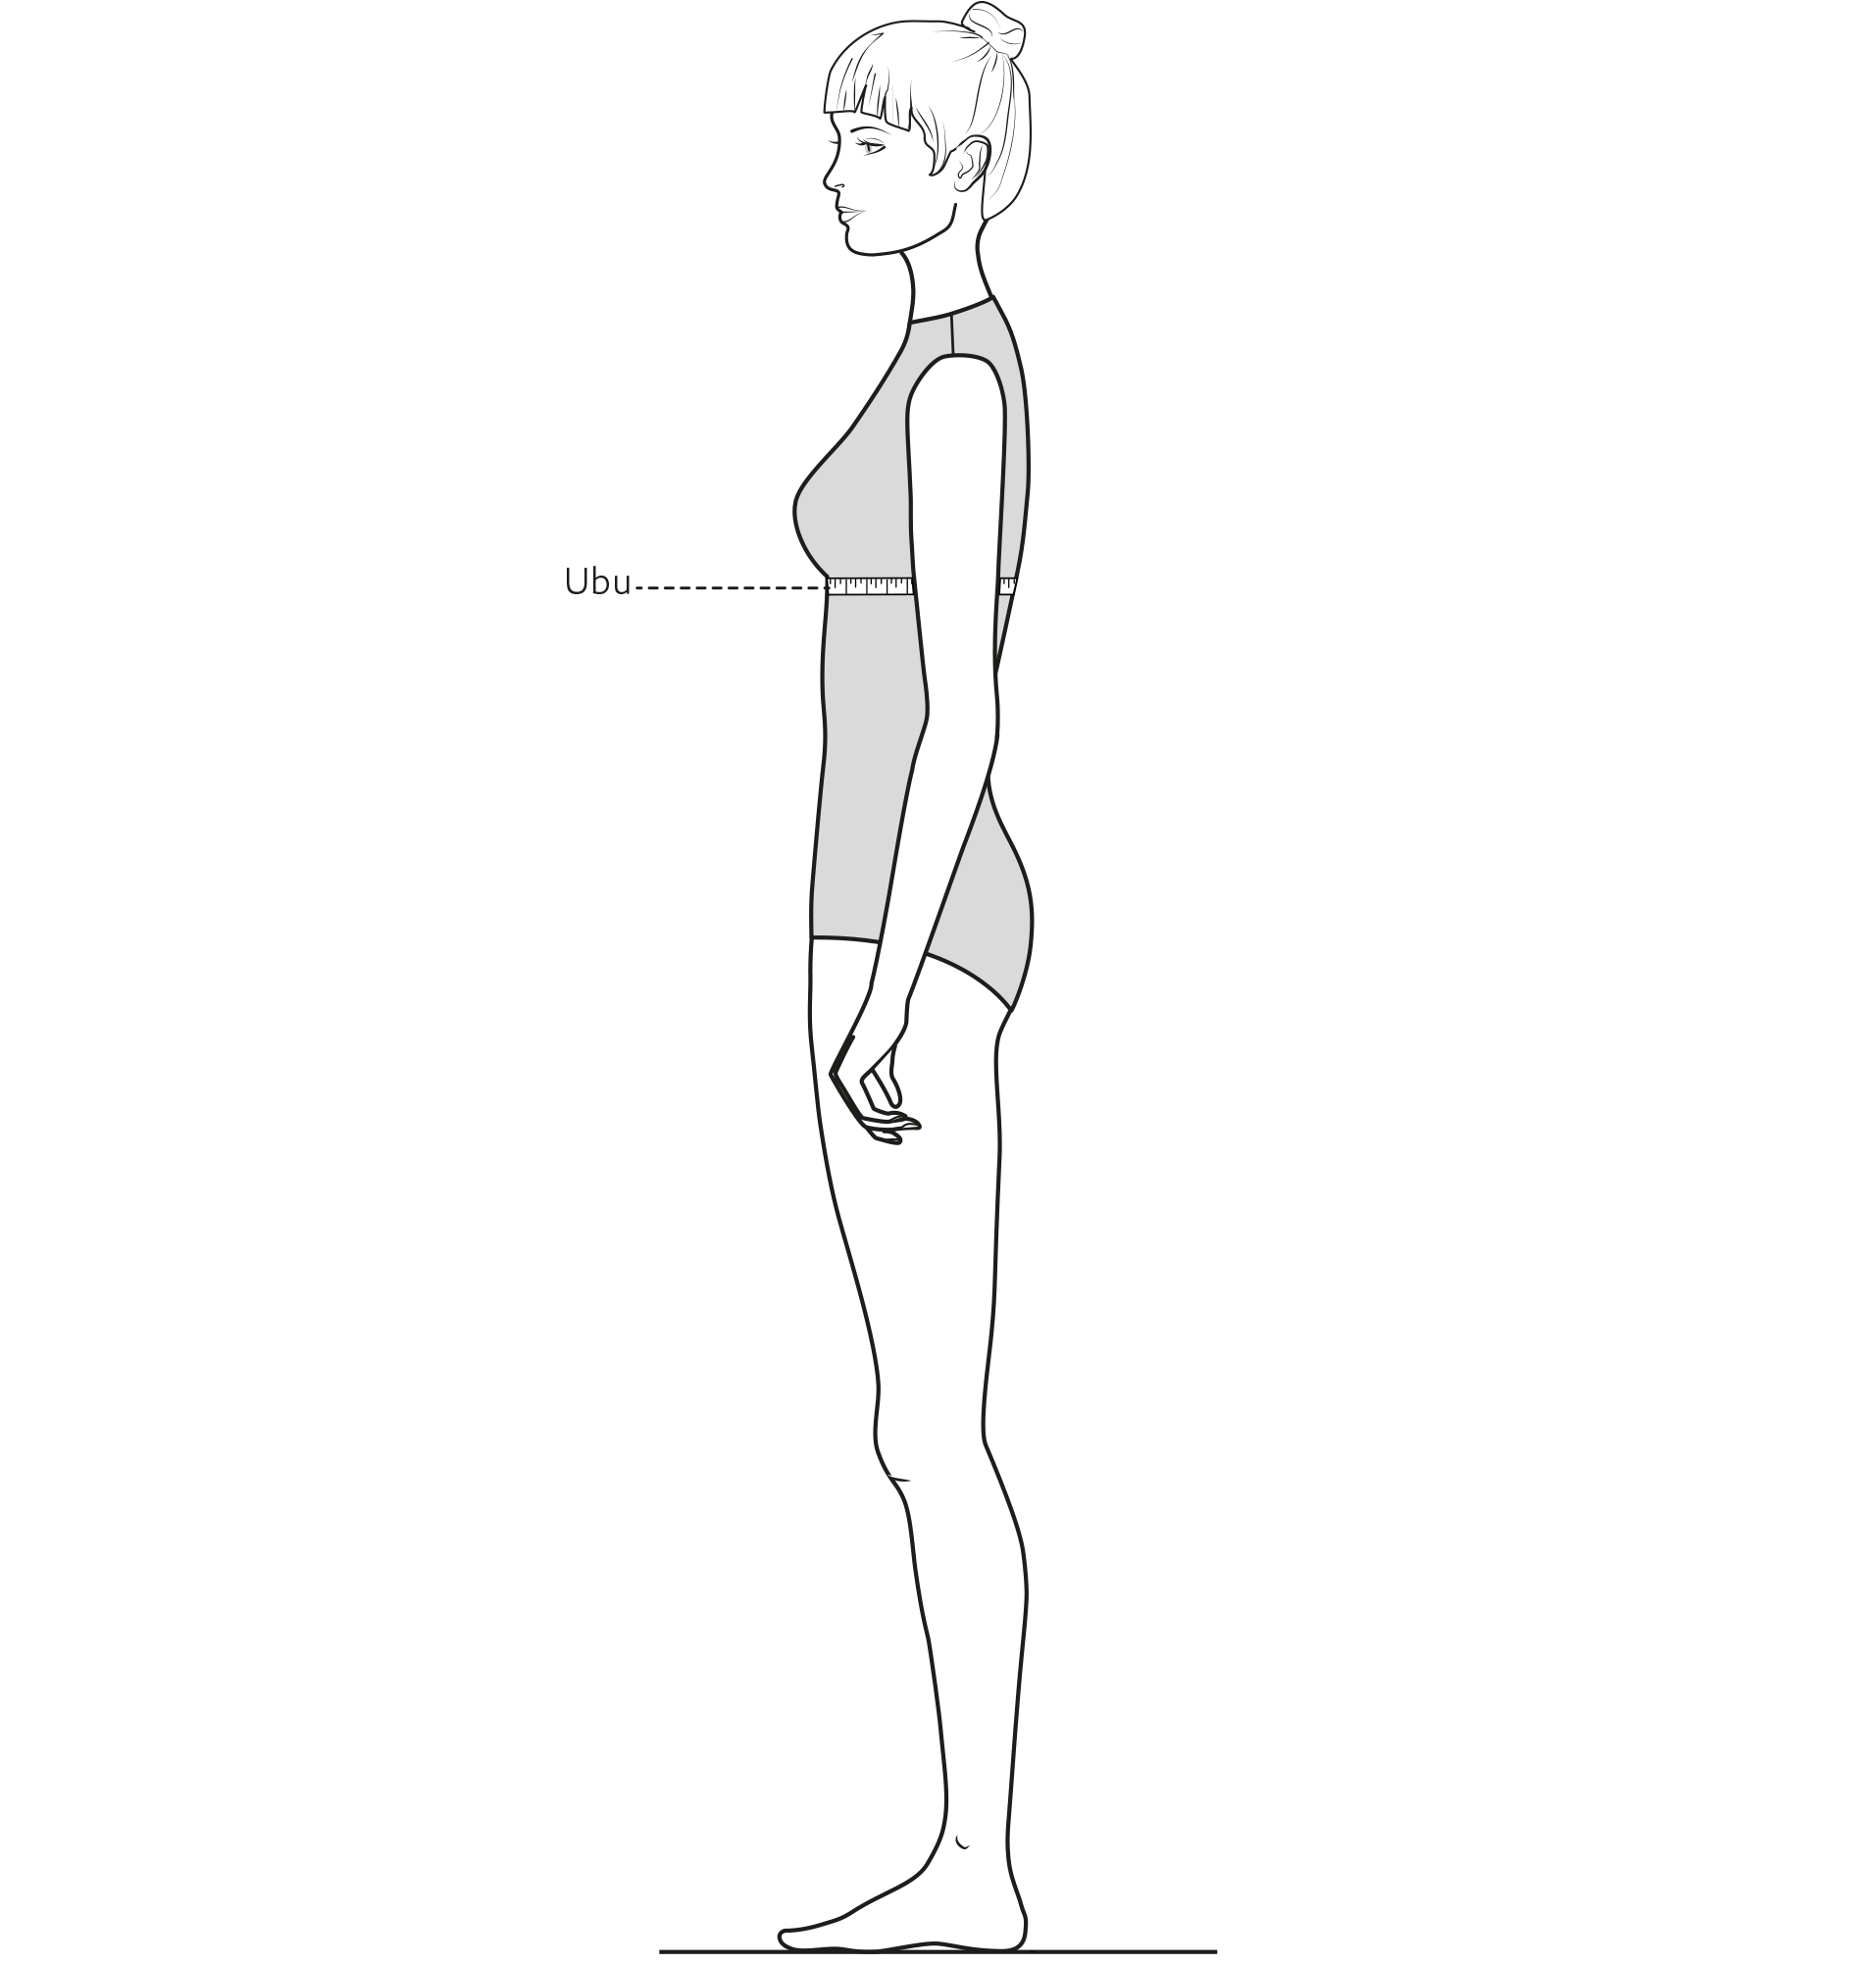
-
Measure the chest circumference horizontally just below the bust.
WG —Waist girth
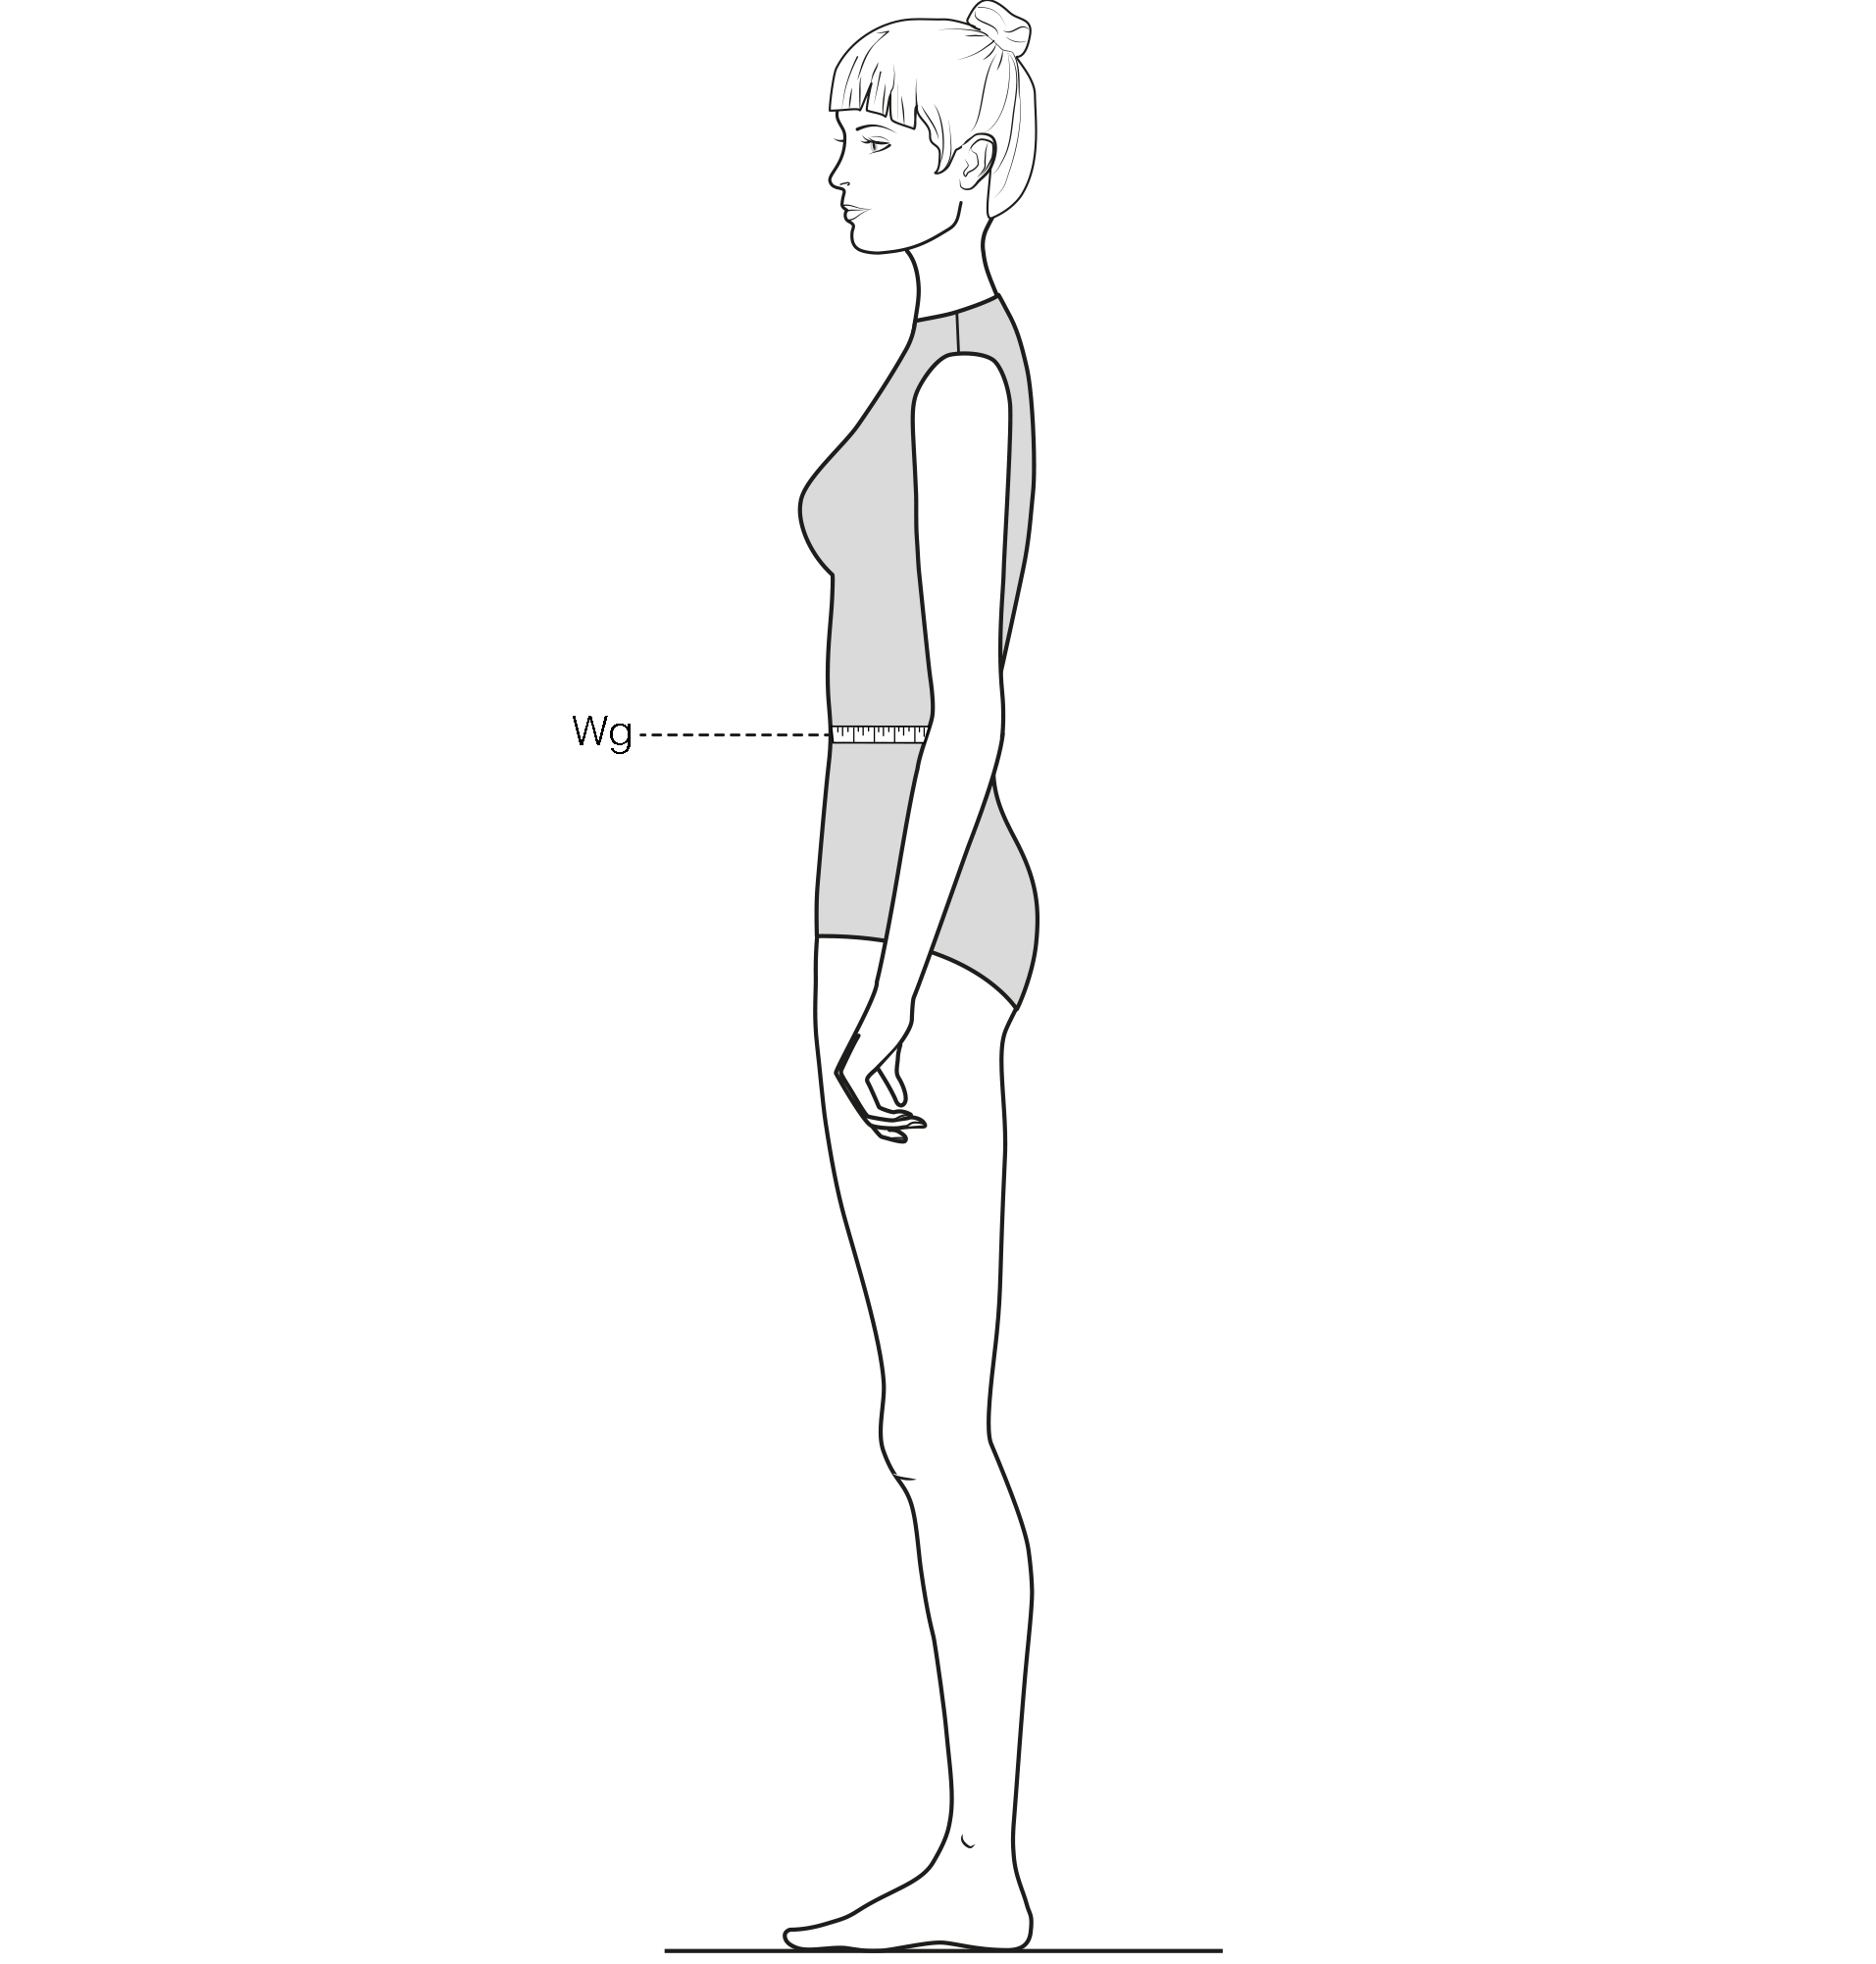
- Measure the circumference at the narrowest part of the waist. Place the measuring tape horizontally around the waist. Take the measurement from the front of the client.
Lwg – Low waist girth
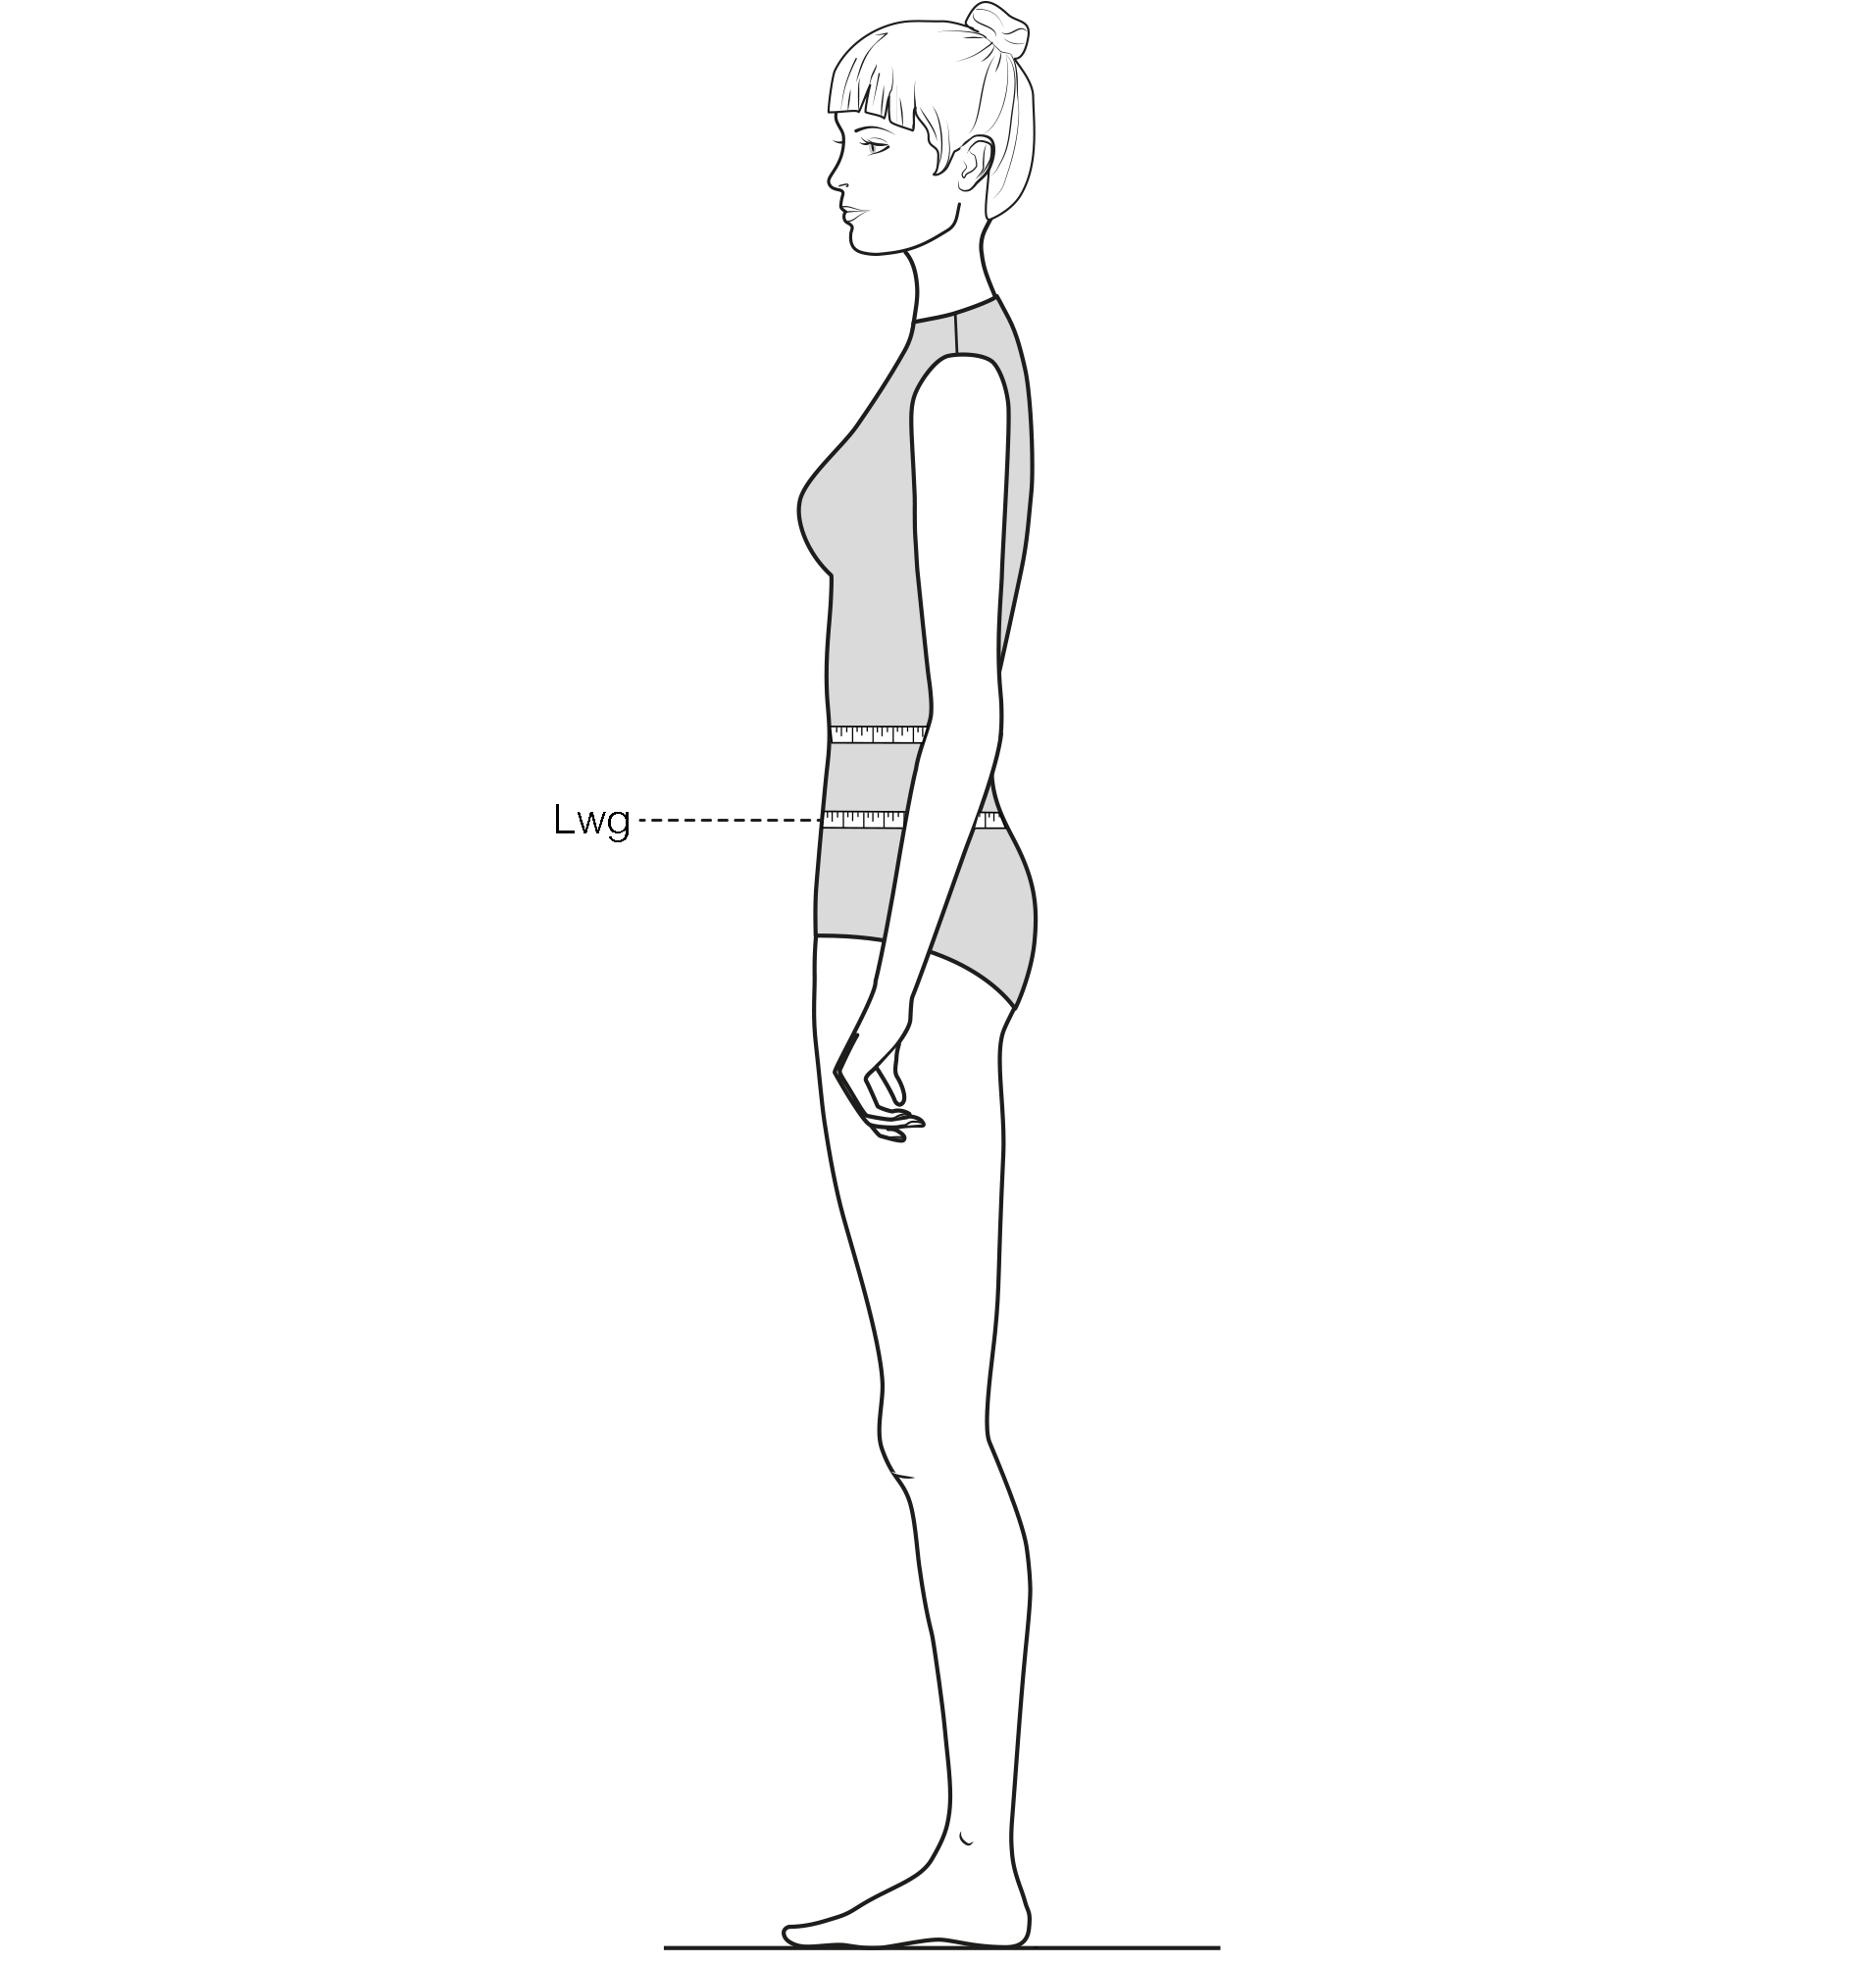
-
Measure the horizontal circumference 8 cm below the waist.
HG — Hip girth
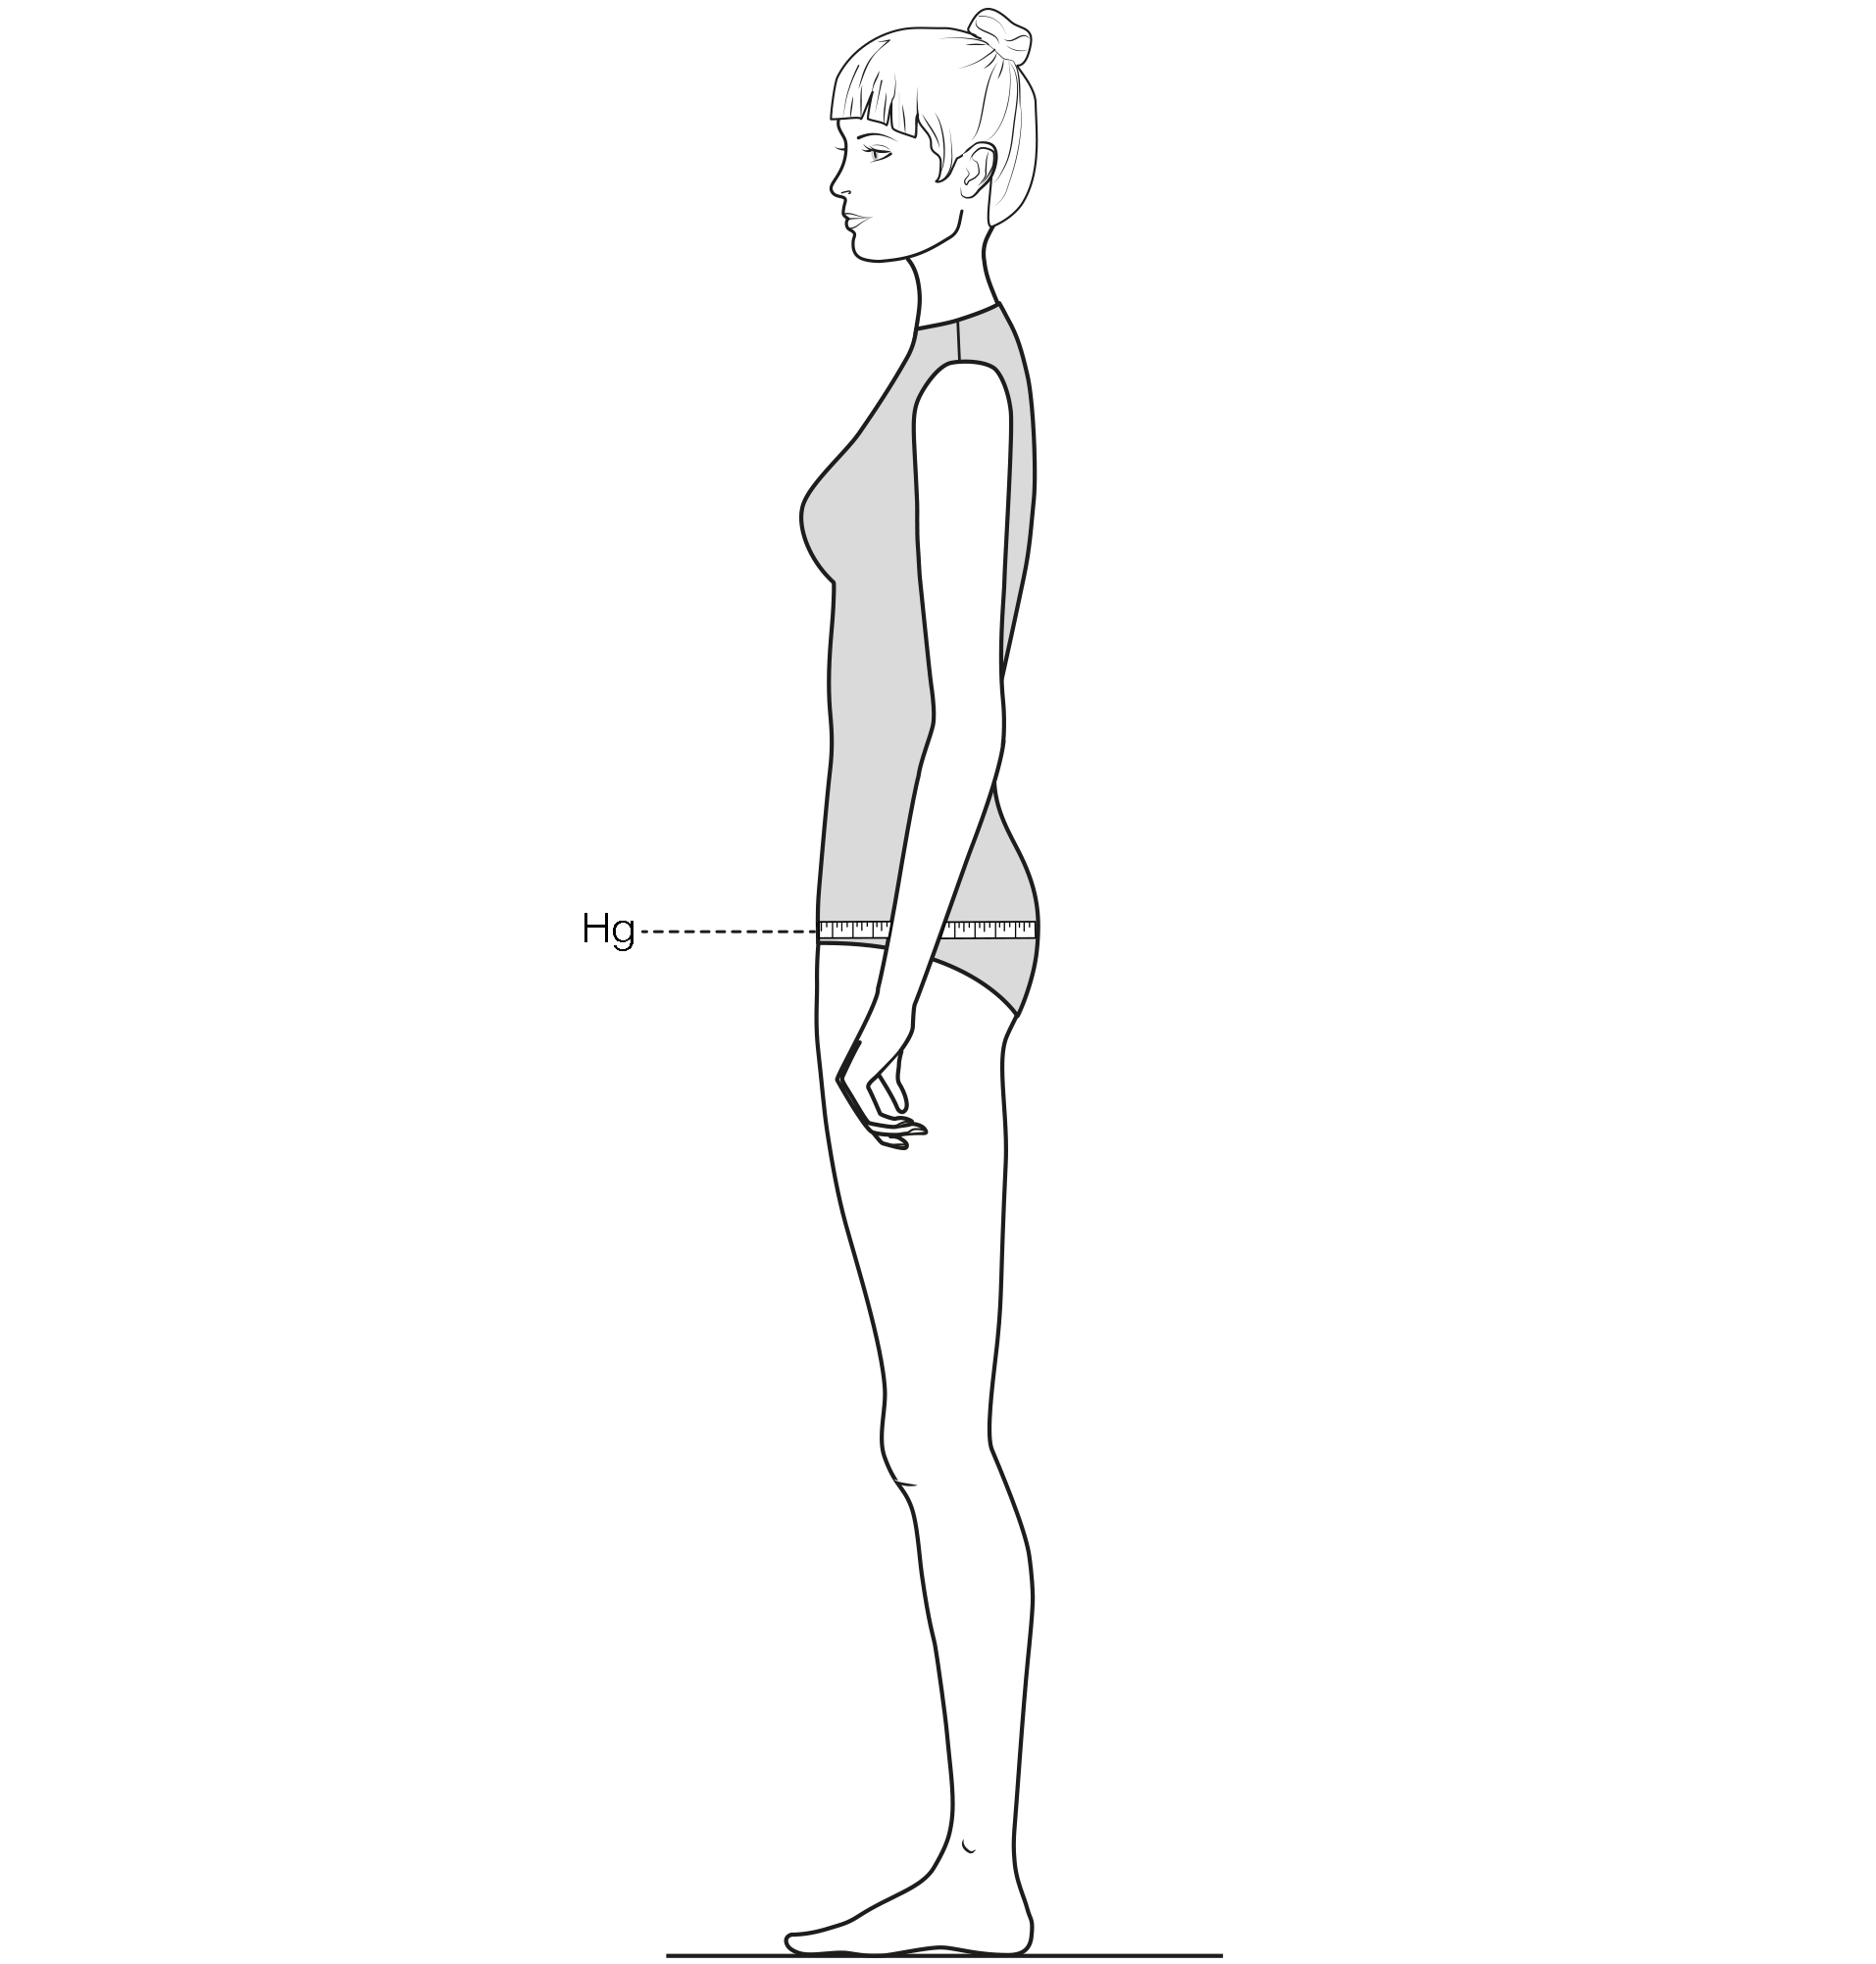
- Measure the circumference over the strongest part of the seat and / or the hip. Take the measurement from the front of the client. Note any obvious figure proportions: e.g. one-sided high or strong hip, full or flat seat, and full or flat abdomen.
SL — Sleeve length
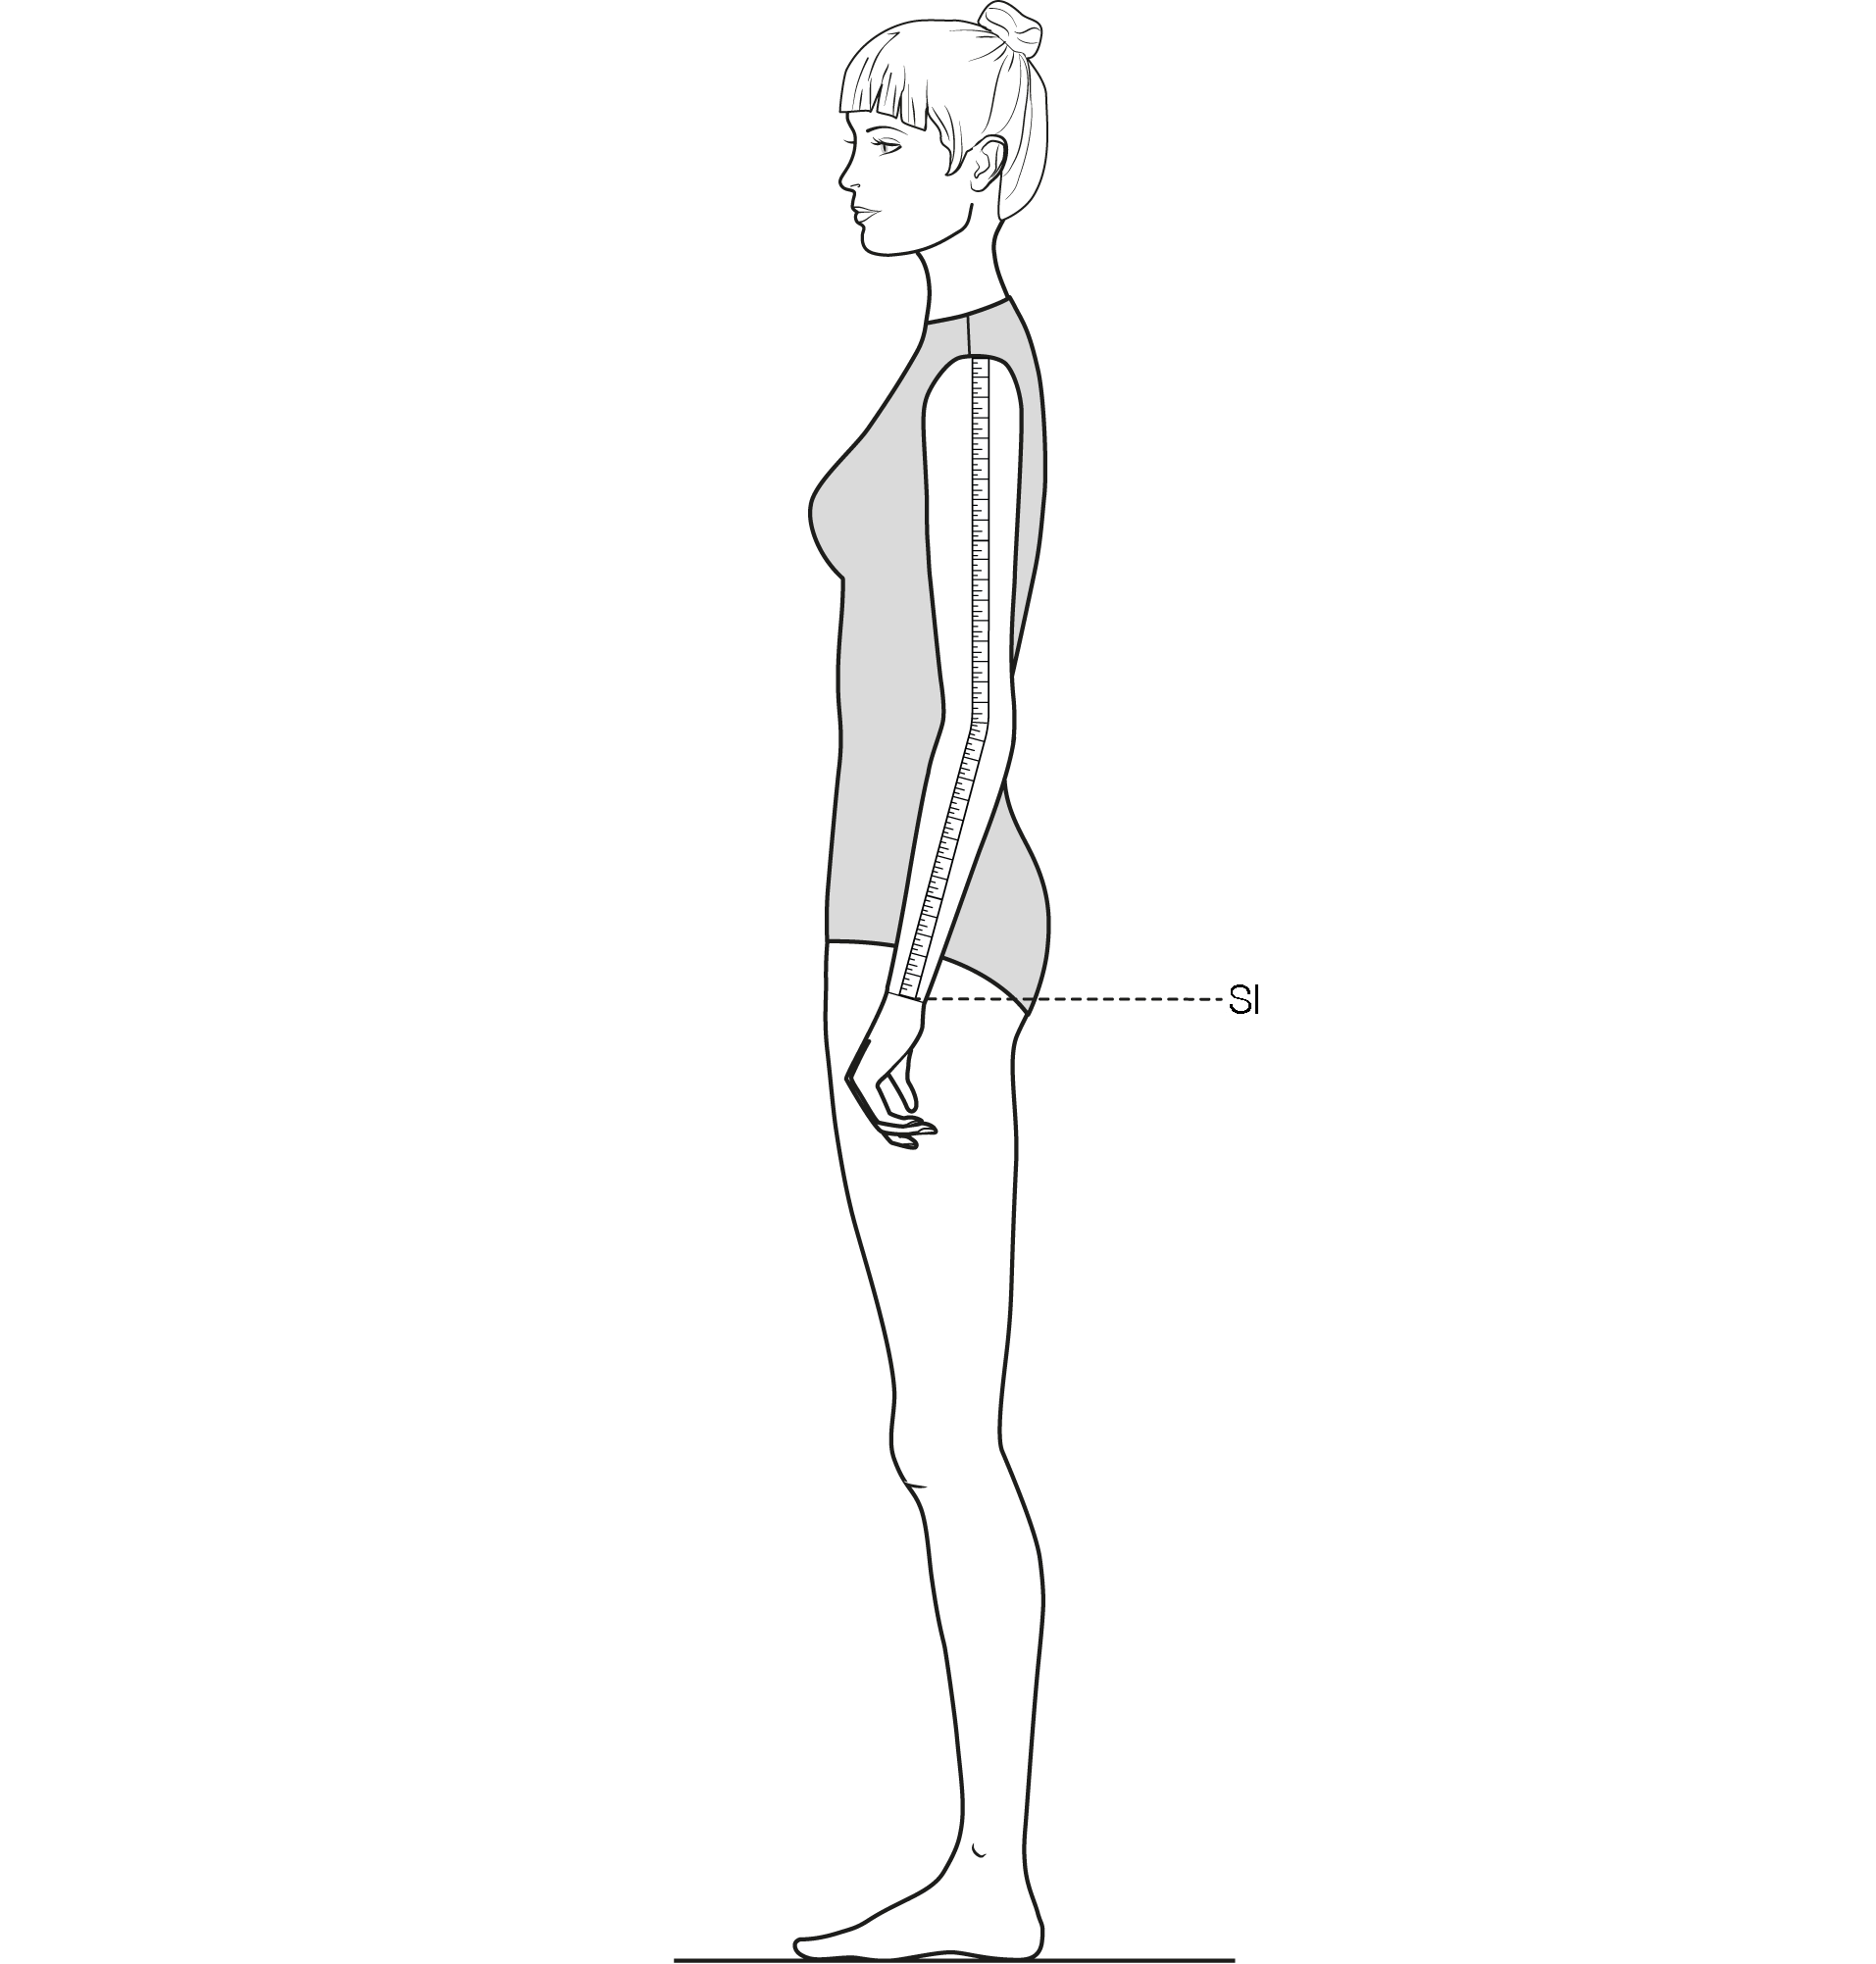
- Measure the sleeve length over the bended elbow from the shoulder tip to the wrist bone. This length can be measured at the sleeve from the sleeve cap to the hem. Add the shoulder Width to the sleeve length to determine the Kimono sleeve length.
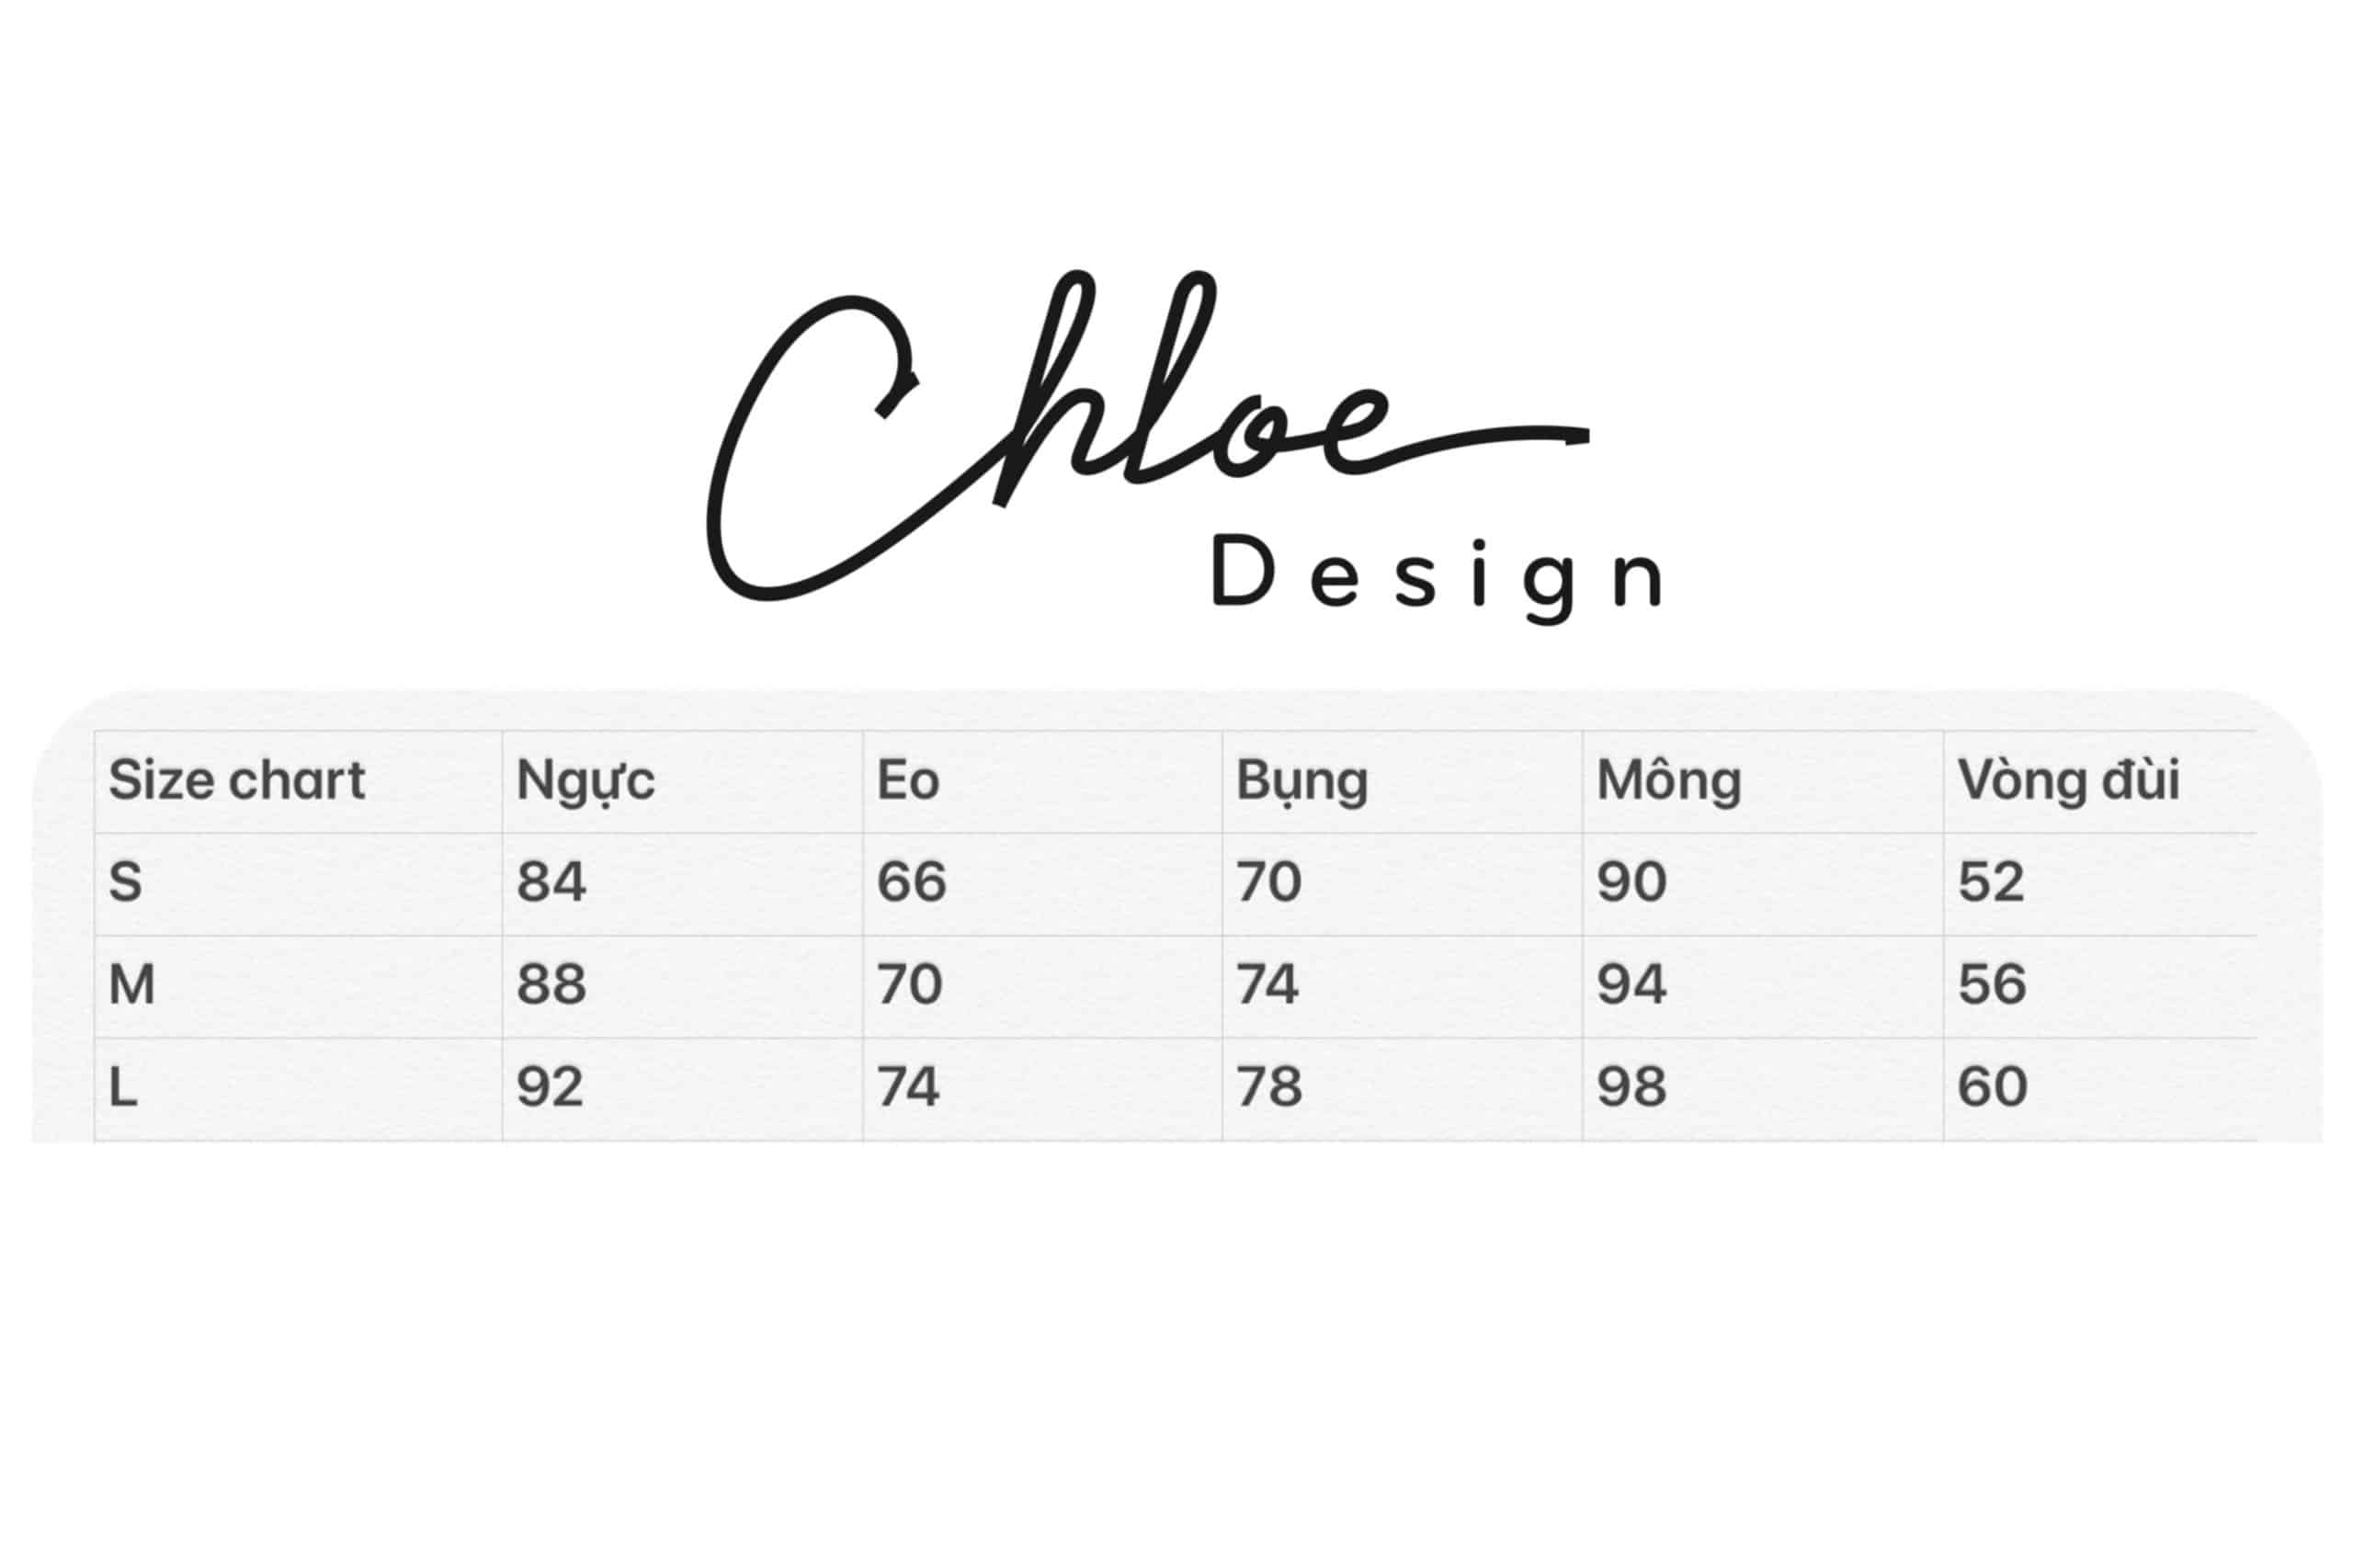
Secondary Measurements
- Mark the waistline with a waist tape measure With hook and eye closure. Check the correct horizontal position of the waist tape measure and note any obvious figure deviations. The correct position is important since the balance measurement of the front waist length and the back waist length are measured to the waist.
SD — Scye depth
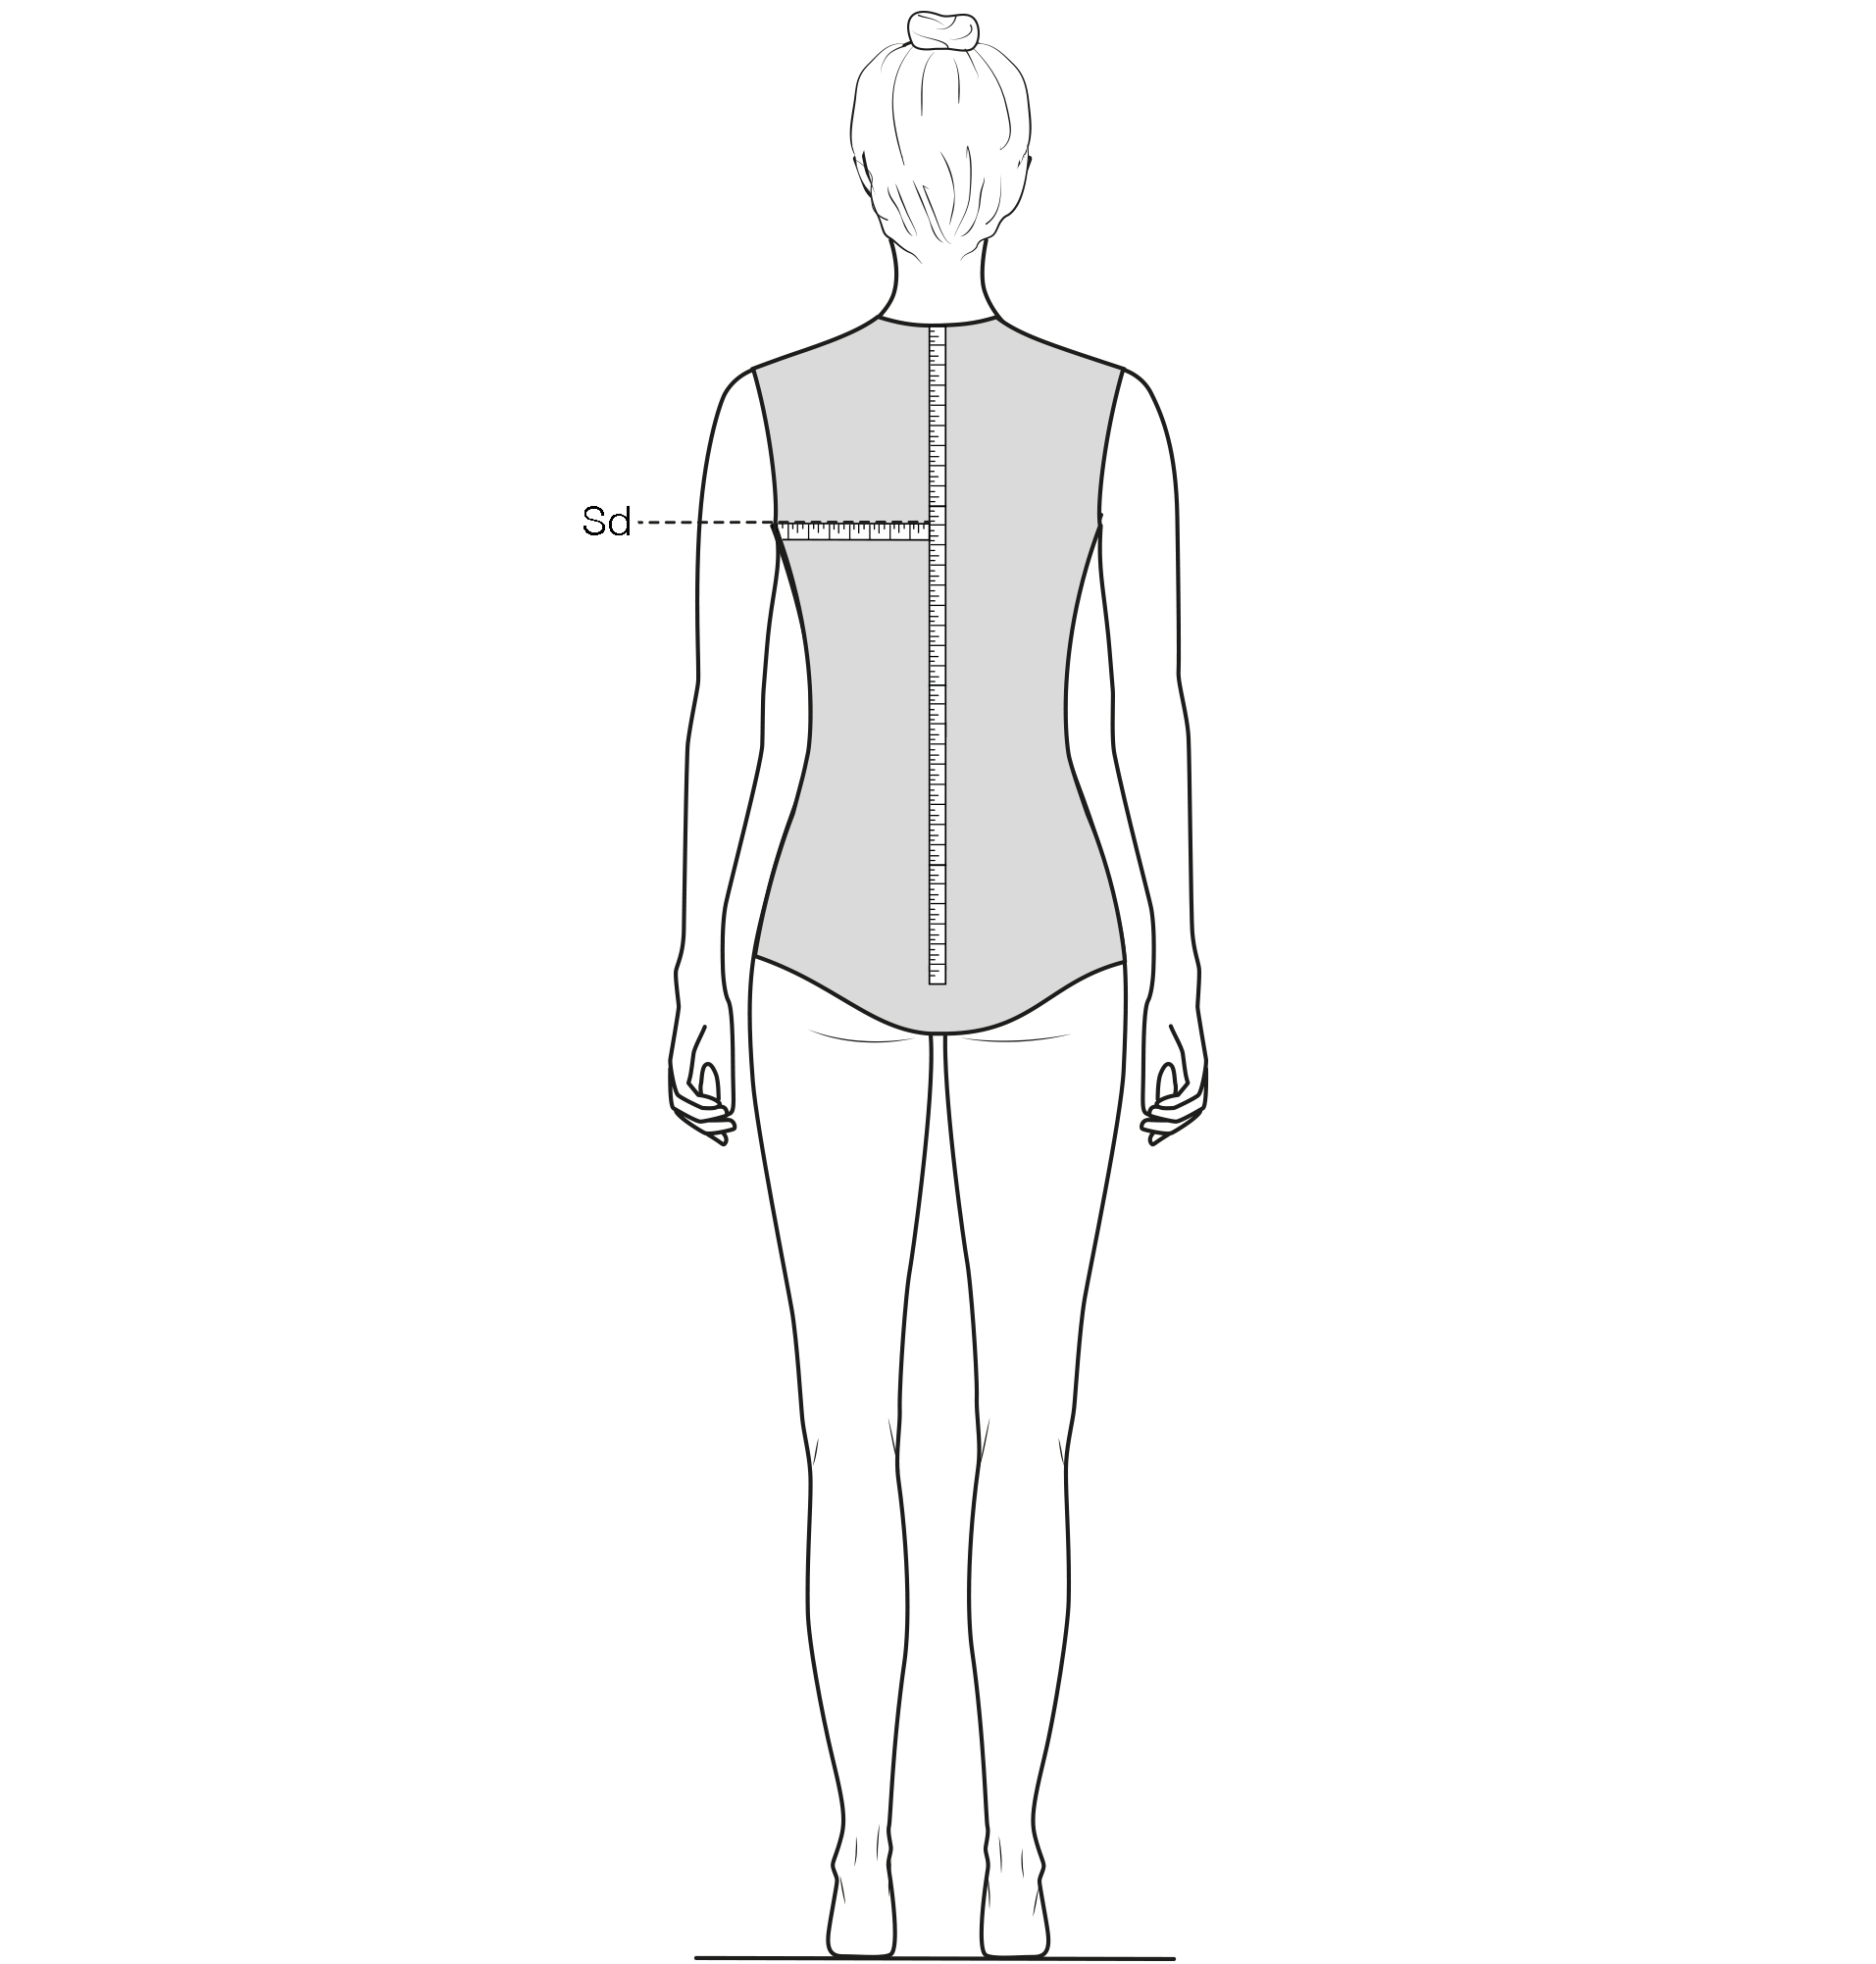
- Measure the scye depth from the vertebra (base of the neck) to the armhole depth. Place a cardboard strip (approx. 50 cm long) under the arm. Fold the cardboard strip horizontally to the centre back. Measure the scye depth at the centre back from the base of the neck to upper edge of the strip. Since measuring the scye depth accurately is very difficult, the measurement should be compared With the calculated scye depth. Use the calculated measurement if the difference is up to 1 cm; for a difference of more than 1 cm use the average value between the calculated and the measured scye depth.
BWL — Back waist length
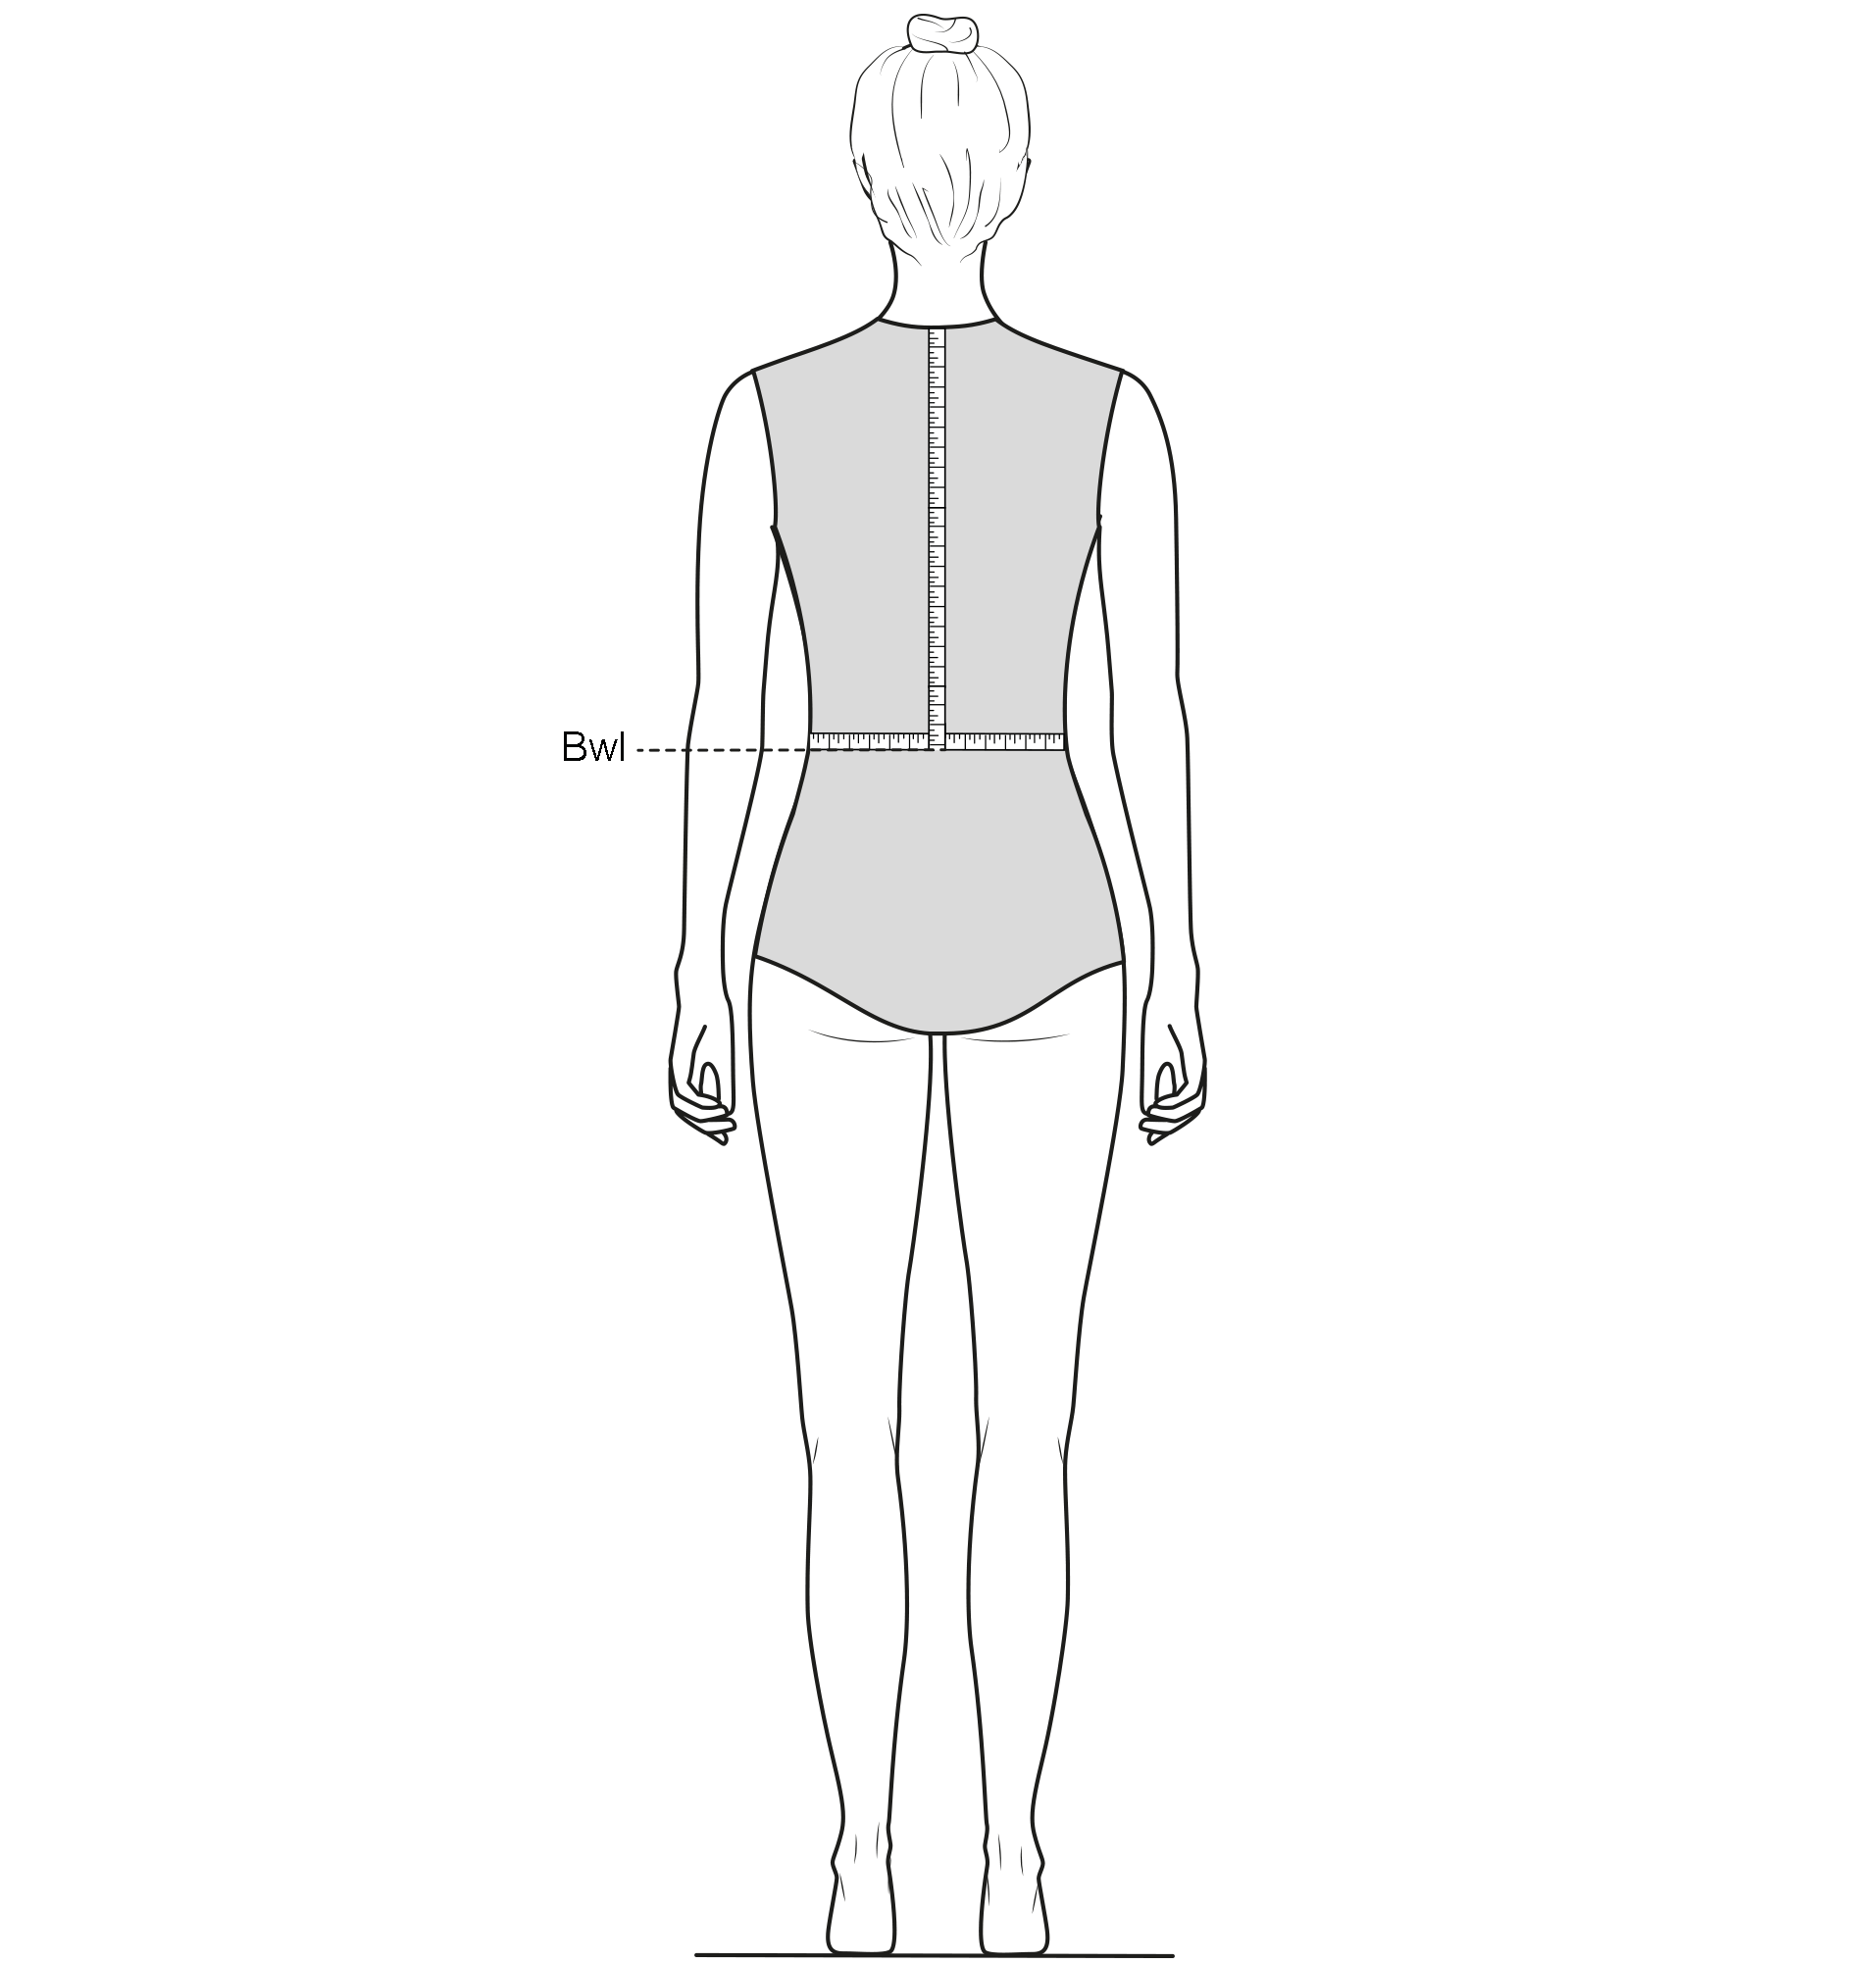
- Measure the back waist length from the vertebra (base of the neck) to the lower edge of the waist tape measure. Place the waist tape measure (measuring tape With hook and eye) at the narrowest part of the waist. – Required for measuring the back and front waist length! To determine the position of the base of the neck, put a measuring tape around the neck and measure from the lower edge of tape downward.
HD—Hip depth
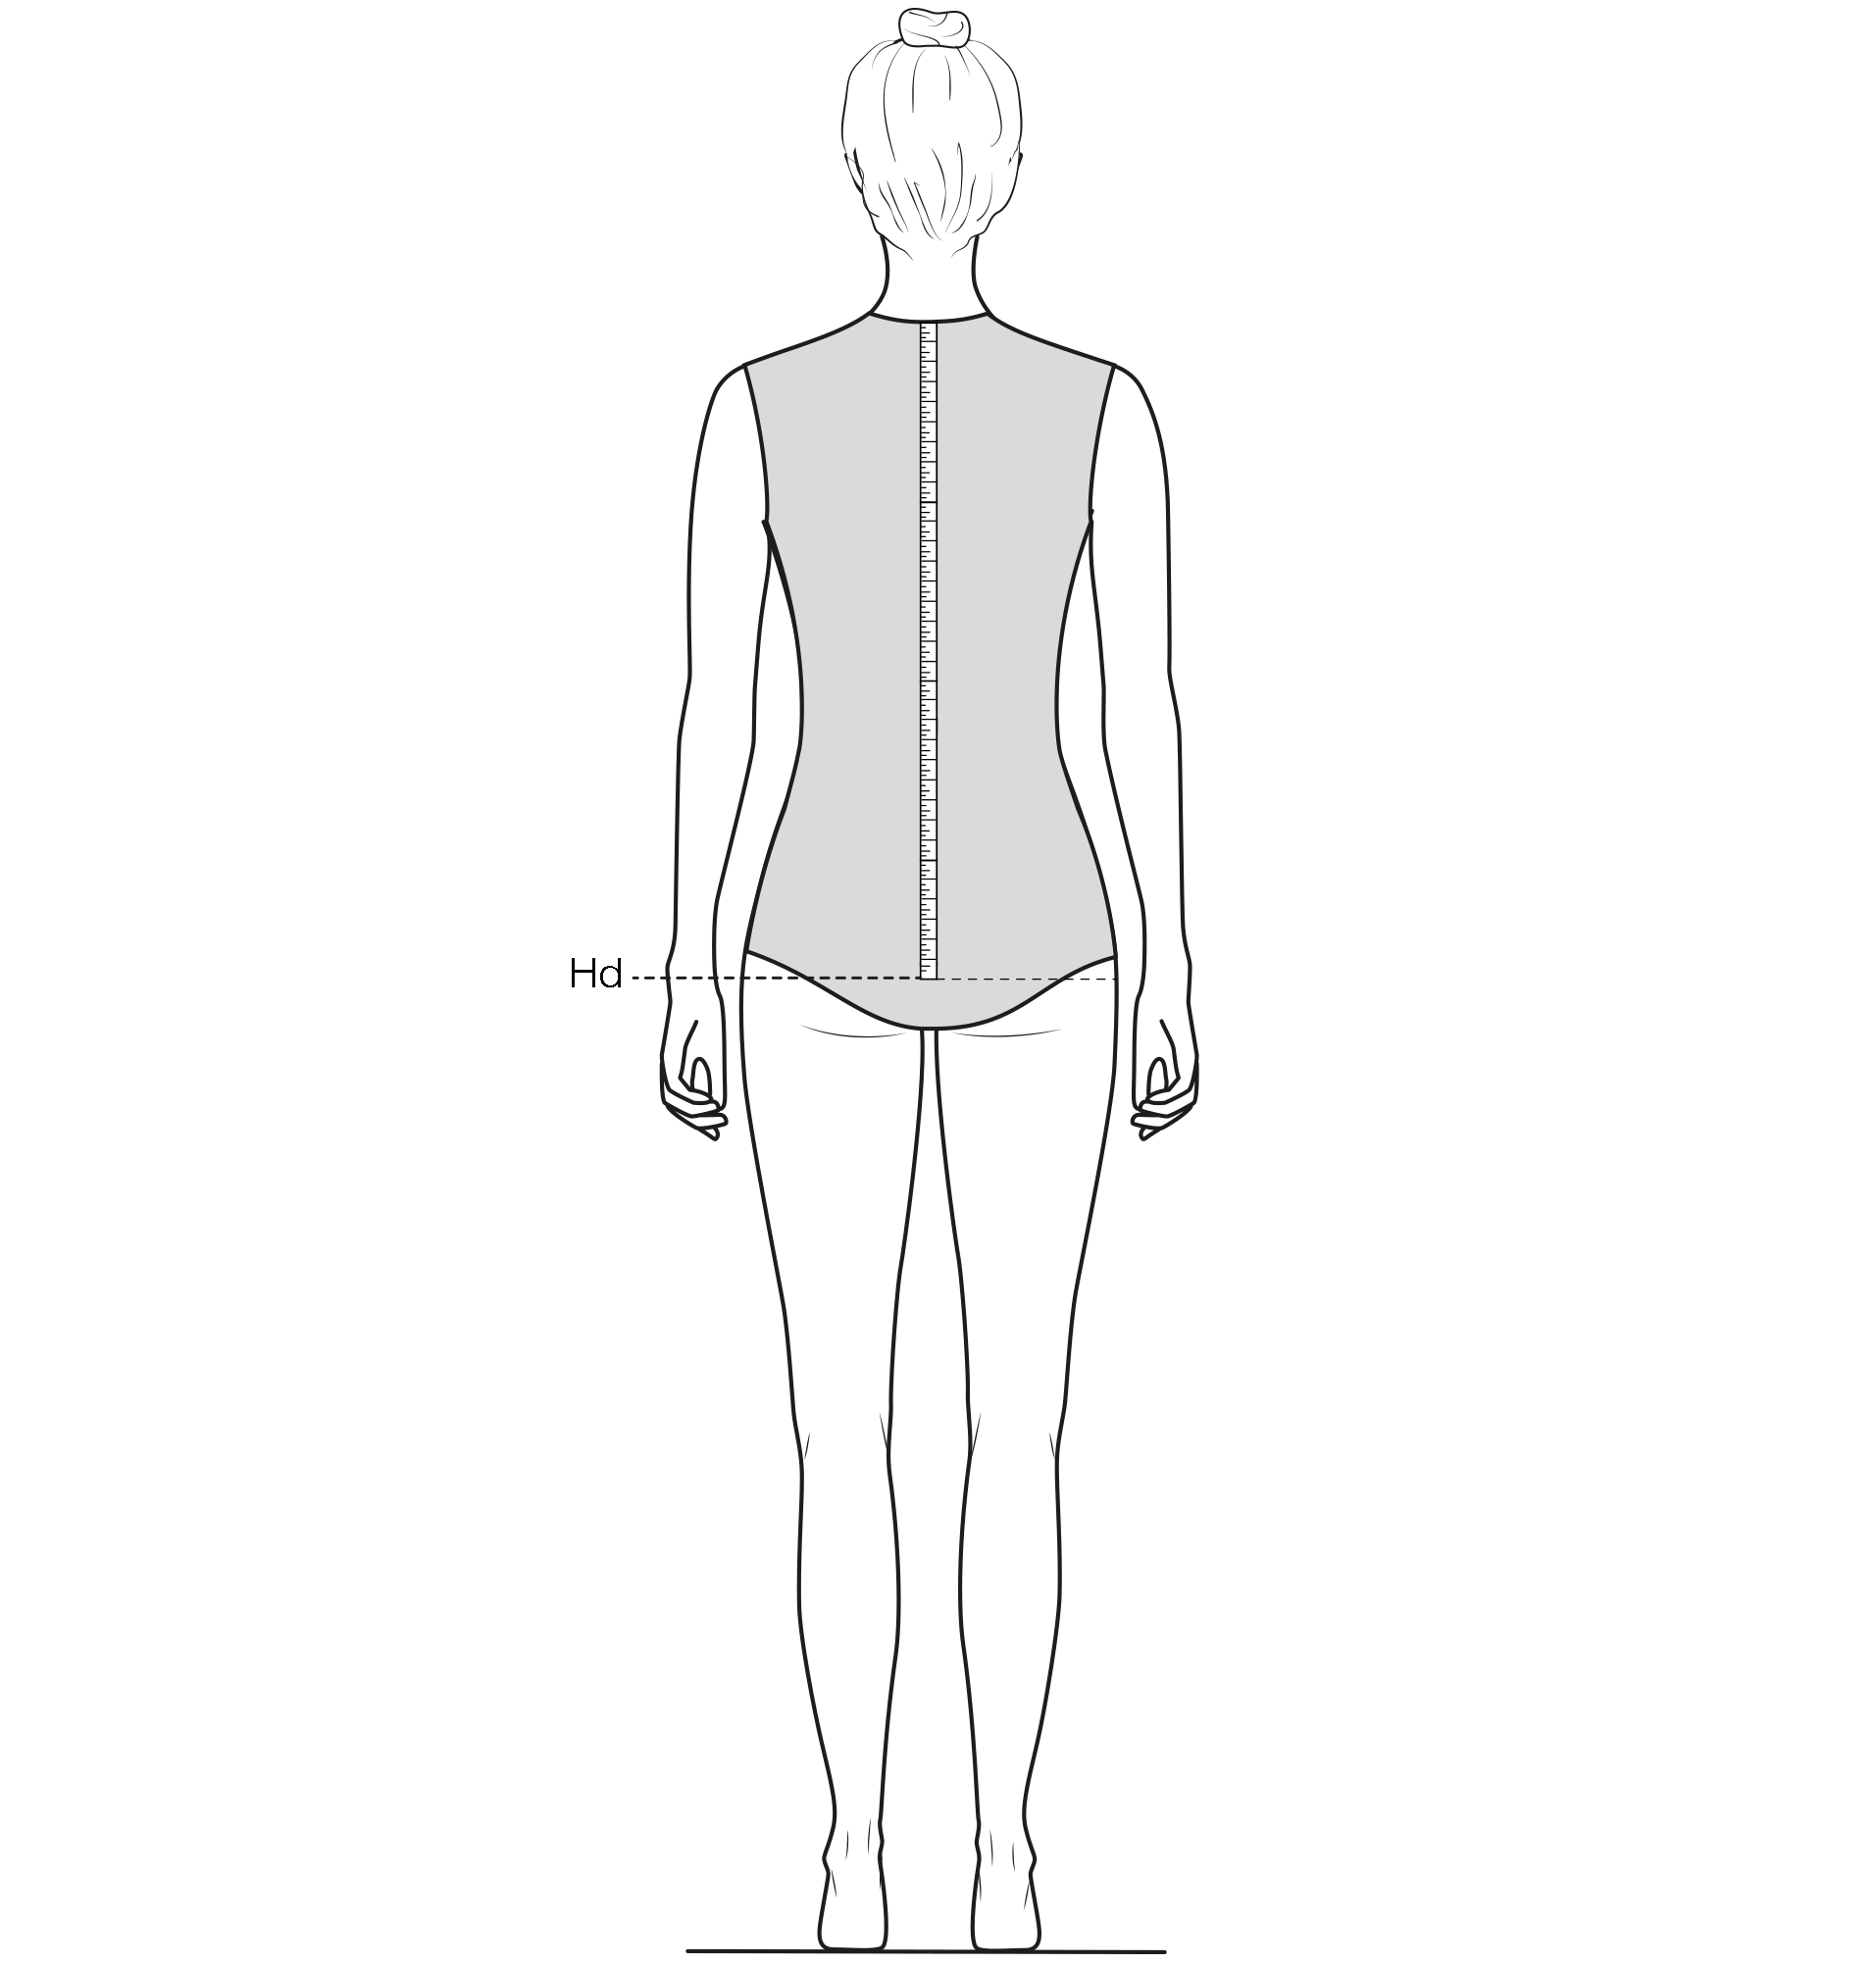
- Measure the hip depth from the vertebra (base of the neck) to fullest part of the hip. This measurement is only necessary for strong hips or thighs. Use the calculated hip depth for normal figure types.
Kl – Knee length
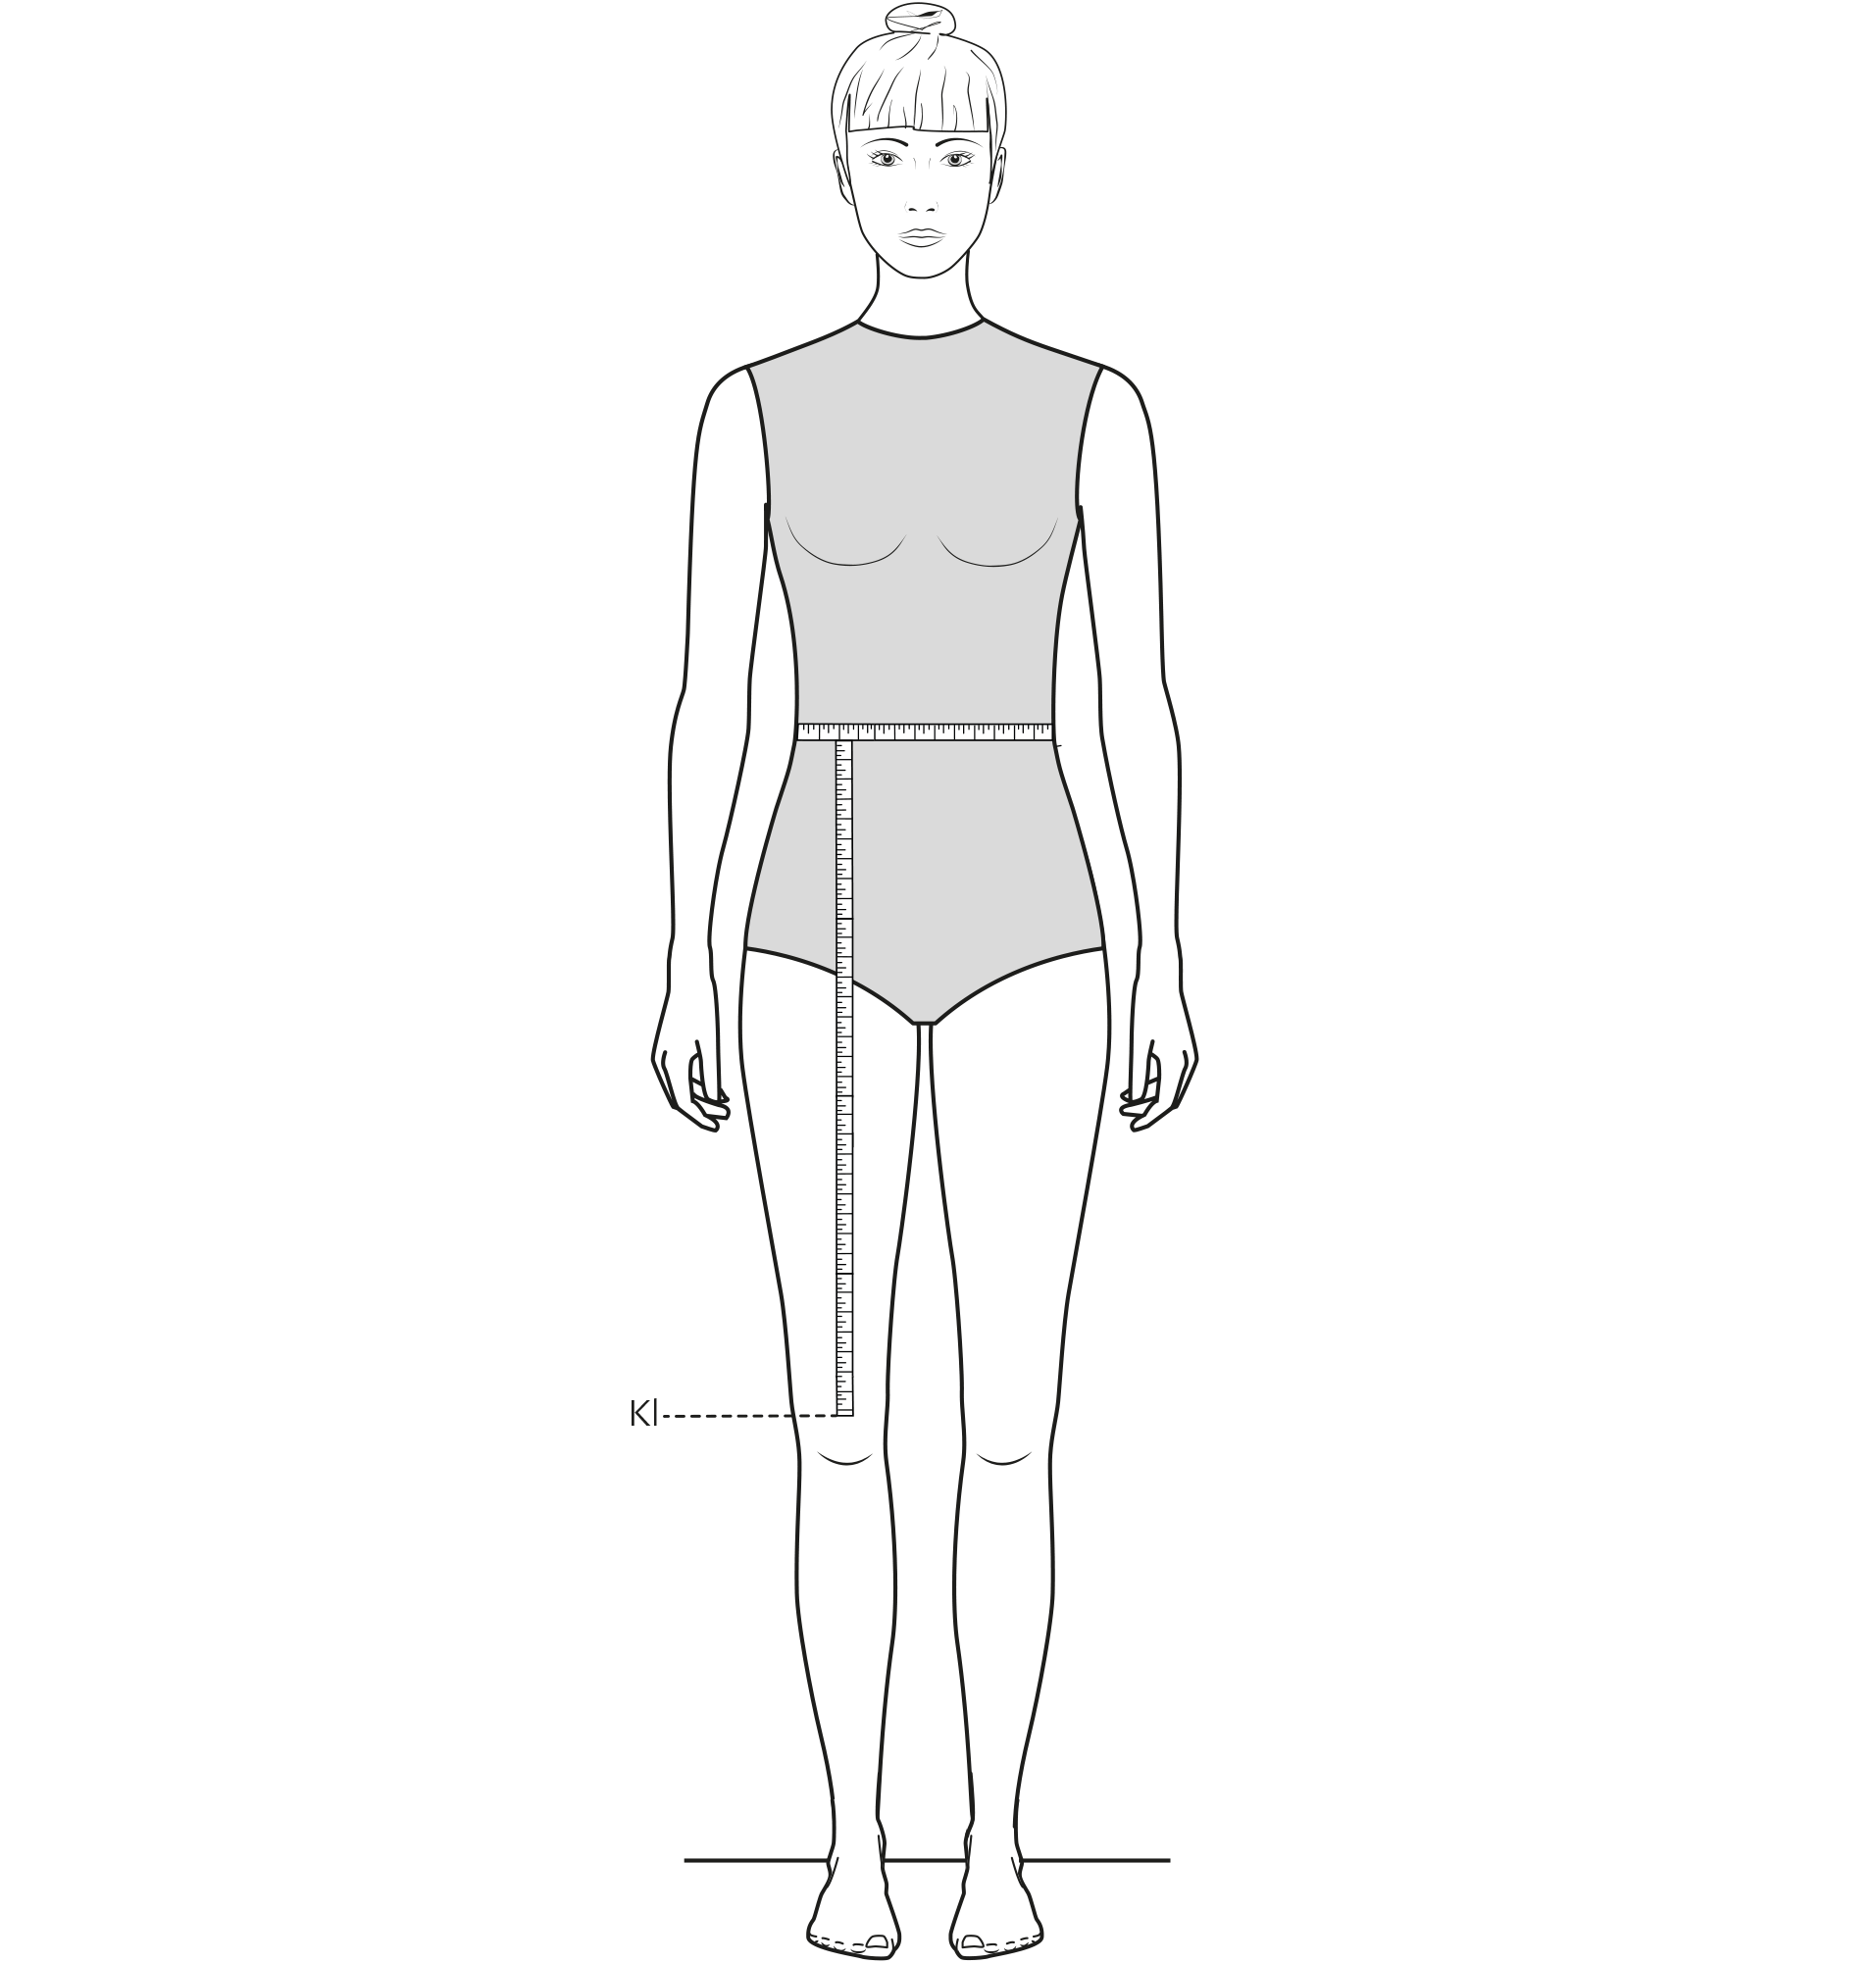
- Measure the finished length from the vertebra (base of the neck) to the desired length.
BL I + II — Bust Length I + II – Bt I + II
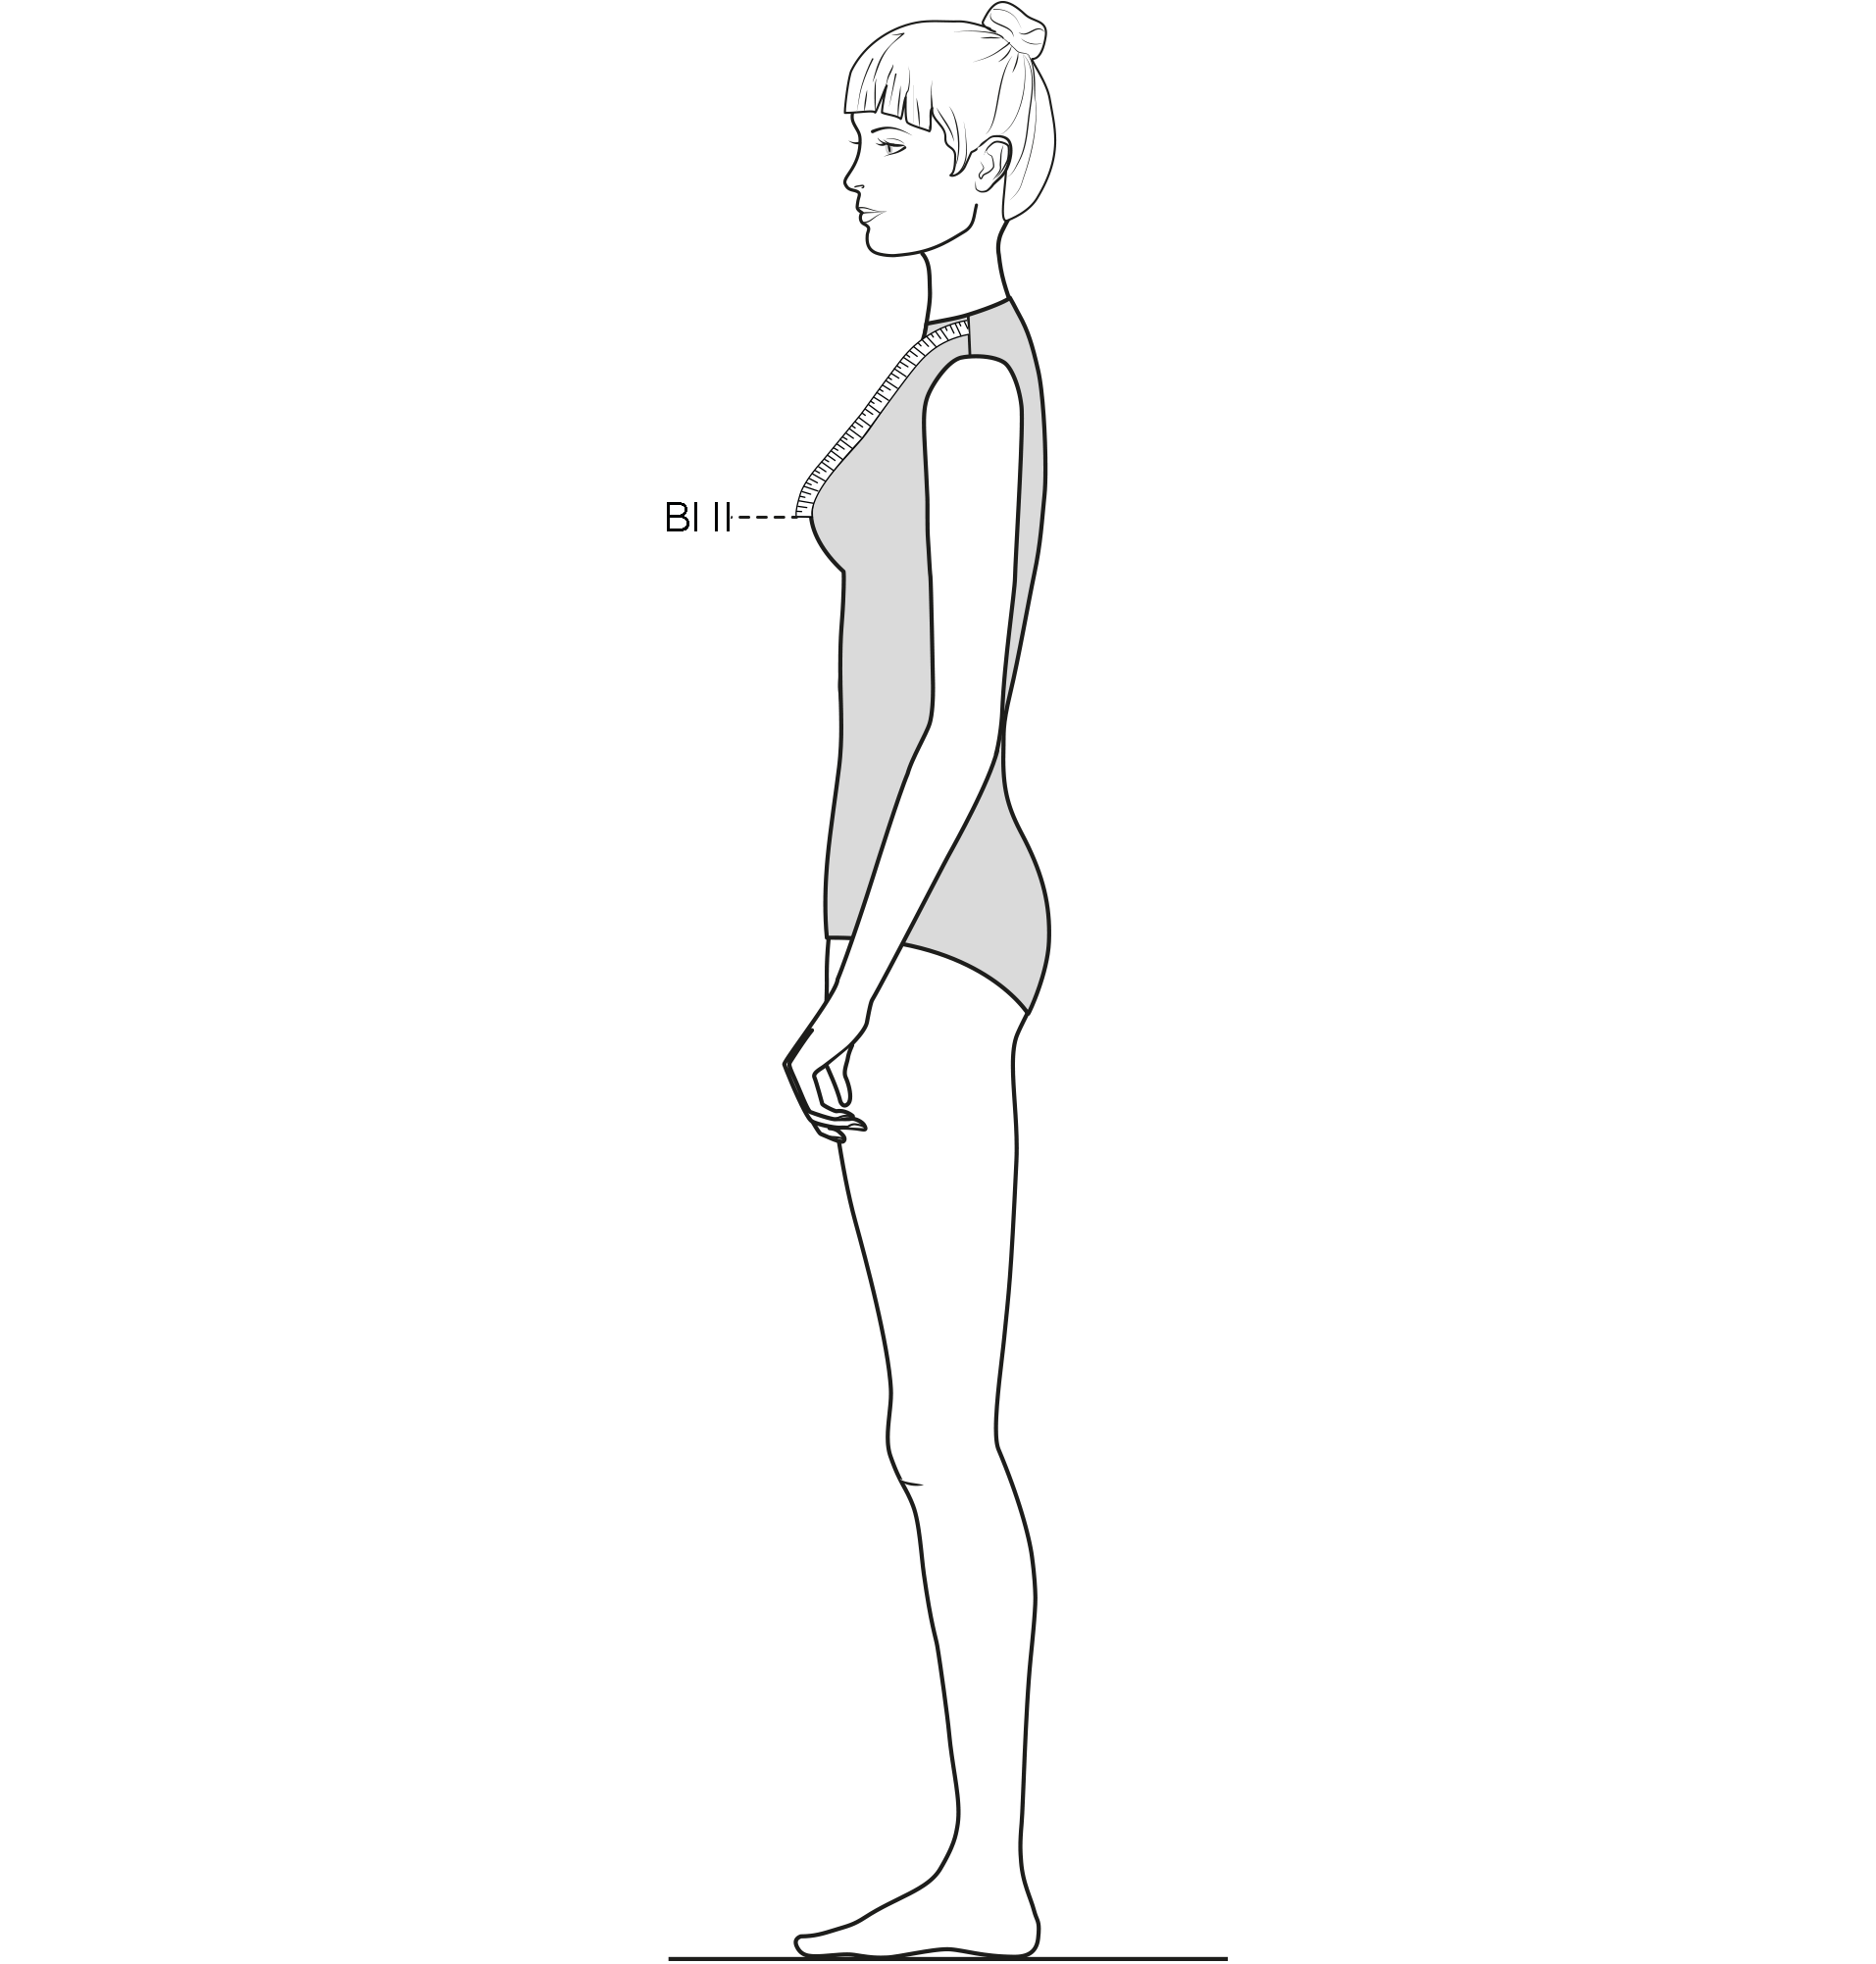
- Measure the bust length I from the vertebra (base of the neck) over the shoulder up to the bust point. Put the measuring tape in the shape of a normal neckline from the vertebra to the shoulder. To determine the position of the base of the neck (vertebra), put the measuring tape around the neck and measure from bust point to bust point. Note one-half of this measurement.
FL I + II — Front length I + II
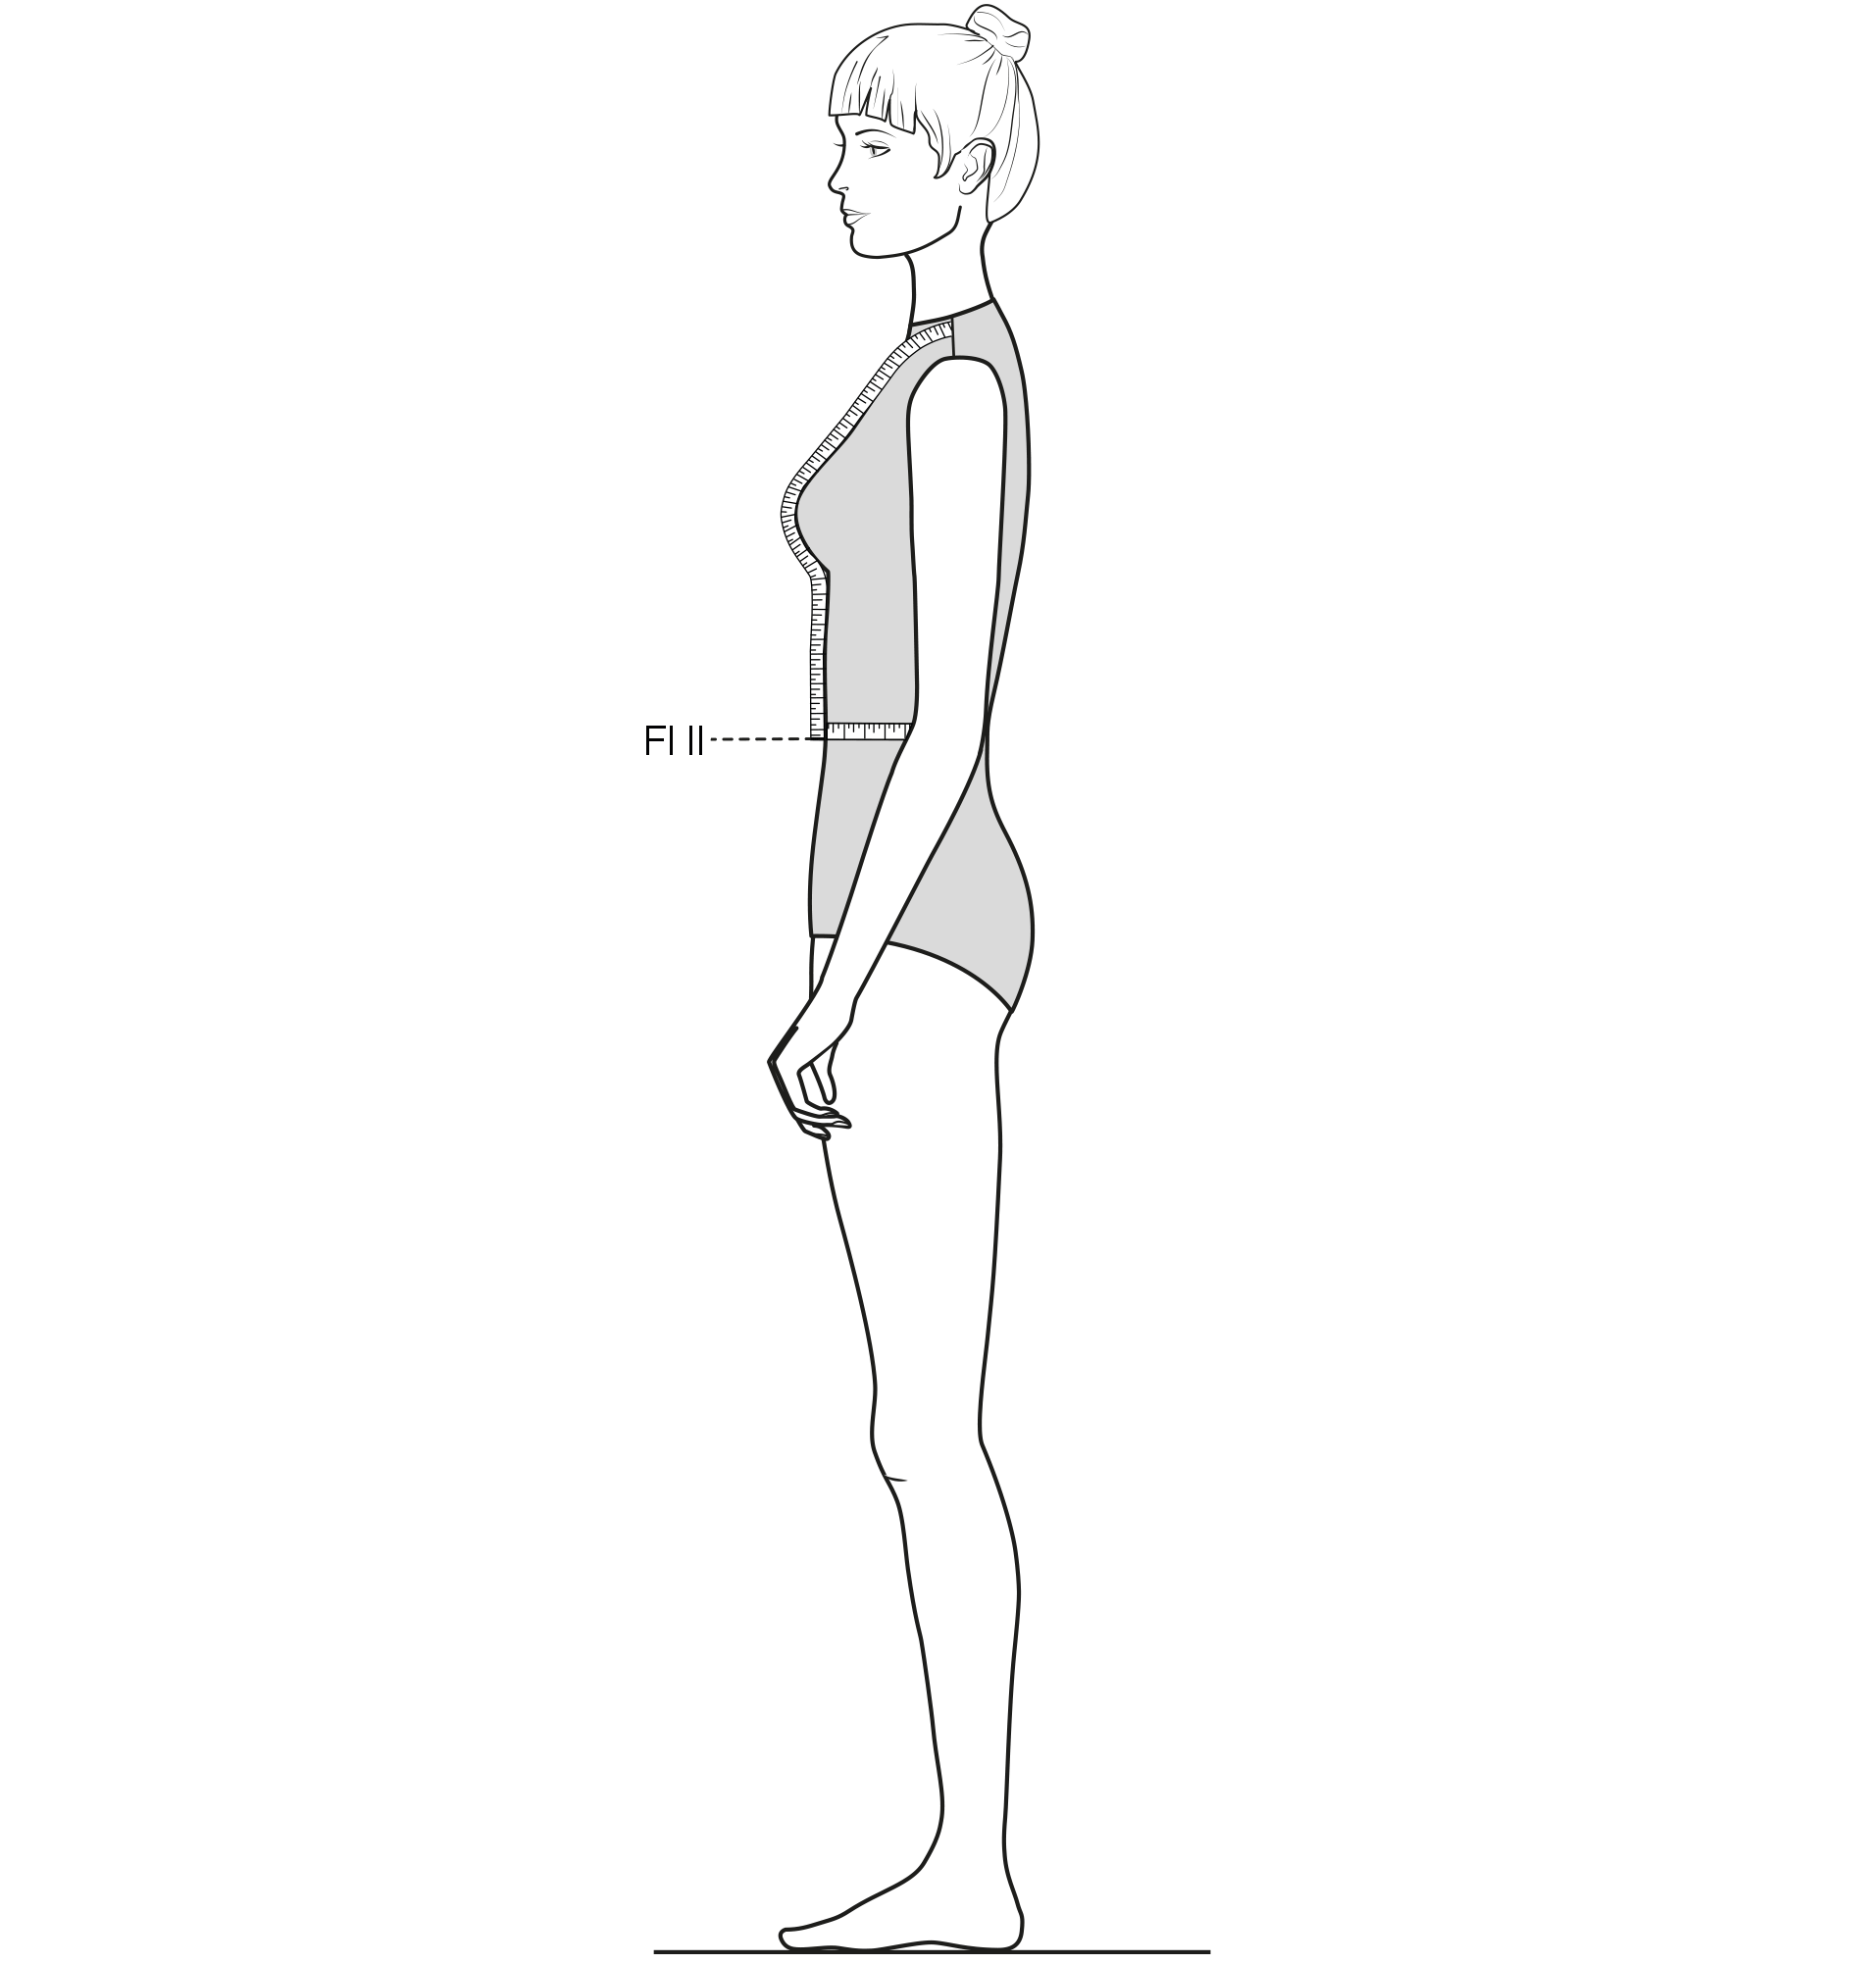
- Measure the front waist length from the vertebra (base of the neck) over the shoulder and the bust point to the lower edge of the waist tape measure. Up to the bust it is the same measuring process as With the bust length I. The double measurement can be taken here as well. Compare the measured front waist length 11 (Front waist length I minus neck width = FWL II) with the calculated front waist length. More than 1 cm difference shows a figure problem (z. B. Full bust, round shoulders, low waist)‚ Which must be taken into account during the pattern development. Note: Back and front length are balance measurements. They must be in the tight proportion (e.g. BWL + 4 cm = FWL II etc. – see measurement chart).
BW — Back width
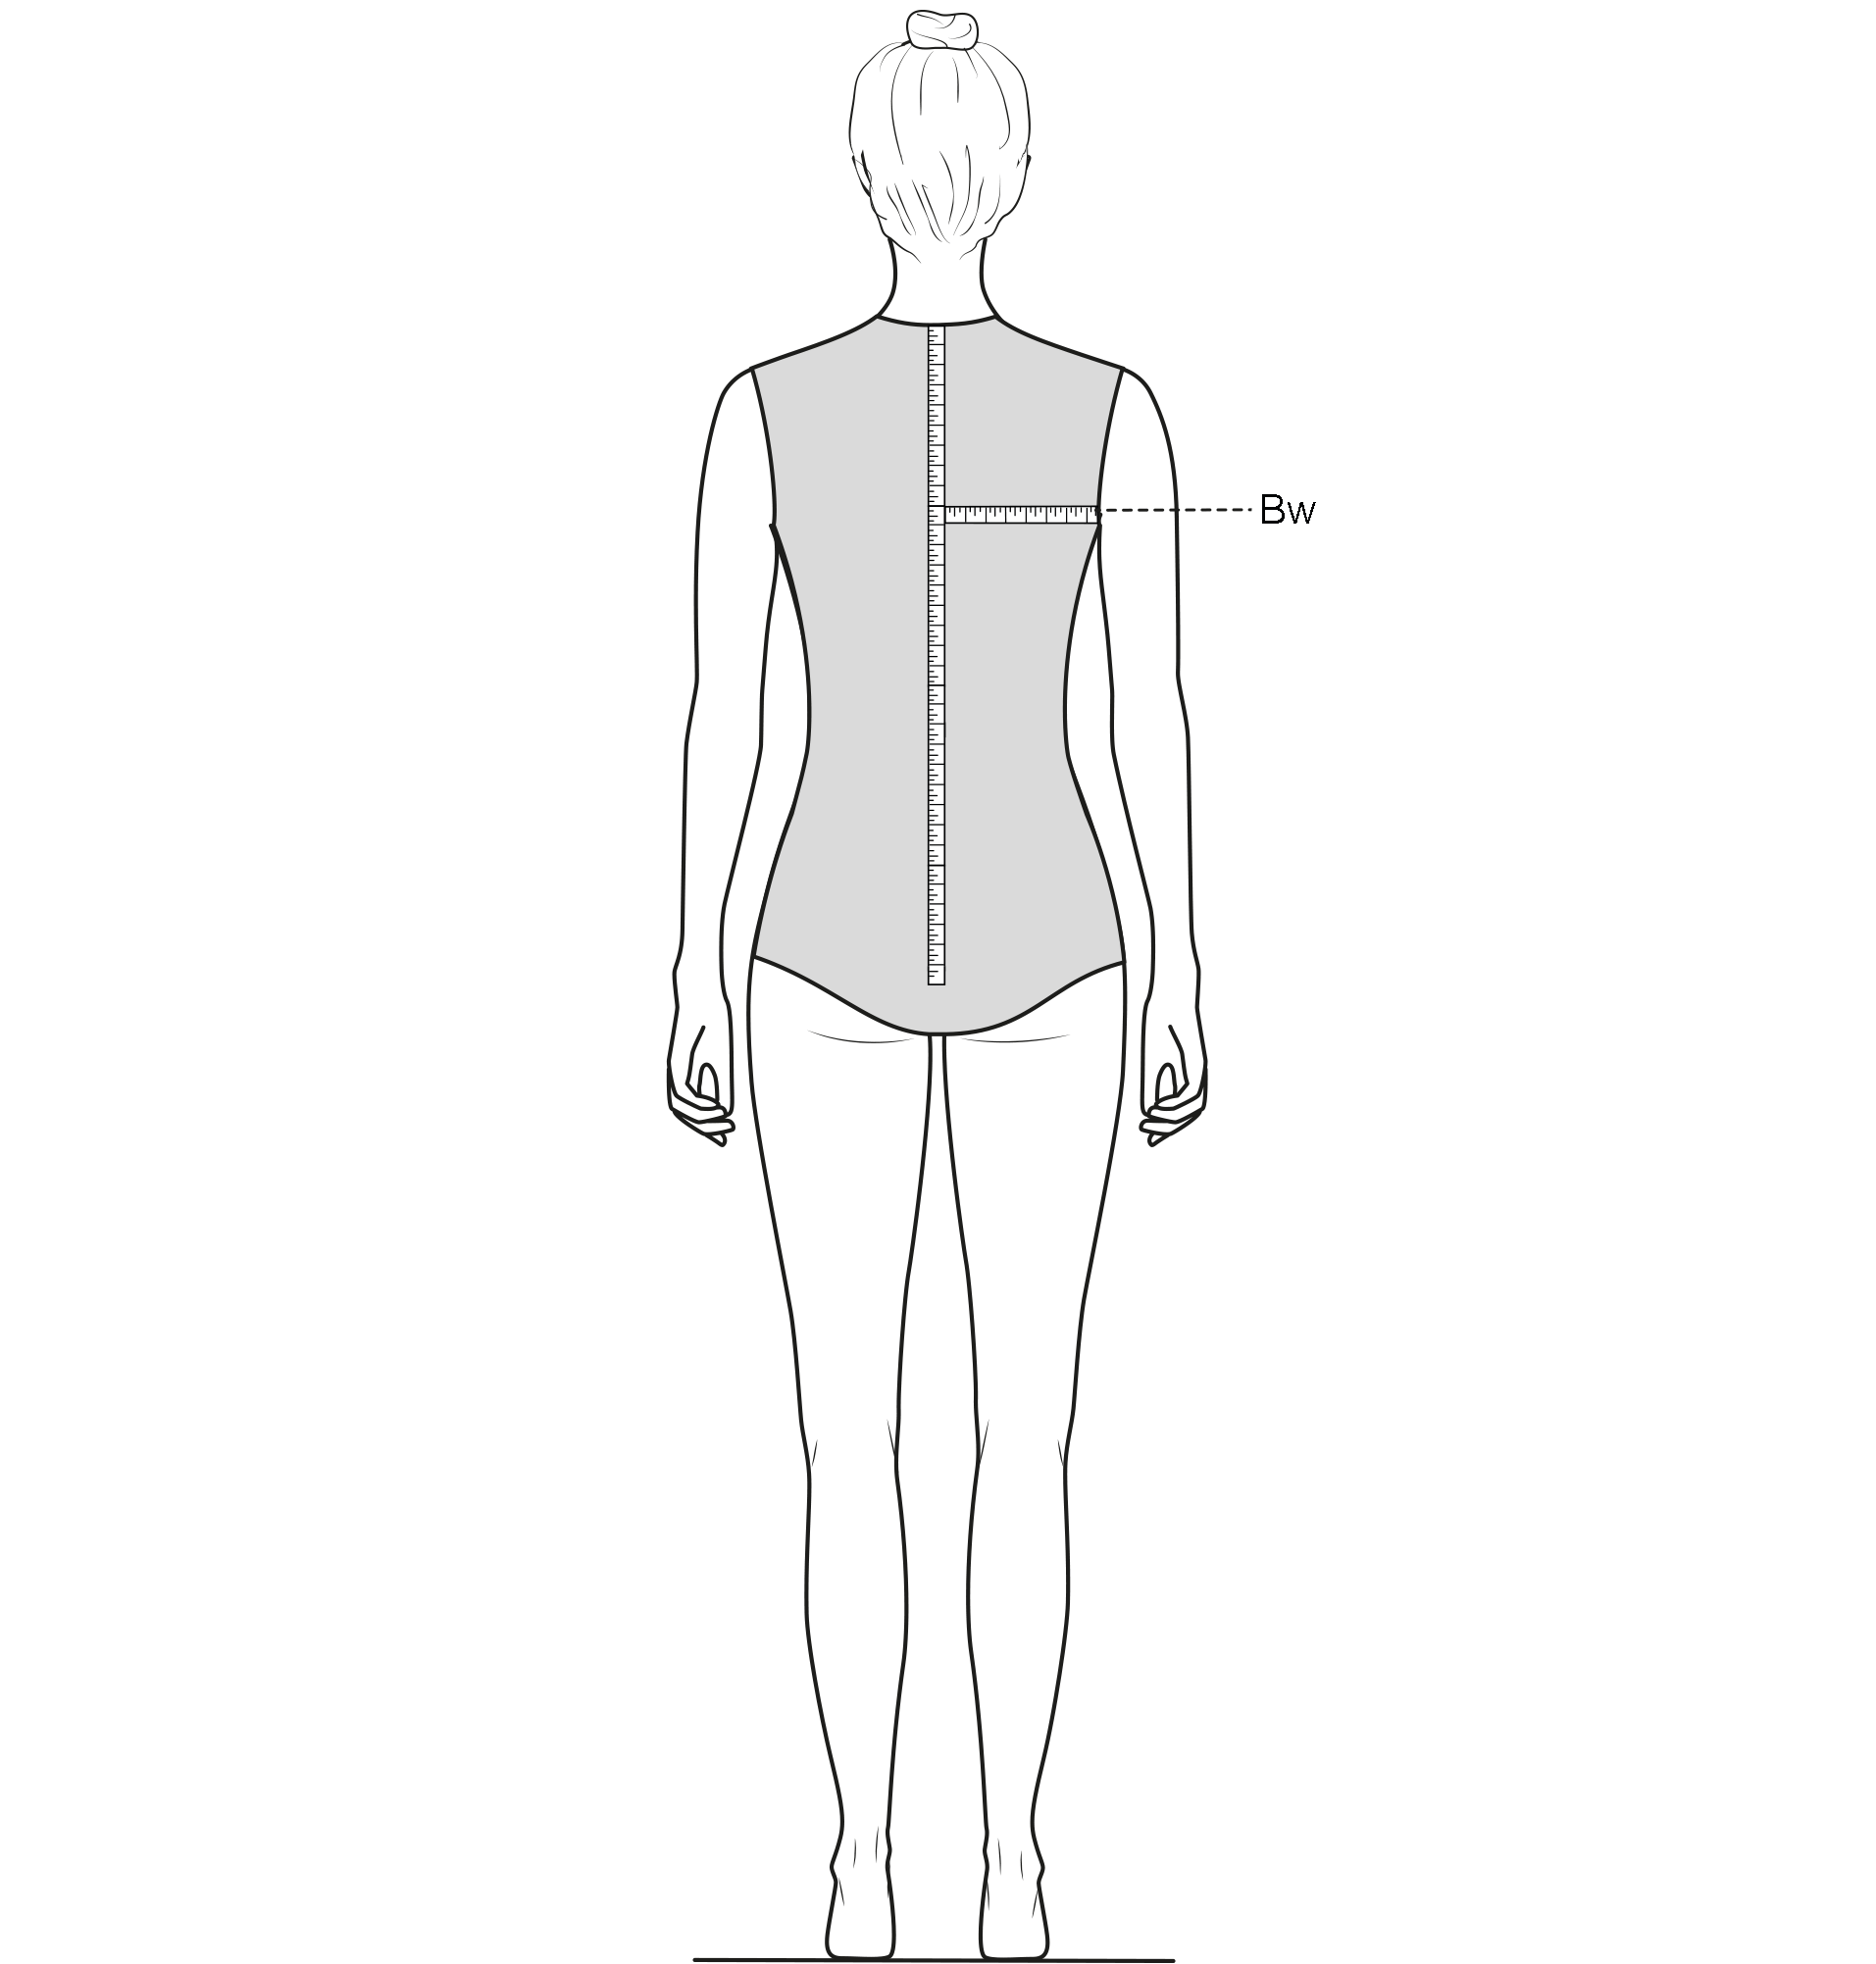
- Measure the back Width over the lower part of the shoulder blades from arm fold to arm fold. Note only half of the measurement. Compare the measured back Width With the calculated one. Use the calculated measurement in the case of a deviation up to 0.5 cm. For a greater difference use the average value between the calculated and measured back Width.
NW – Neck width
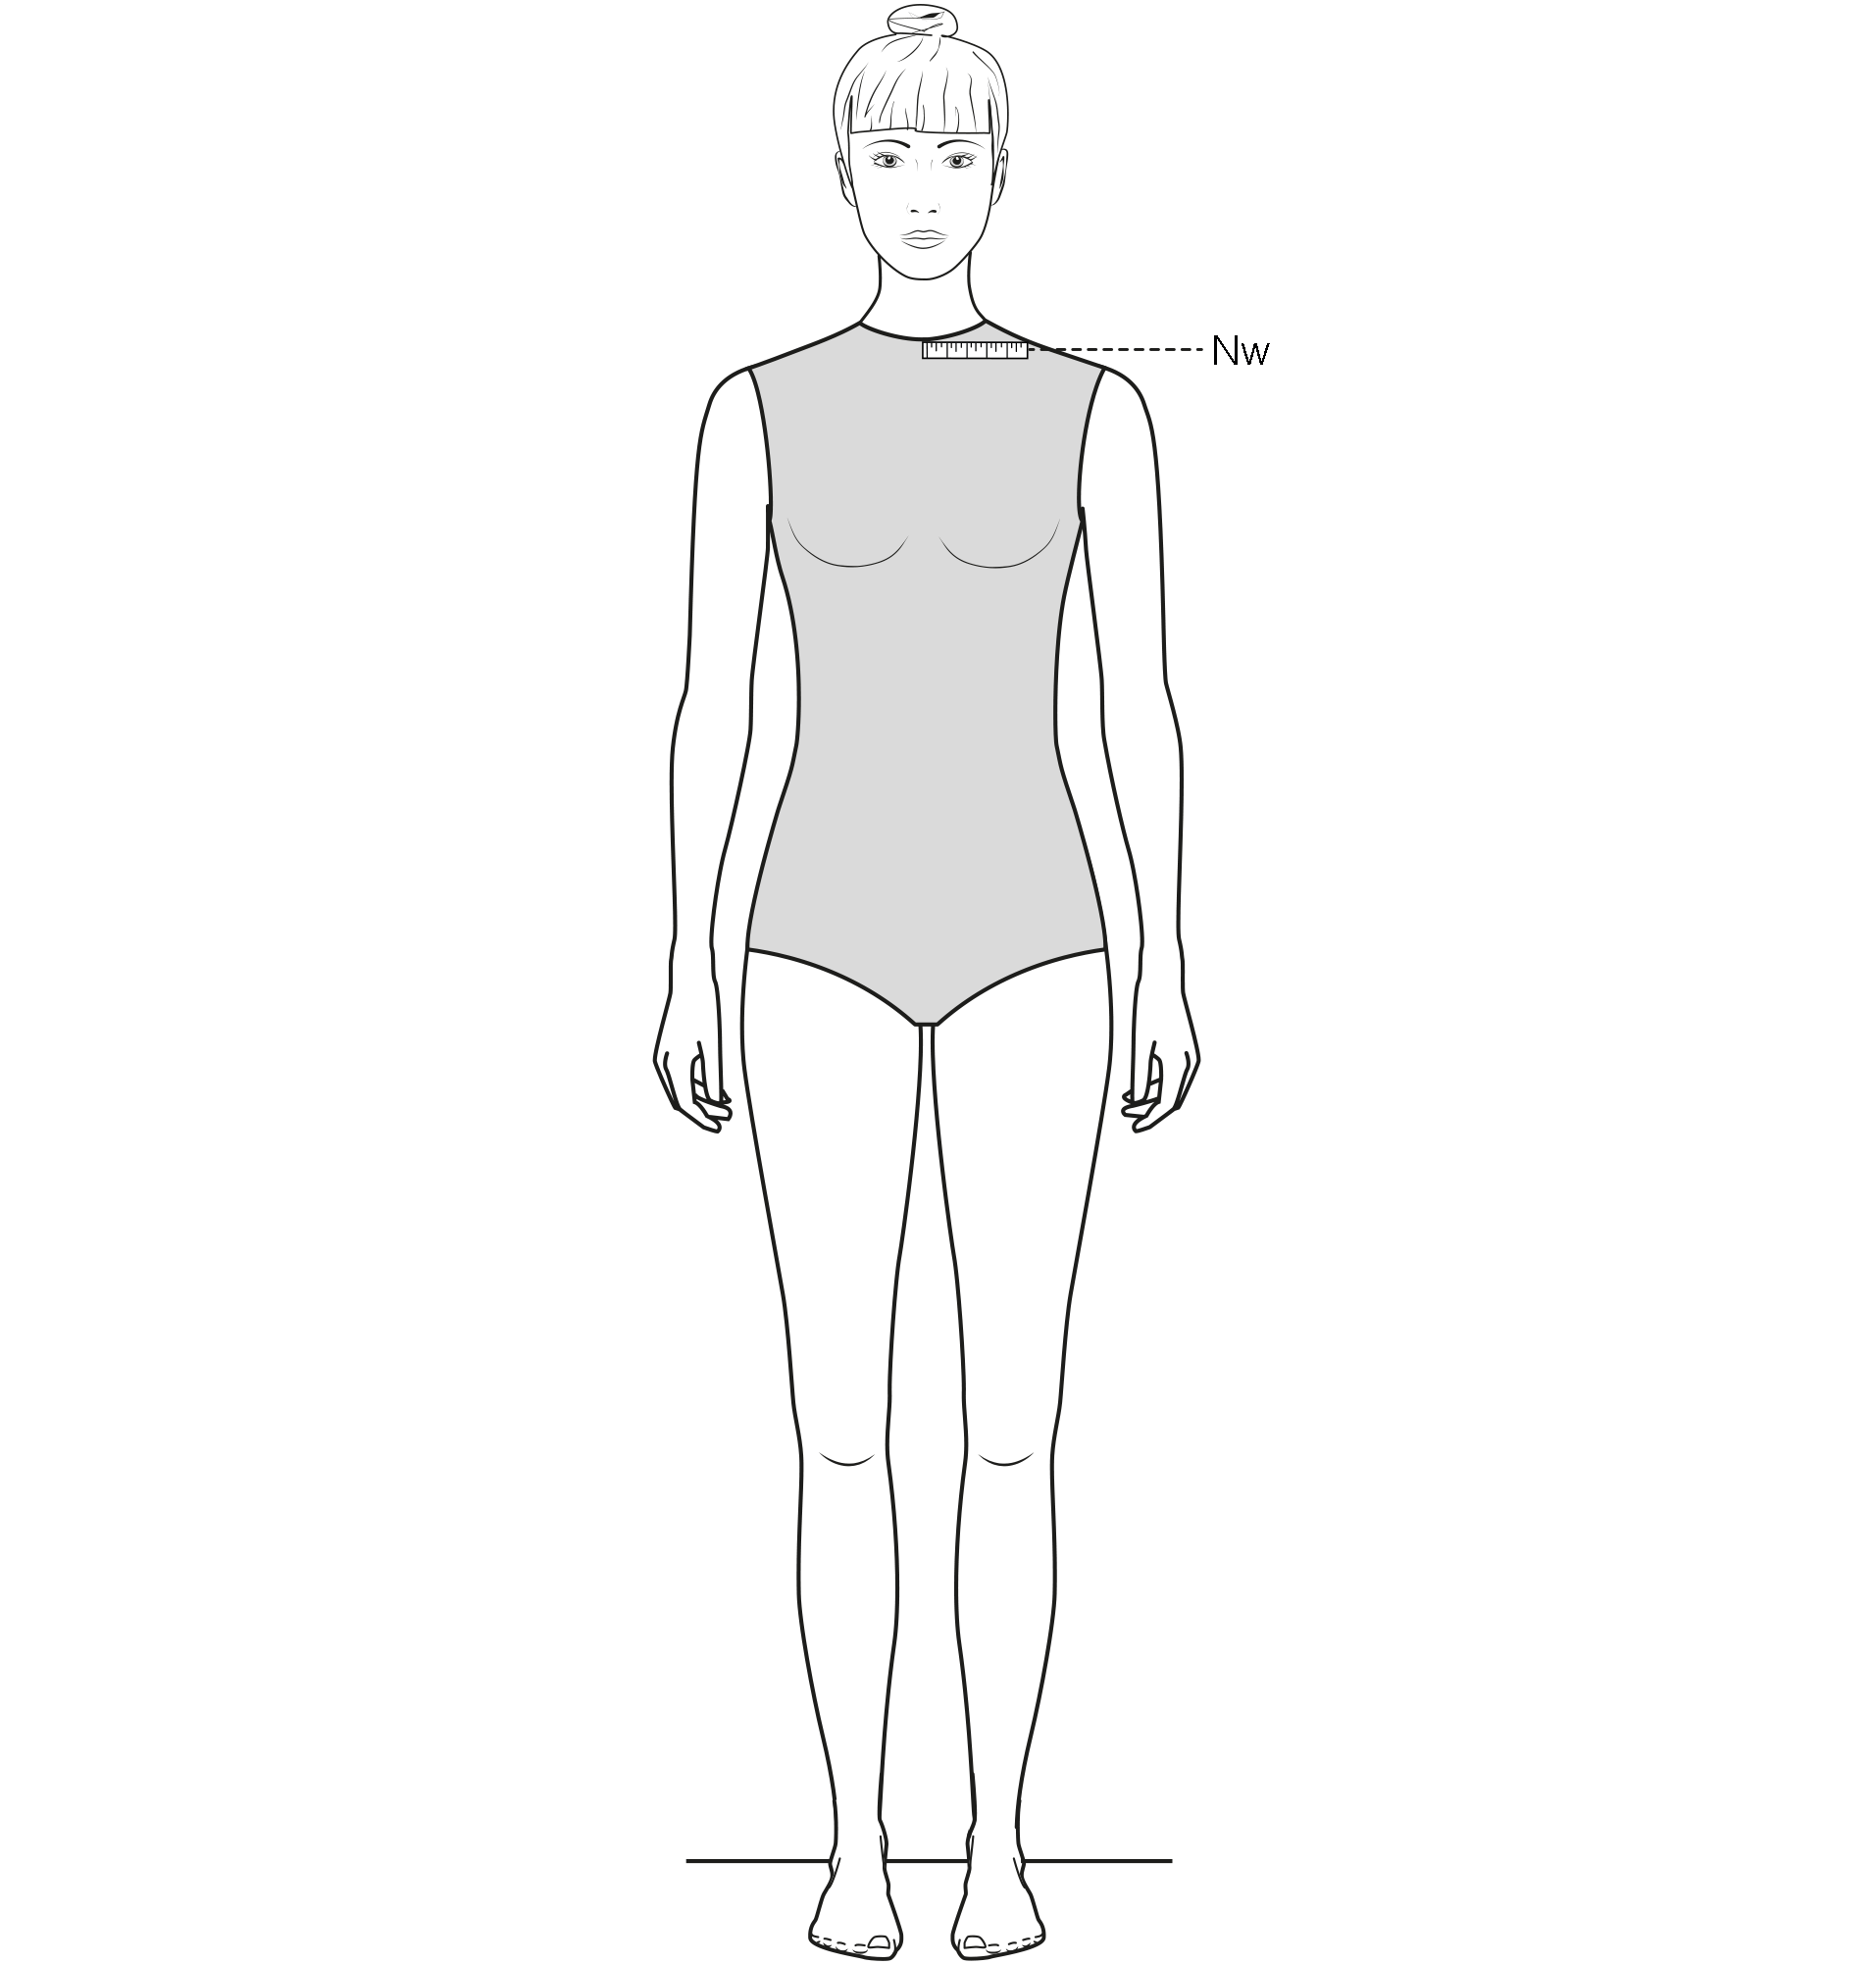
-
Measure from the nape of the neck (7th cervical vertebra) horizontally to the shoulder seam. This measurement is half the width of the back neckline.
Sw – Scye width
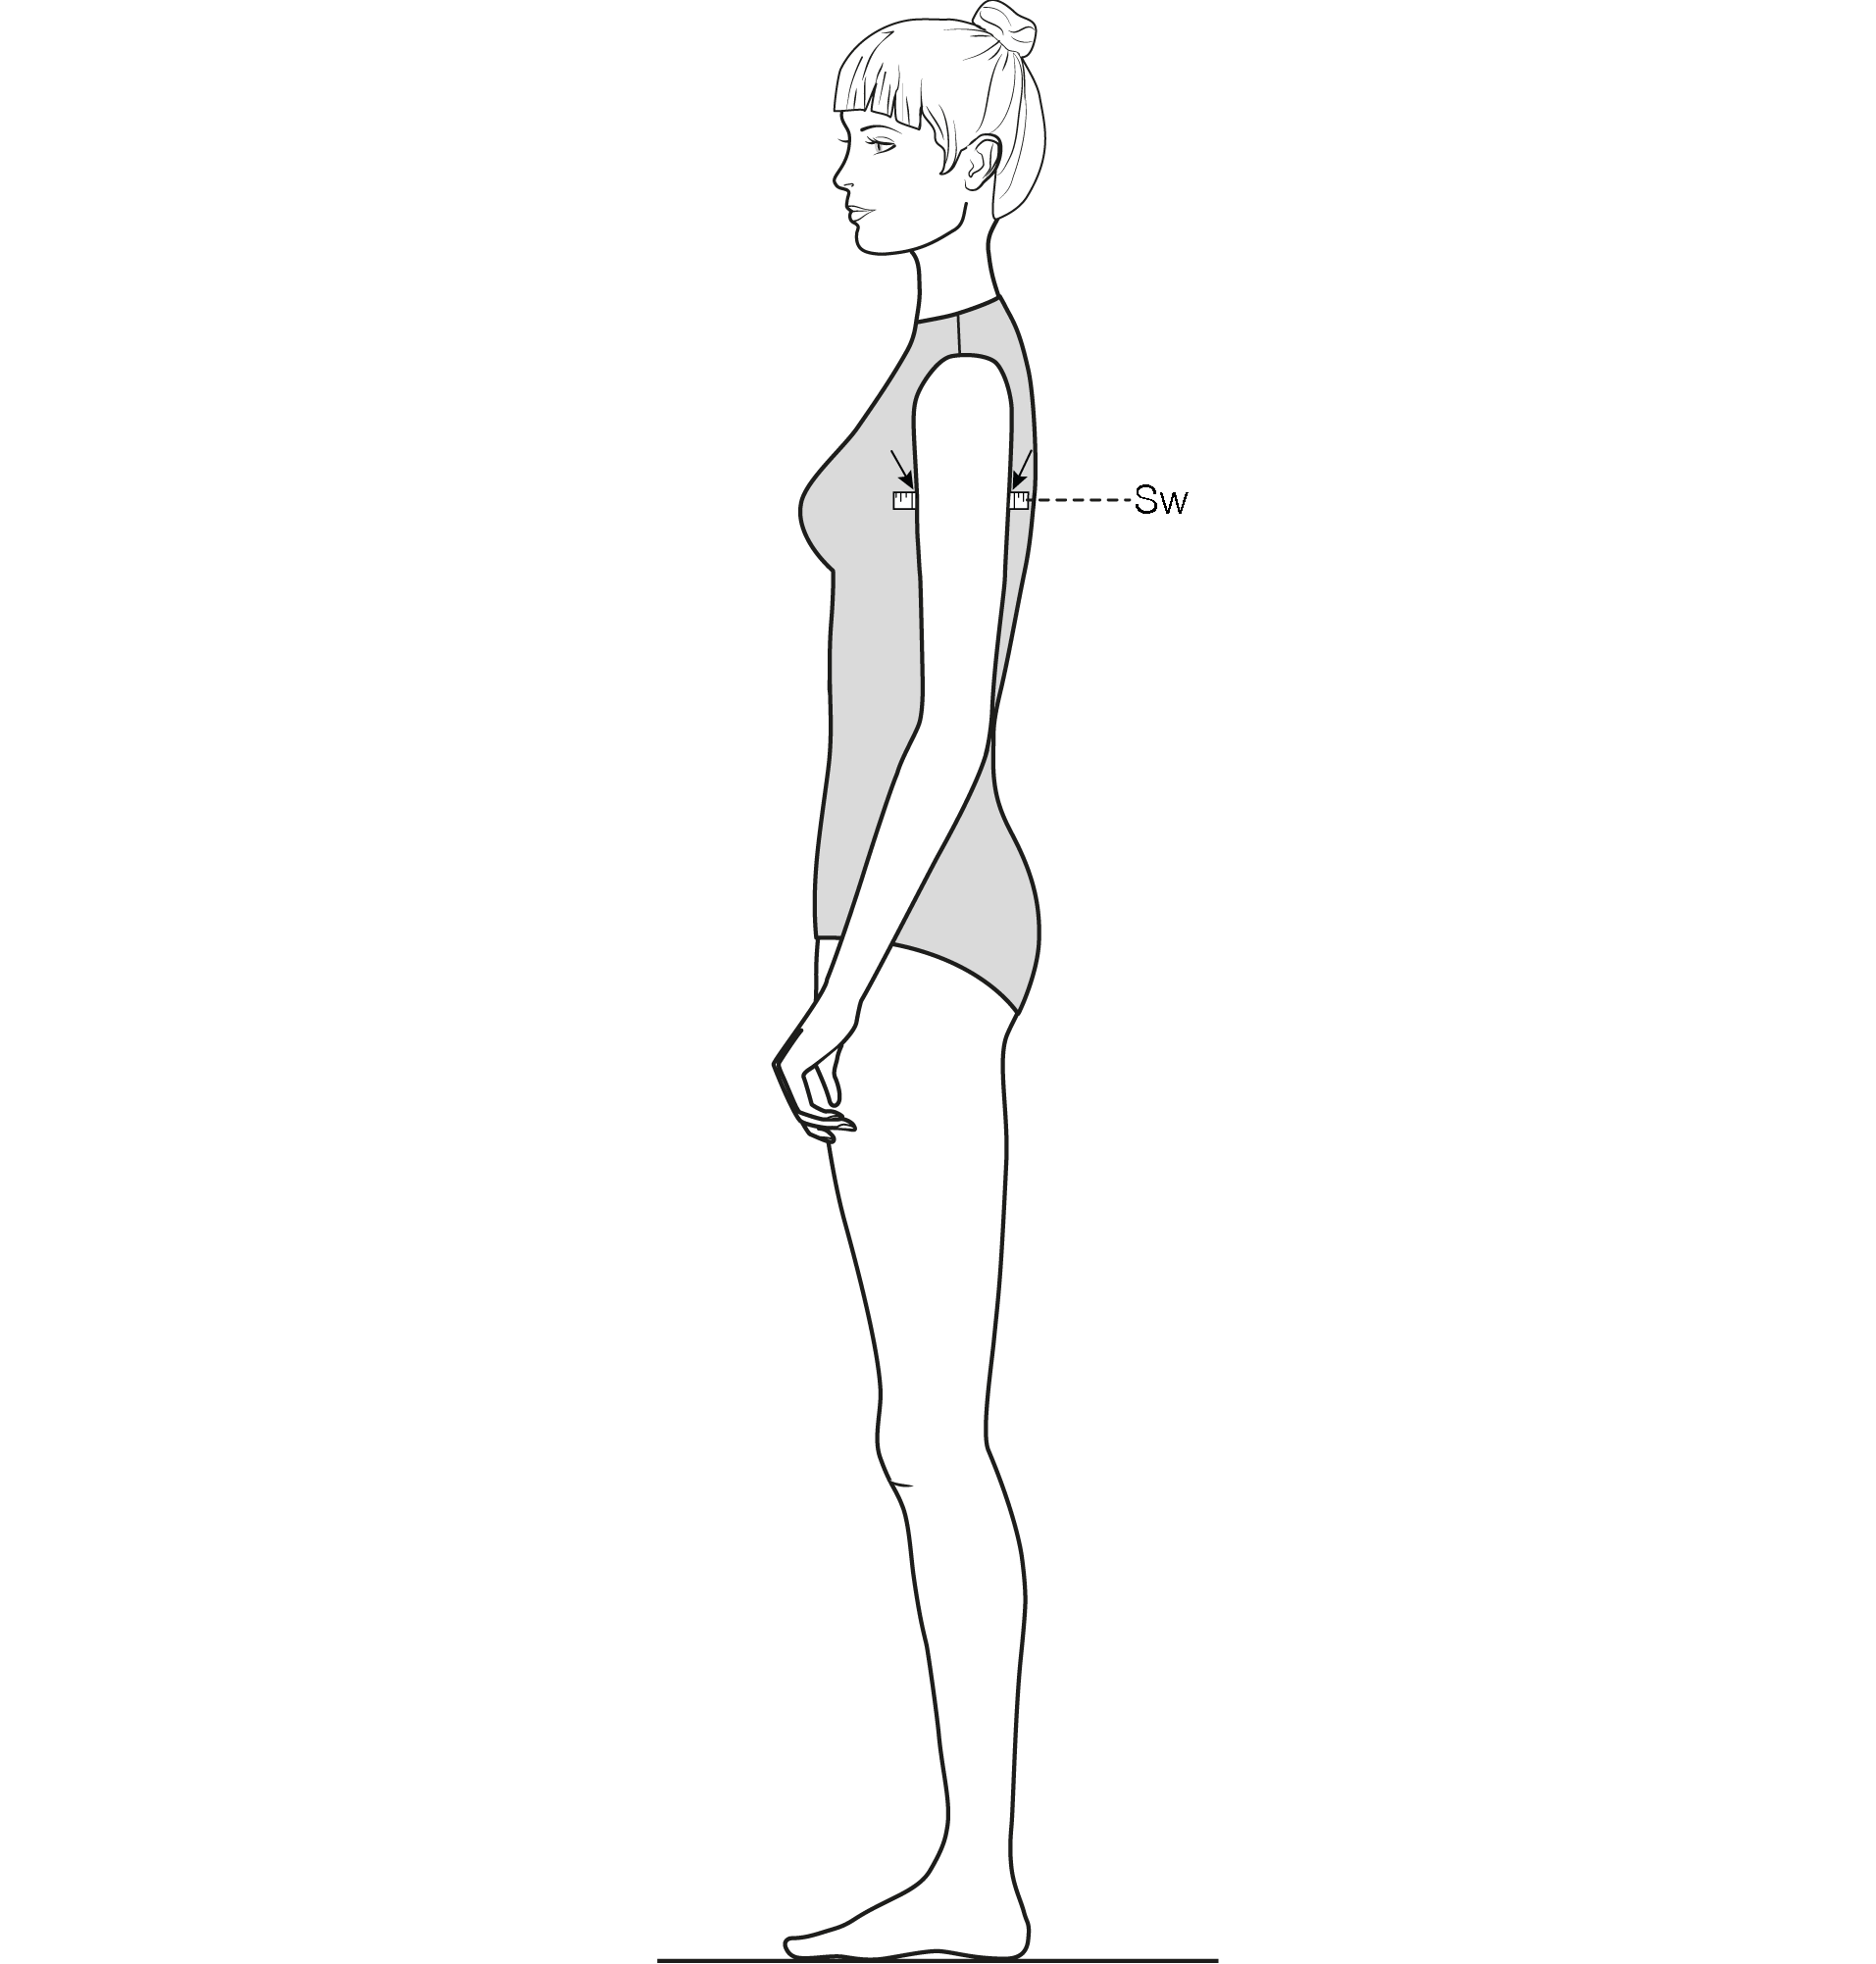
-
Measure the scye width between the front and back armhole pitch line. The scye width determines the armhole width. The scye width can also be calculated.
Cw – Chest width
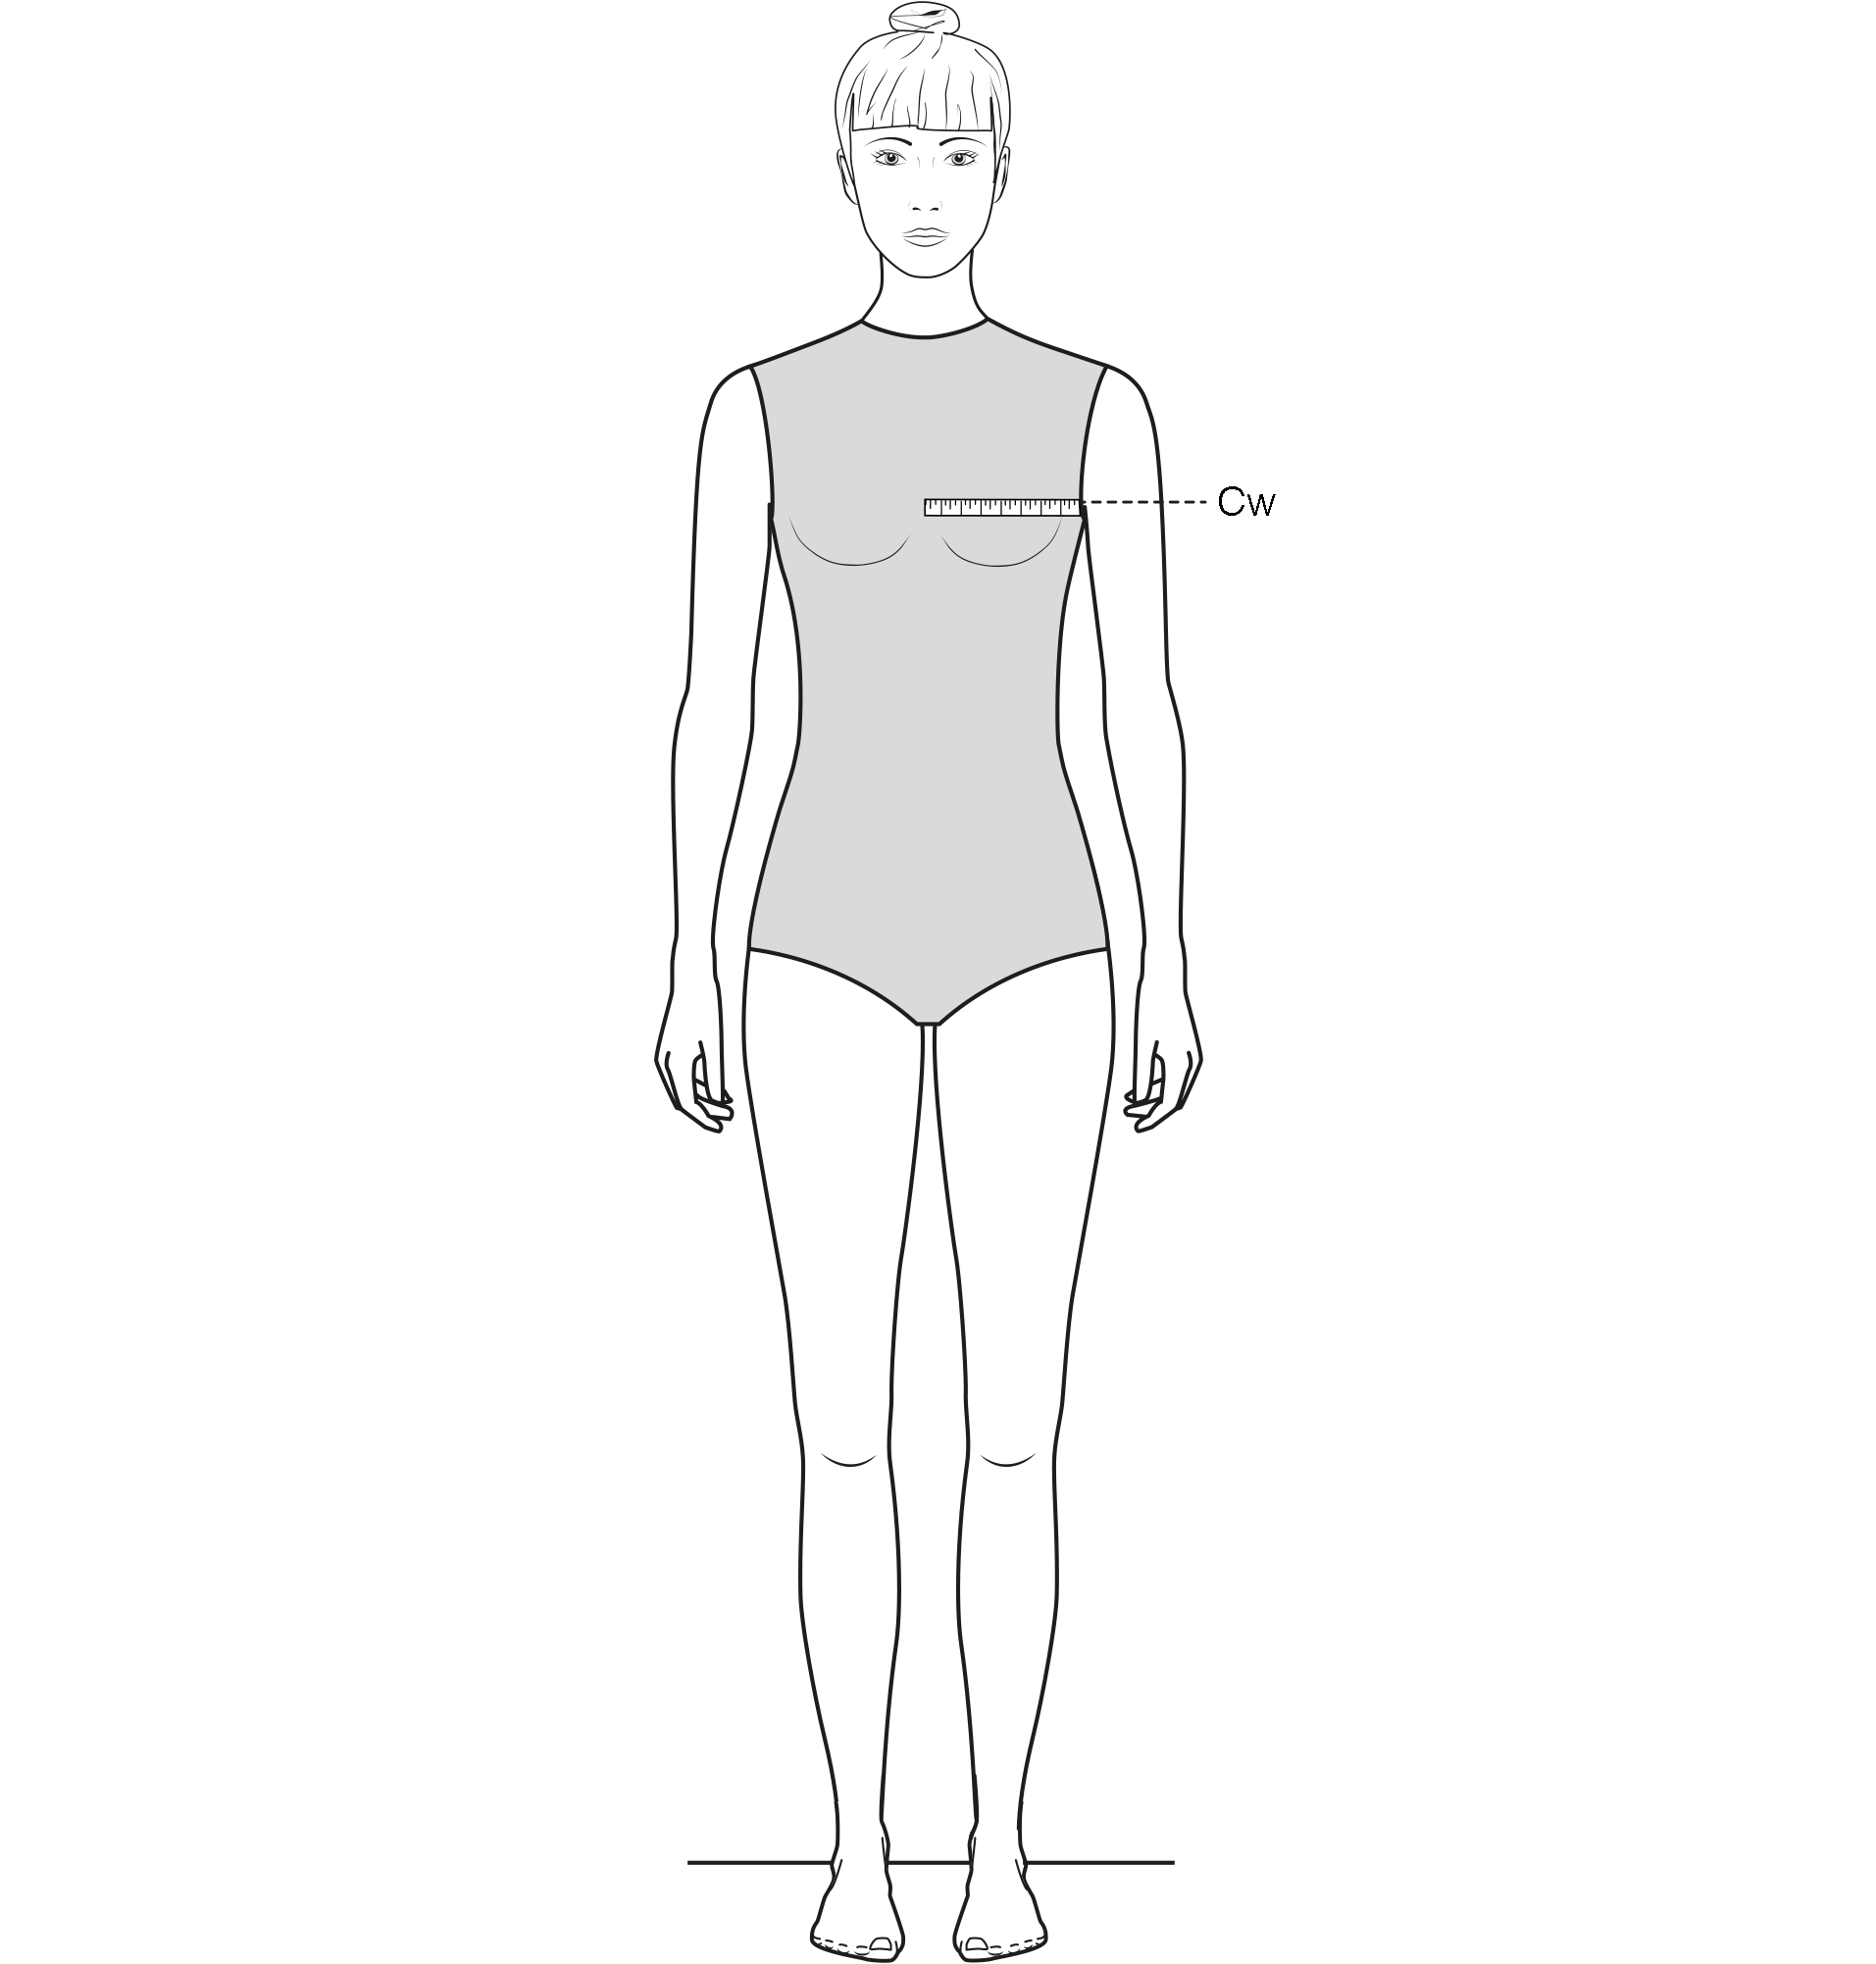
-
Measure horizontally from the centre front to the beginning of the arm. The chest width can also be calculated.
Bg – Biceps girth
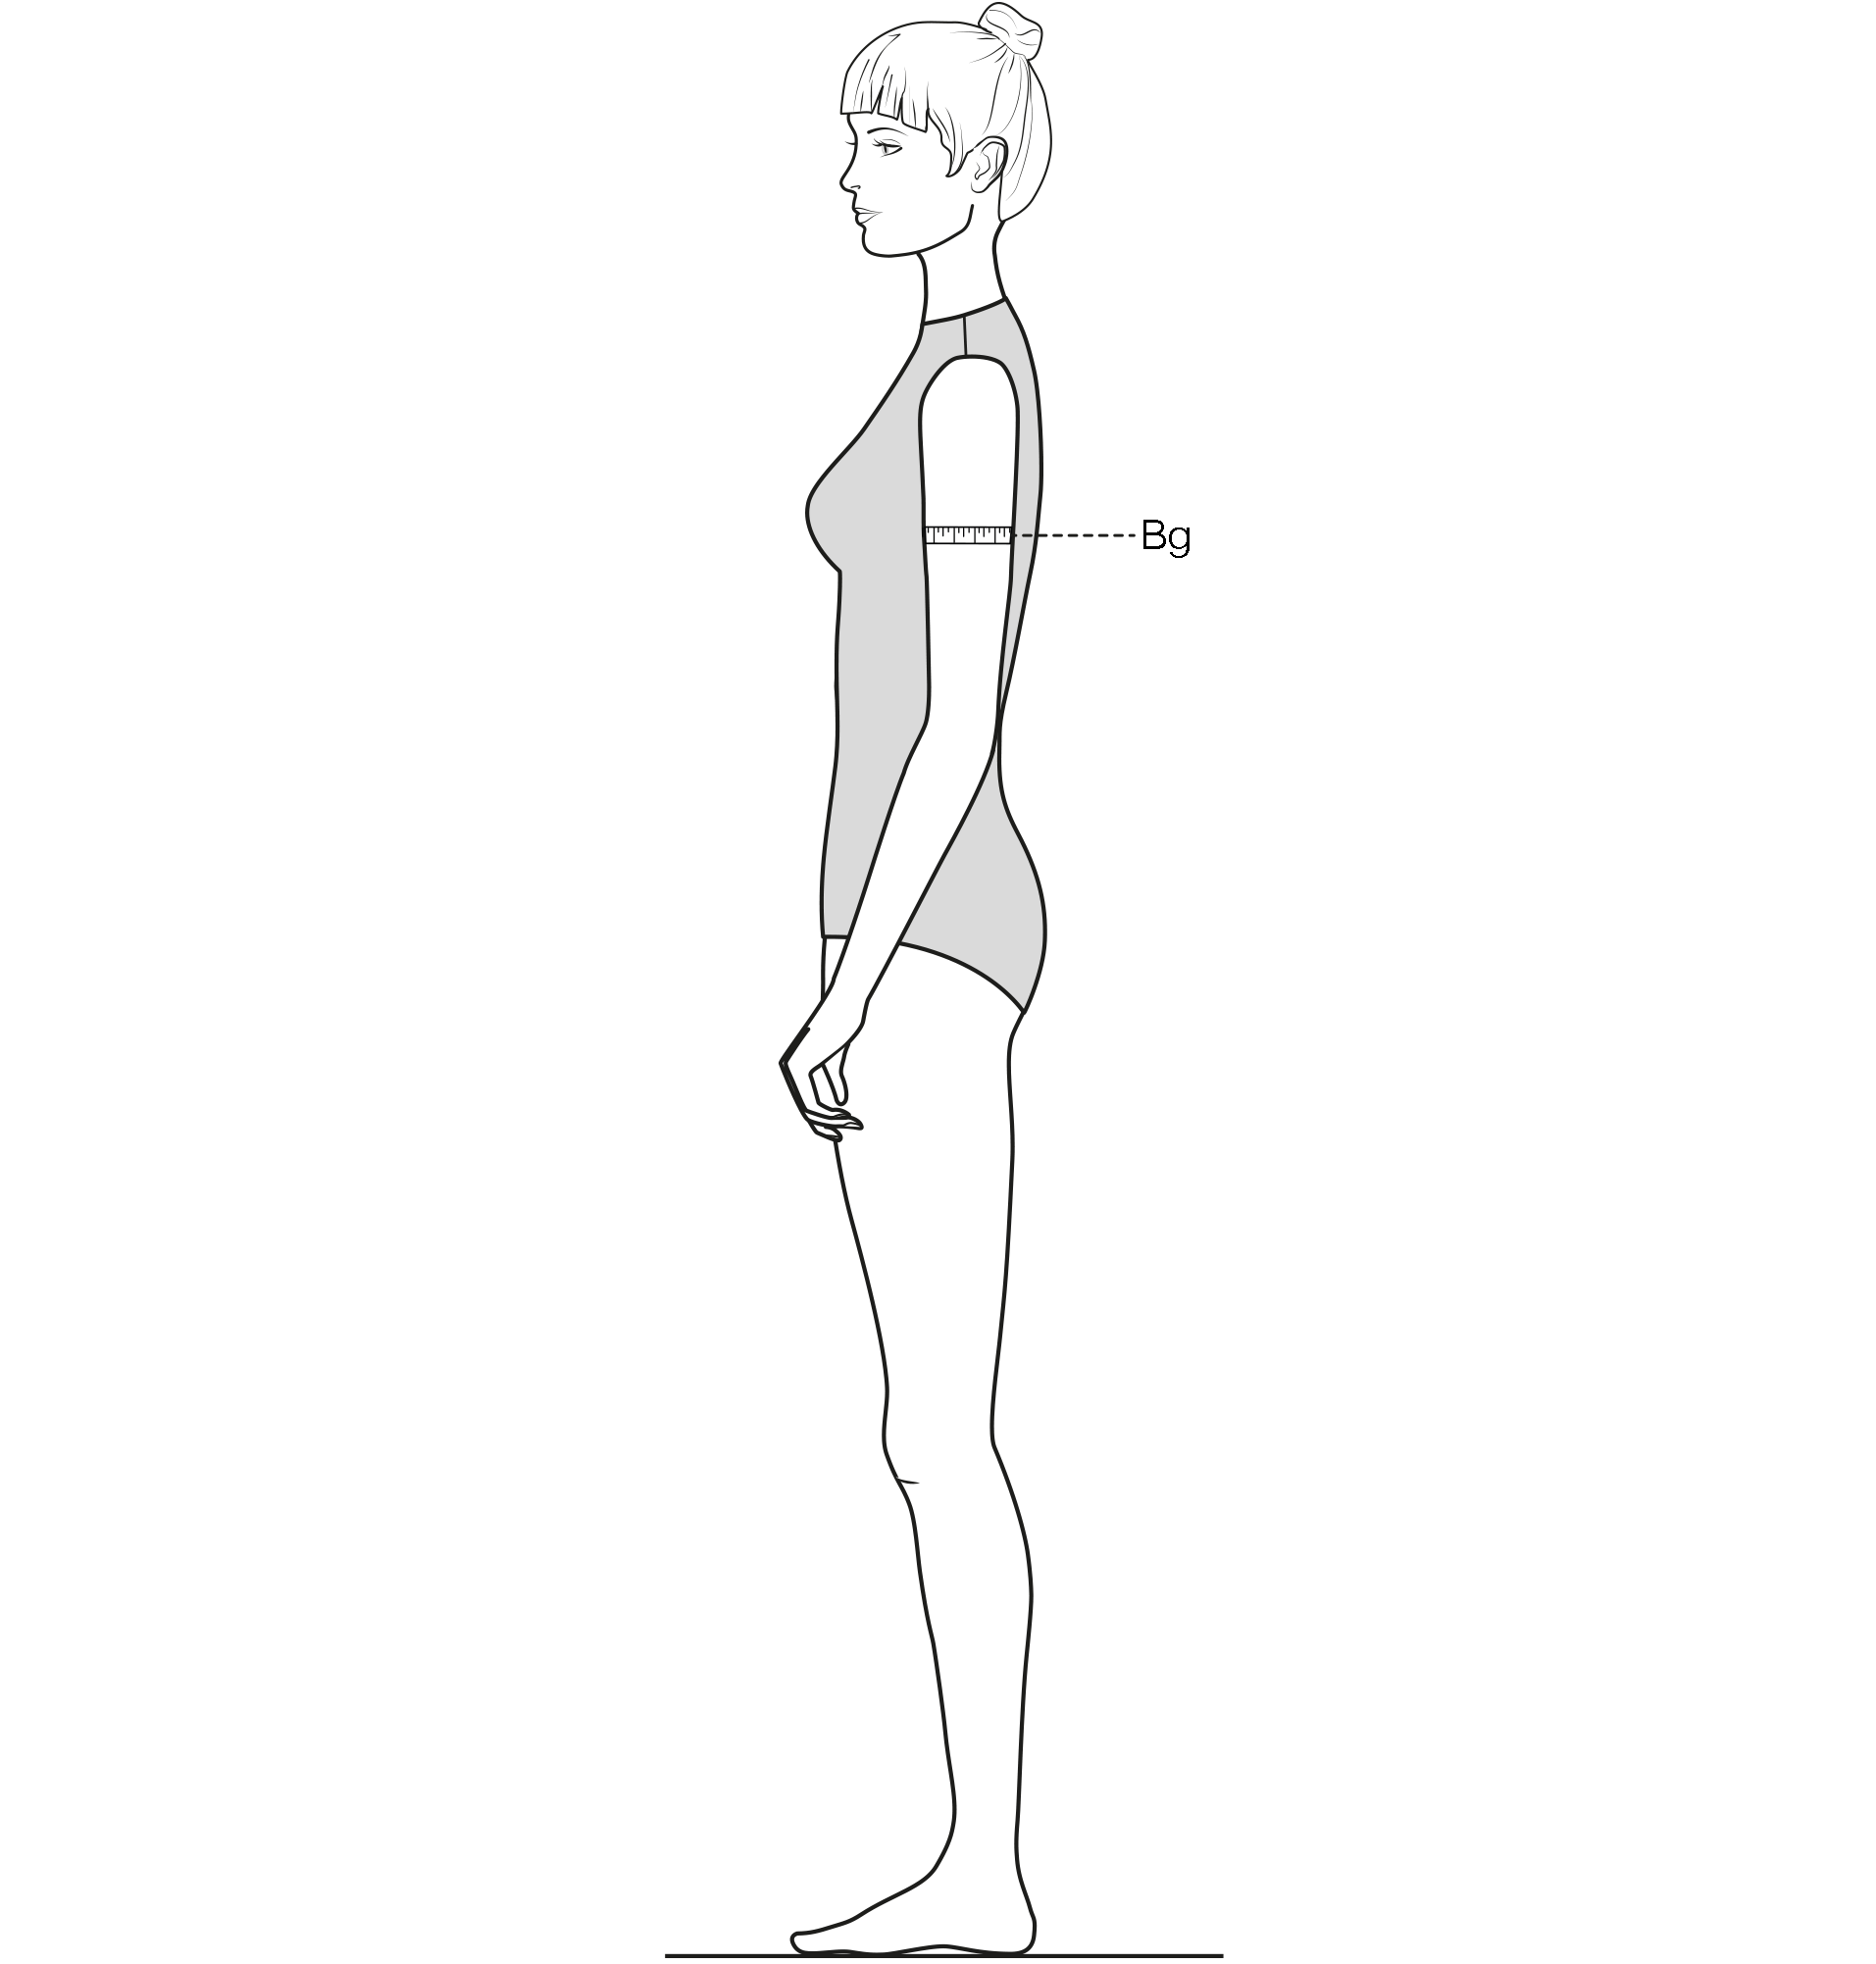
-
Measure the biceps horizontally around the fullest part of the upper arm.
El – Elbow length
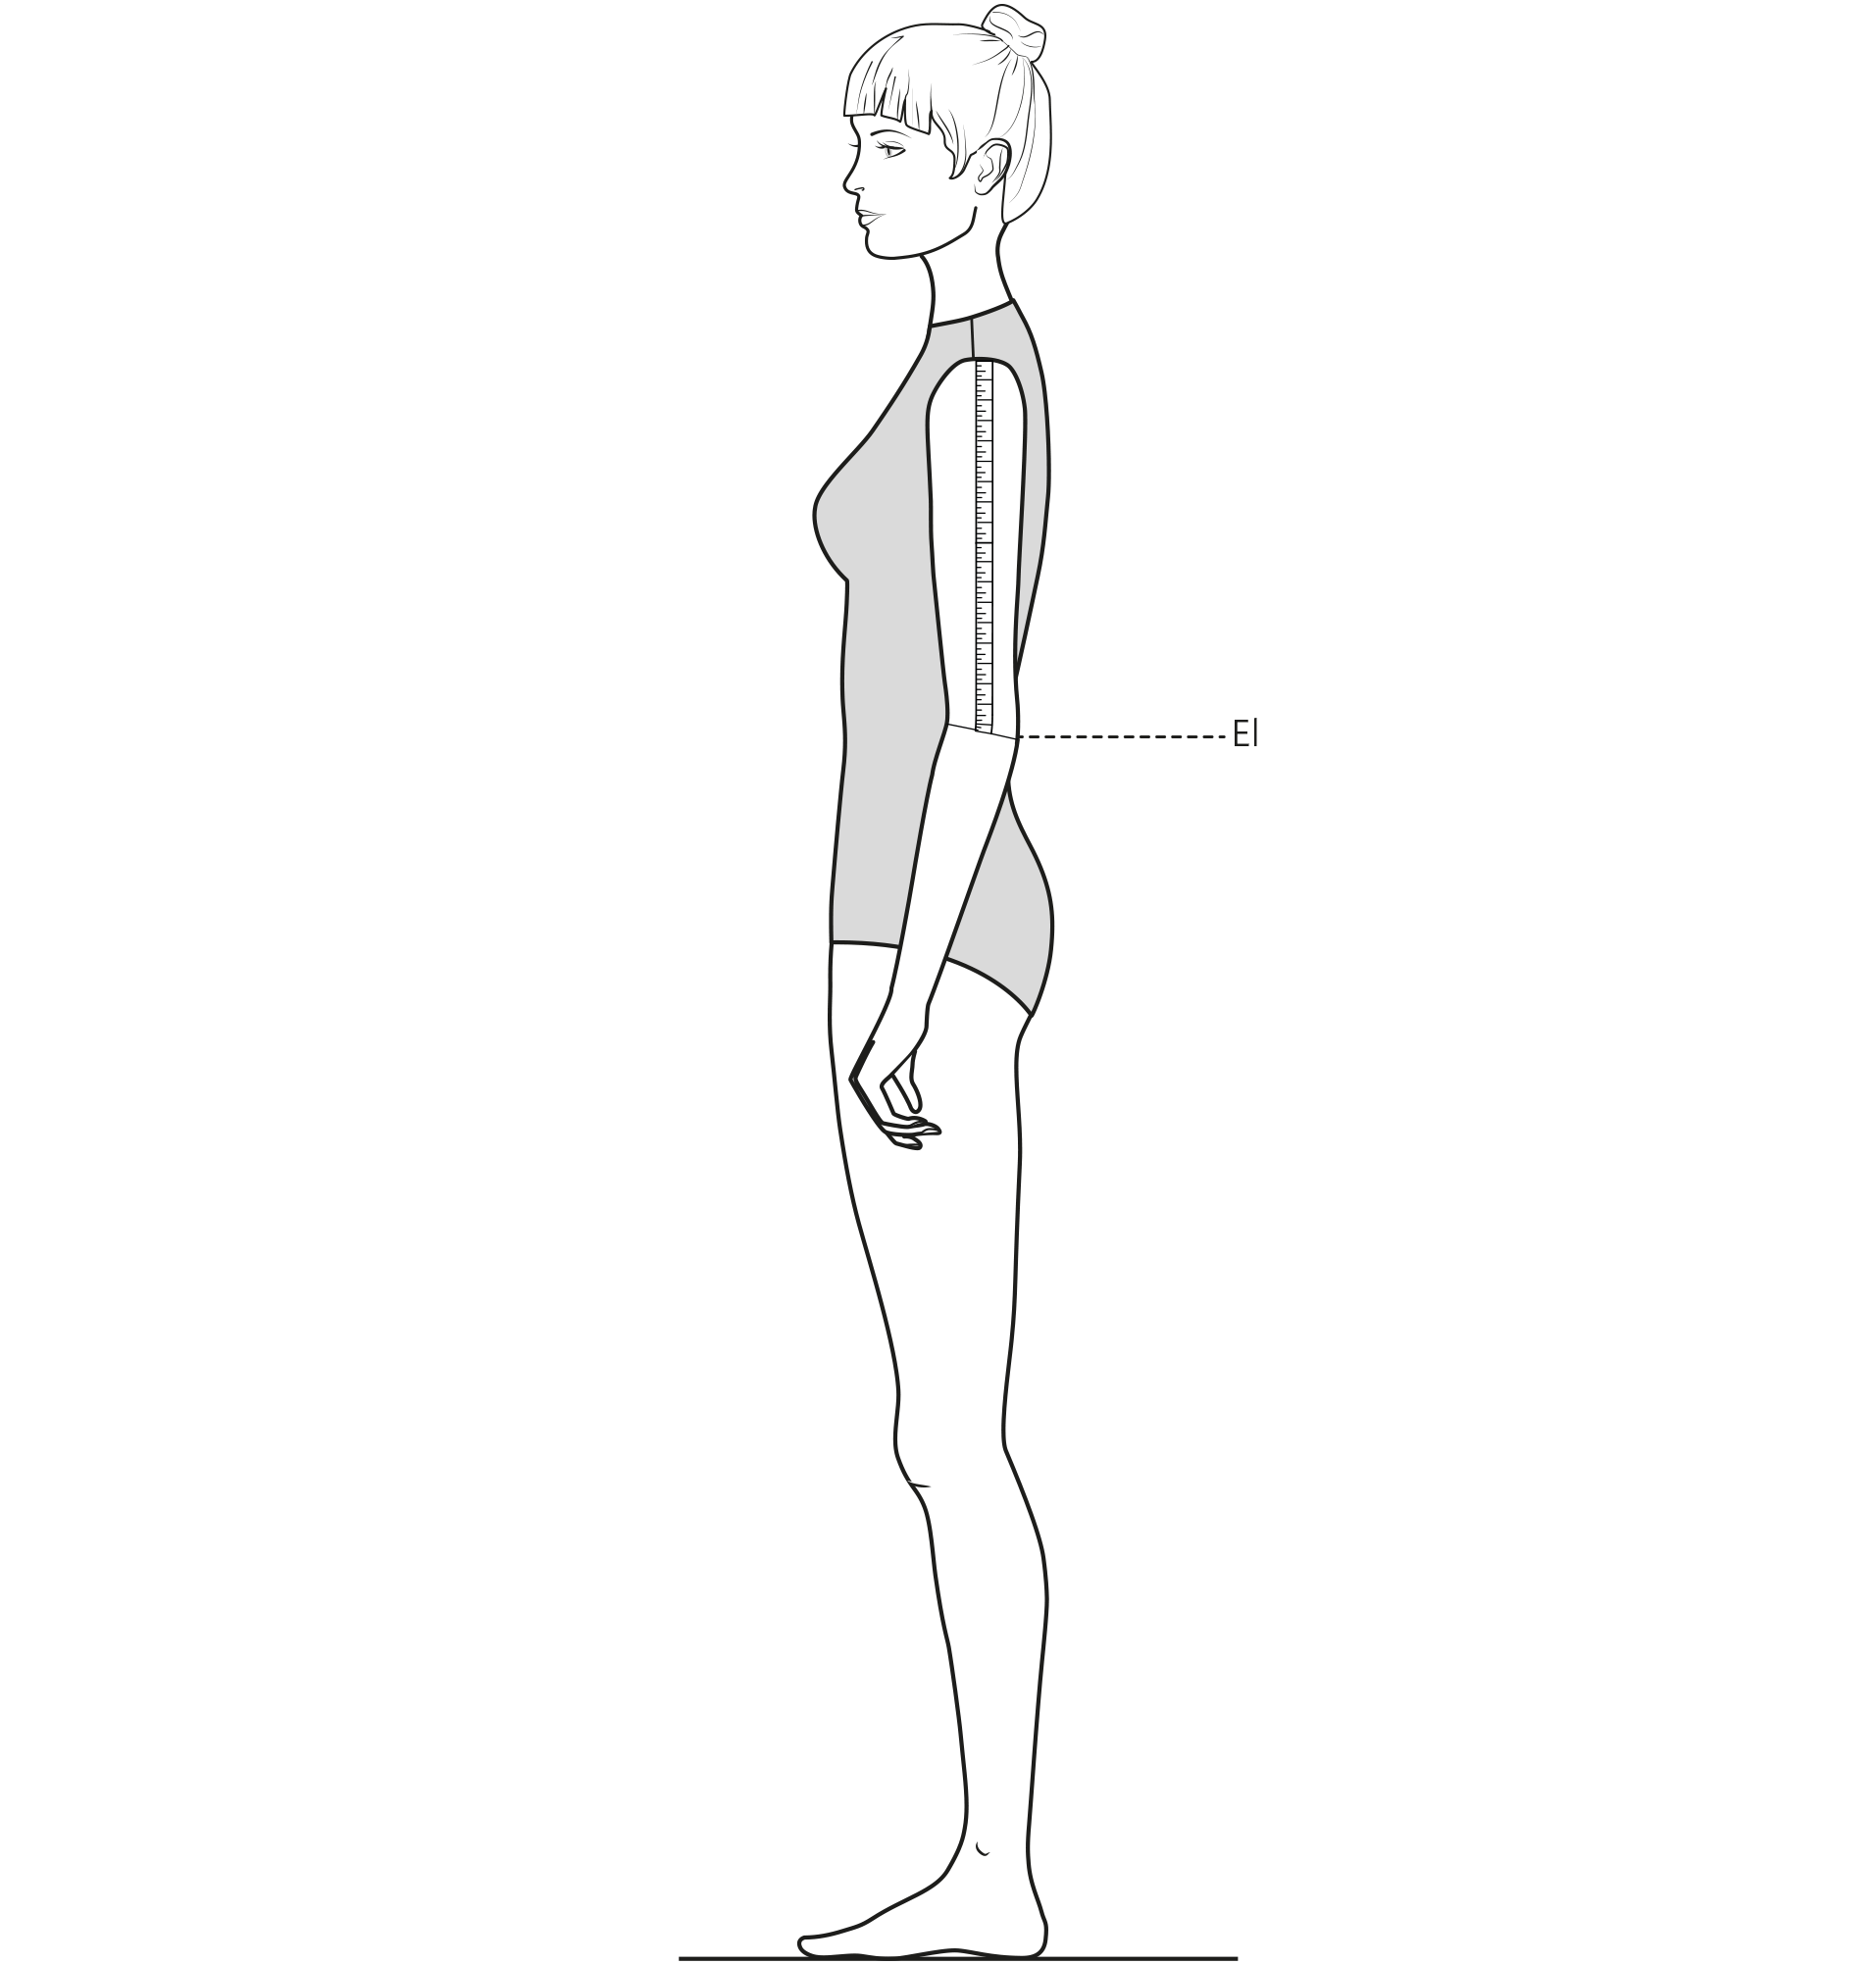
-
Measure the elbow length over the hanging arm from the arm head to the elbow.
Sl – Sleeve length
-
Measure the sleeve length over the hanging arm with slightly forward bend underarm from the arm head over the elbow to the wrist bone.
Shw – Shoulder width
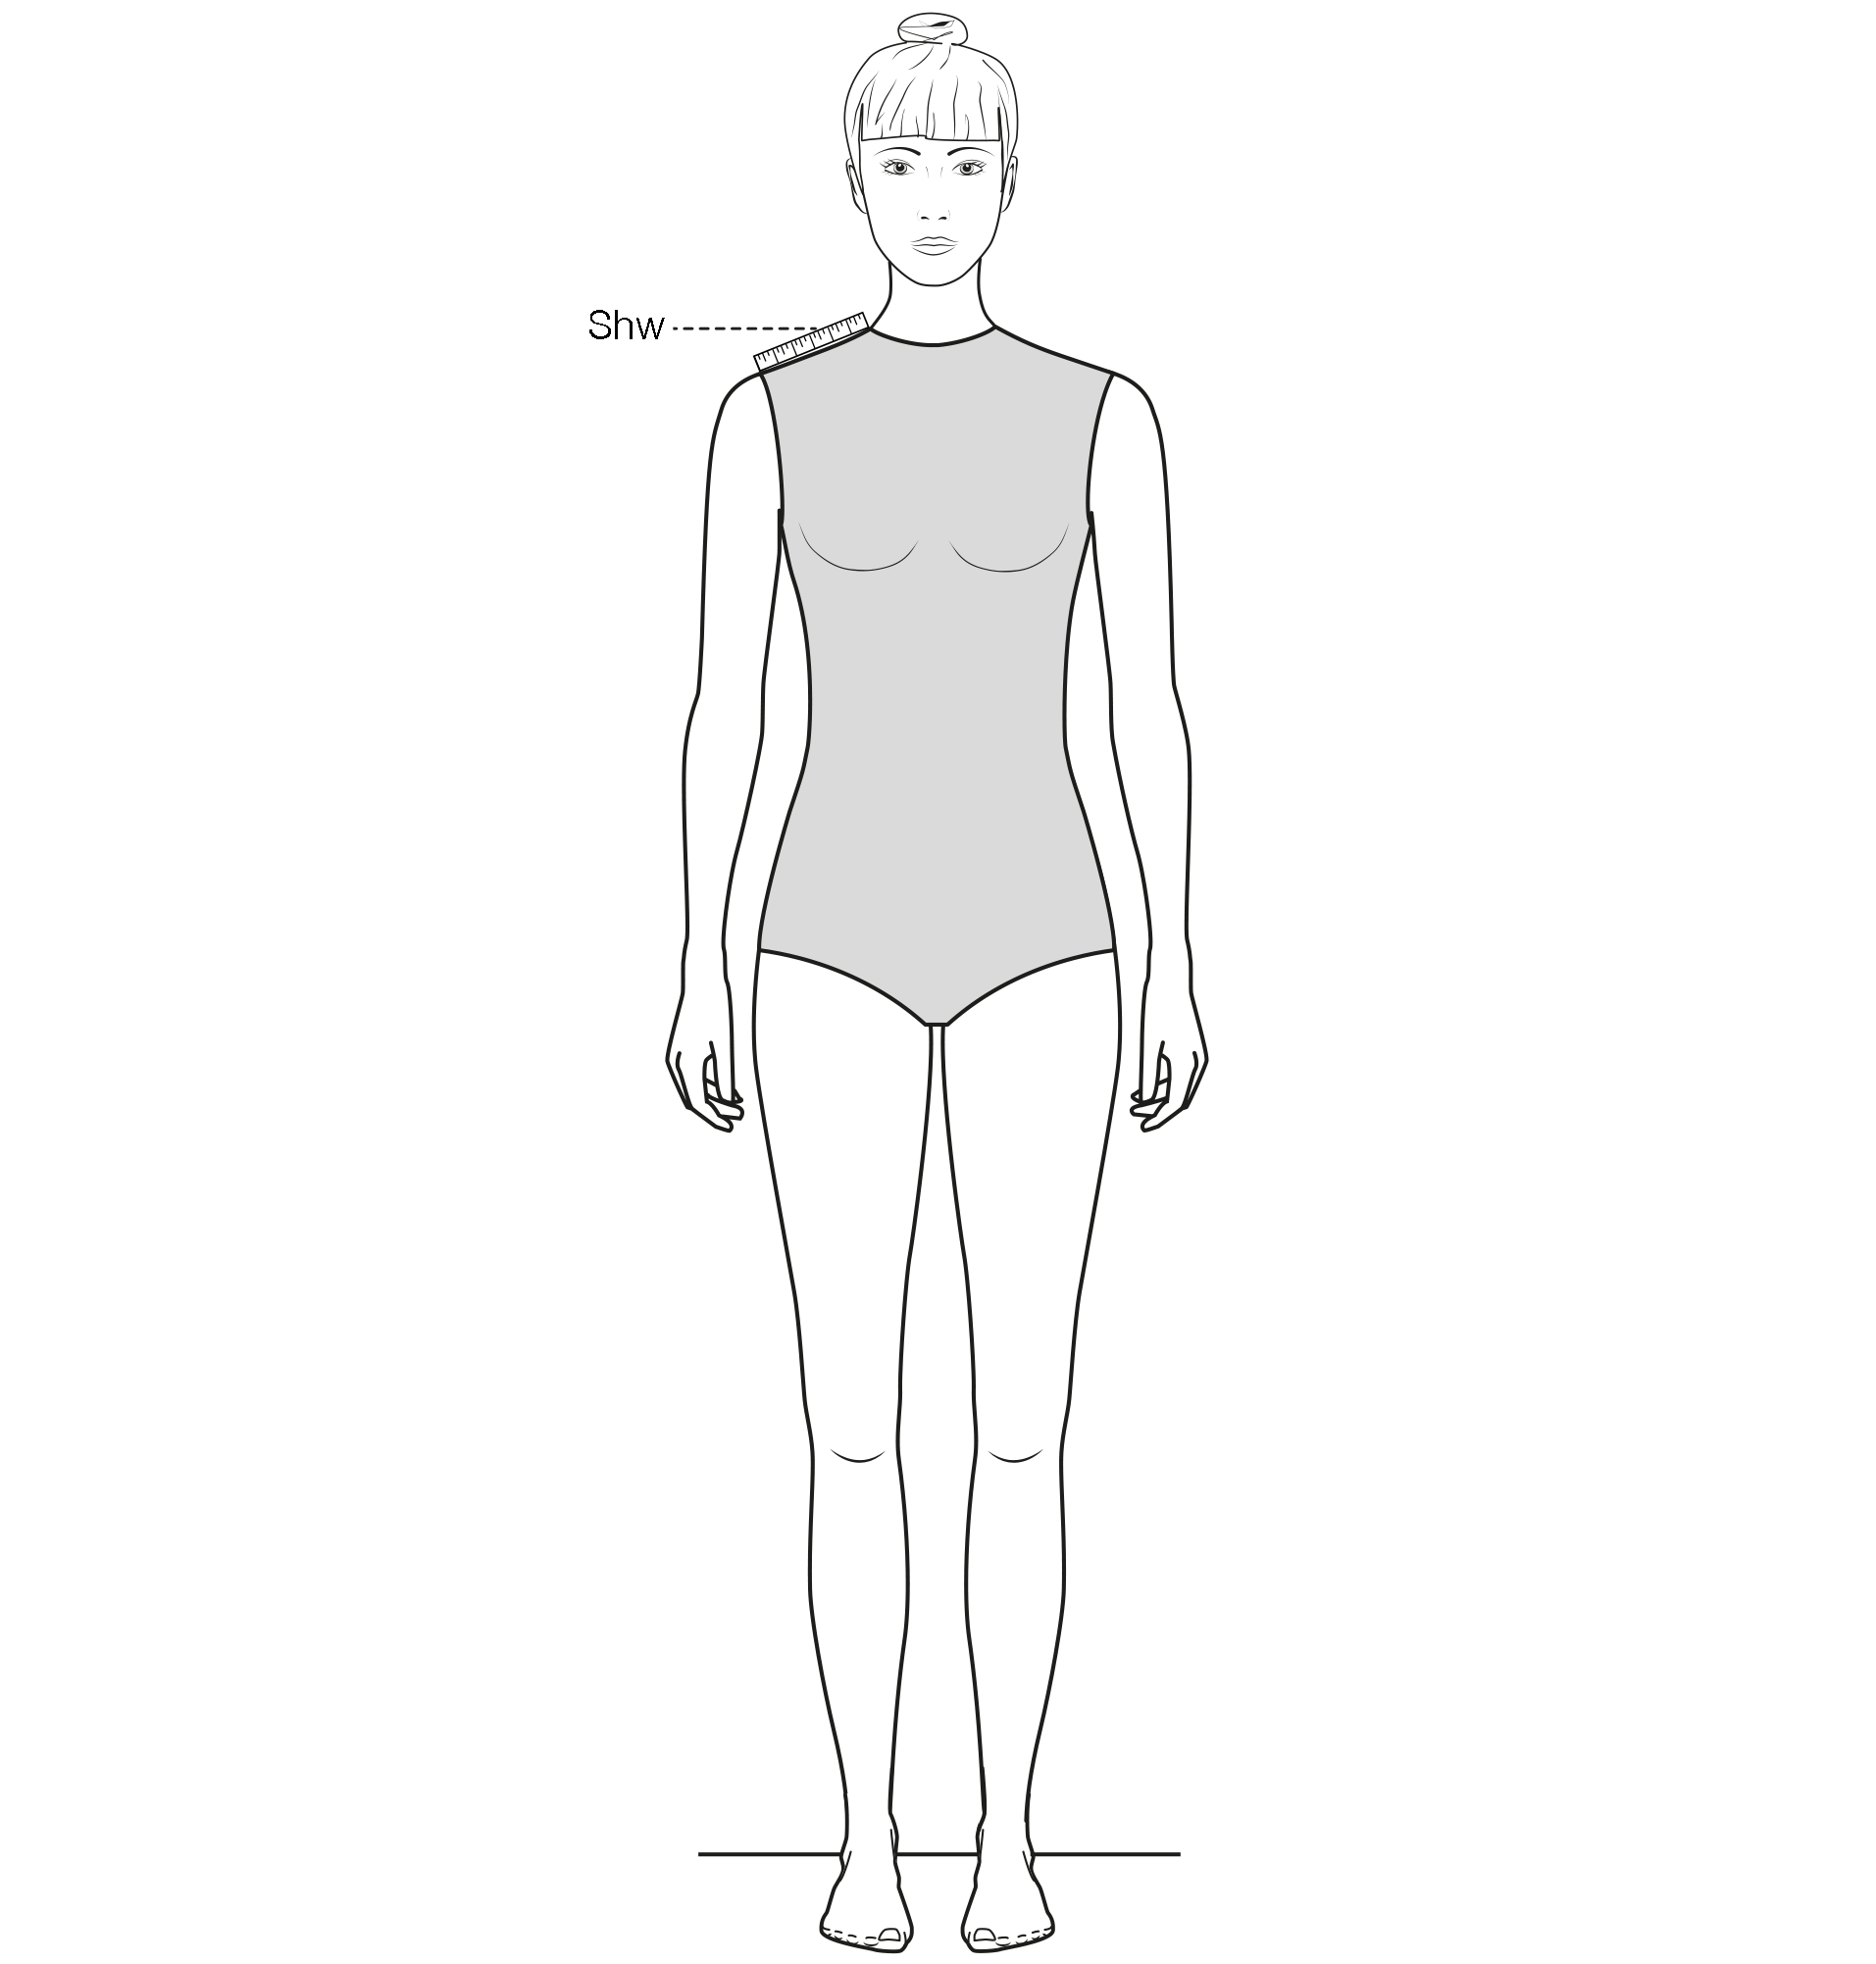
-
Measure the shoulder from the beginning of the neck to the beginning of the arm at the shoulder.
Wrg – Wrist girth
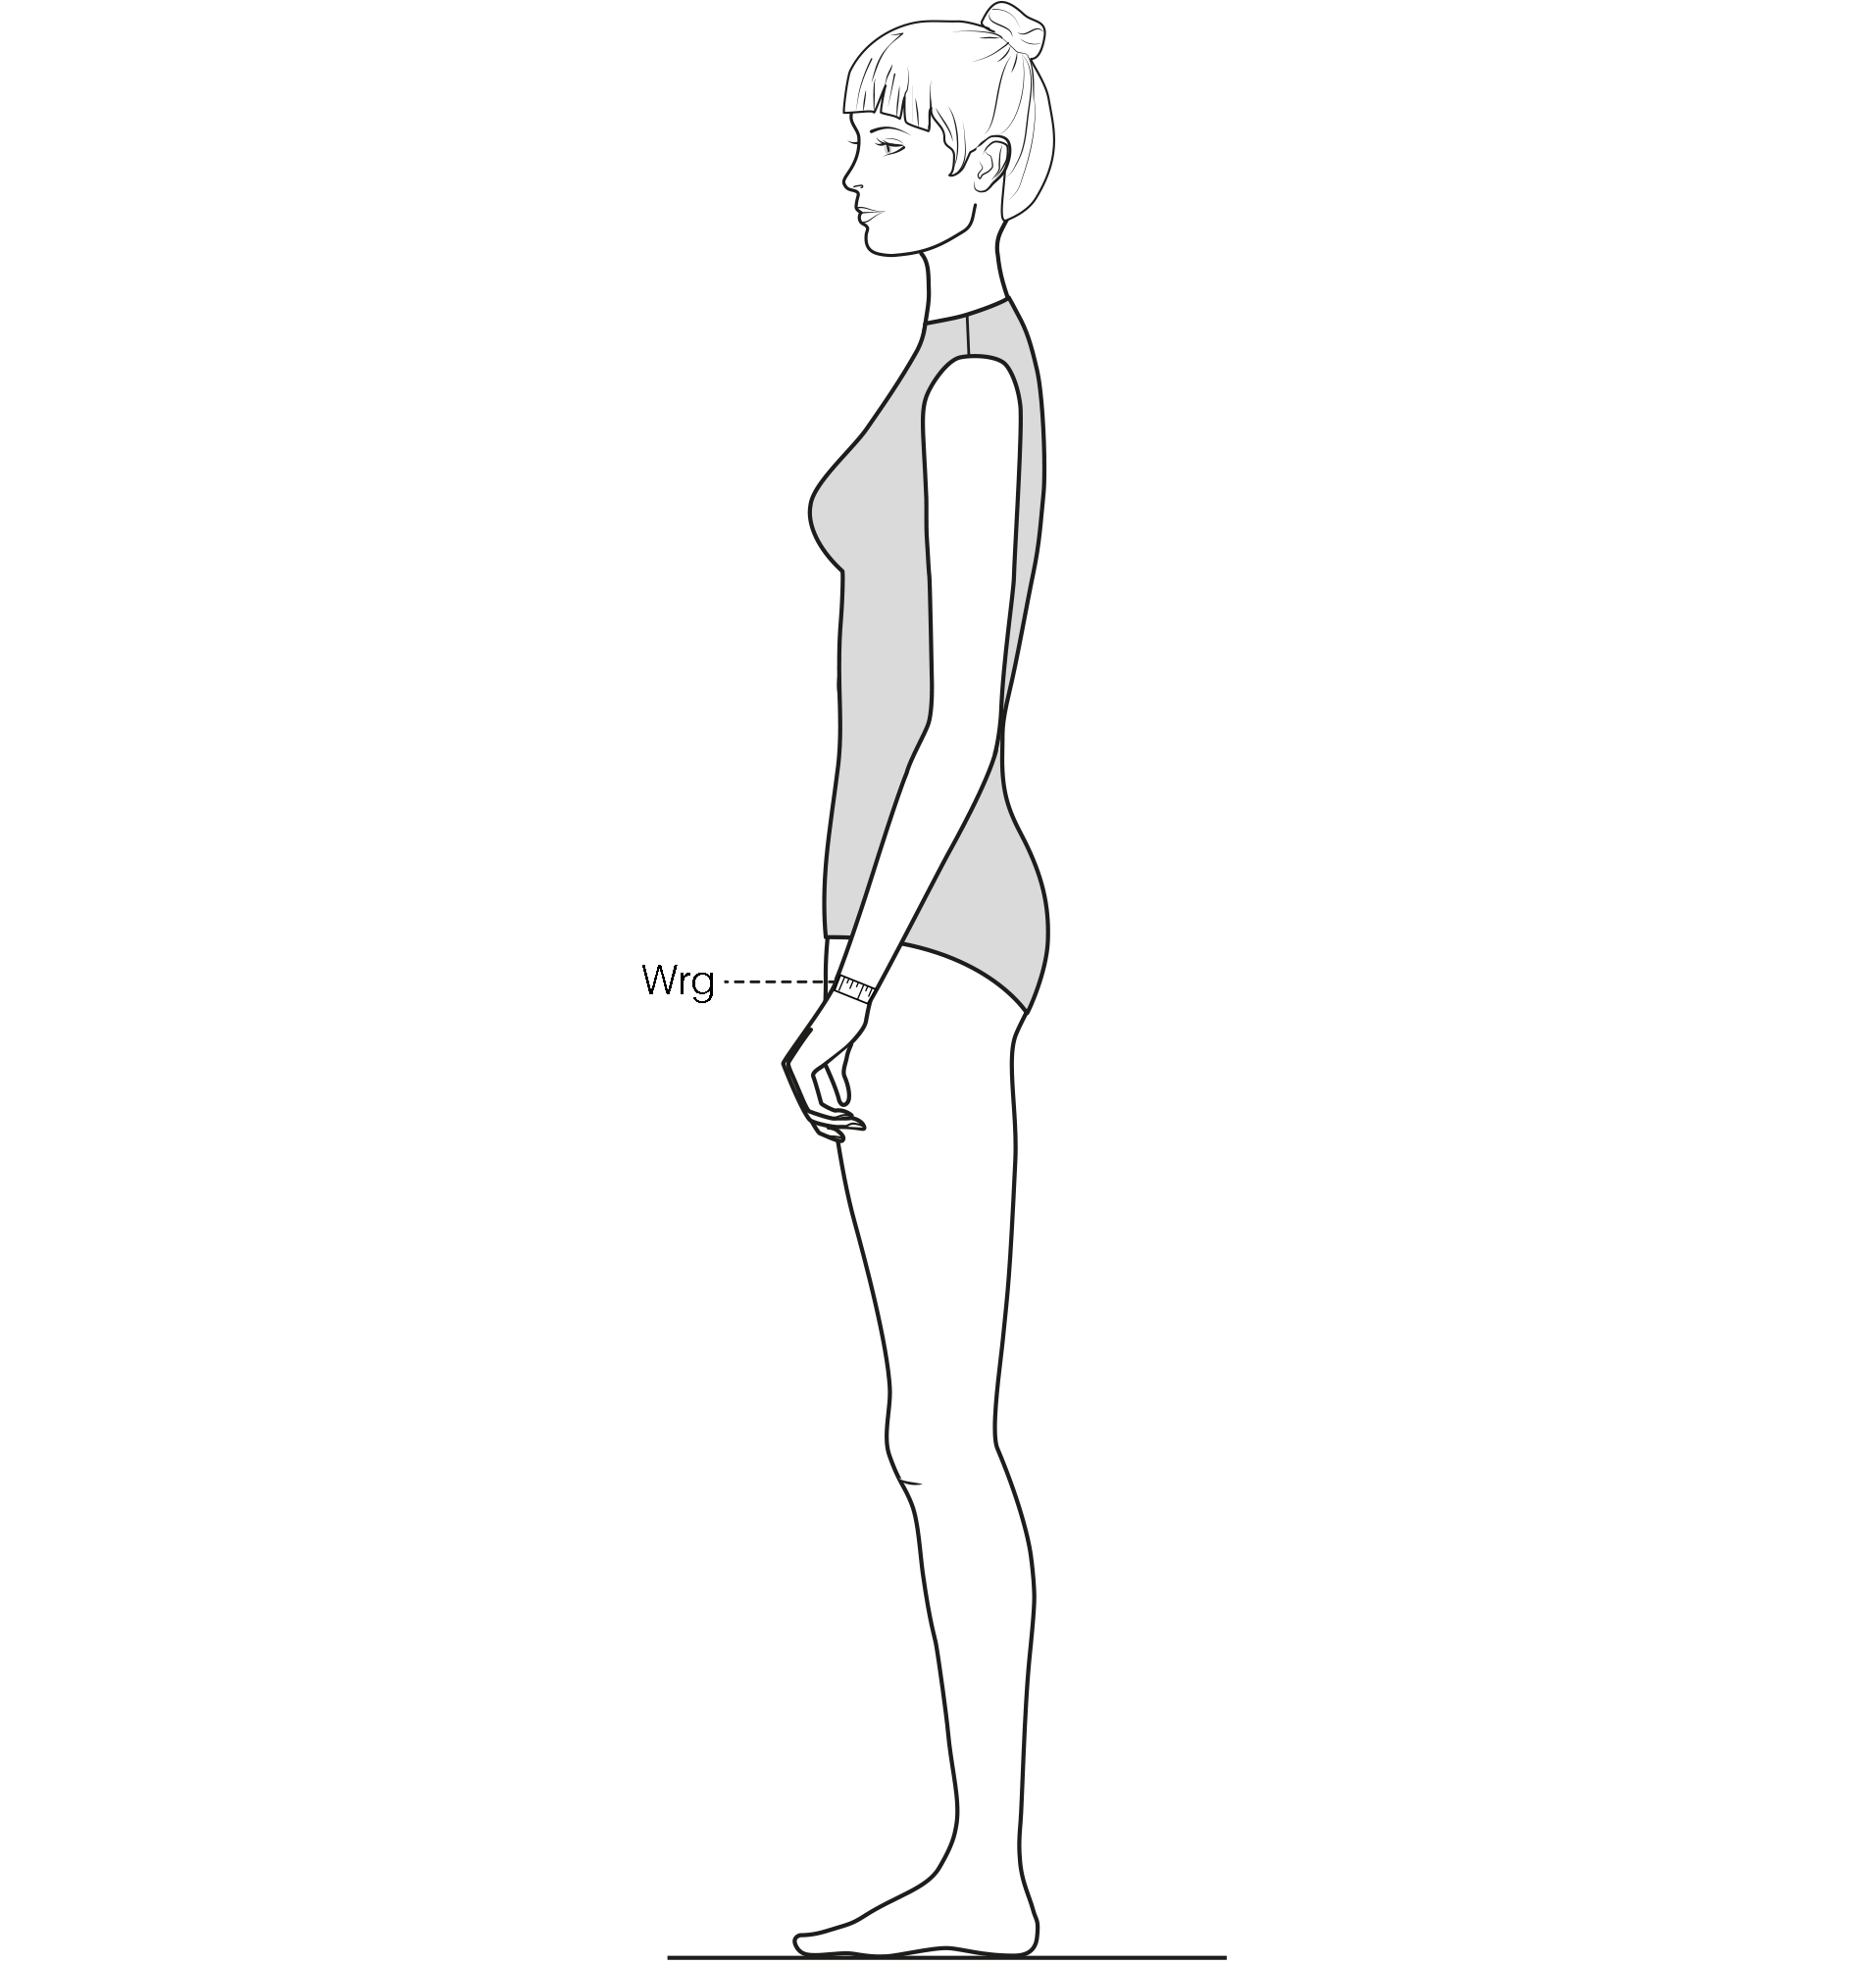
-
Measure the wrist circumference horizontally over the wrist bone.
Ng – Neck girth
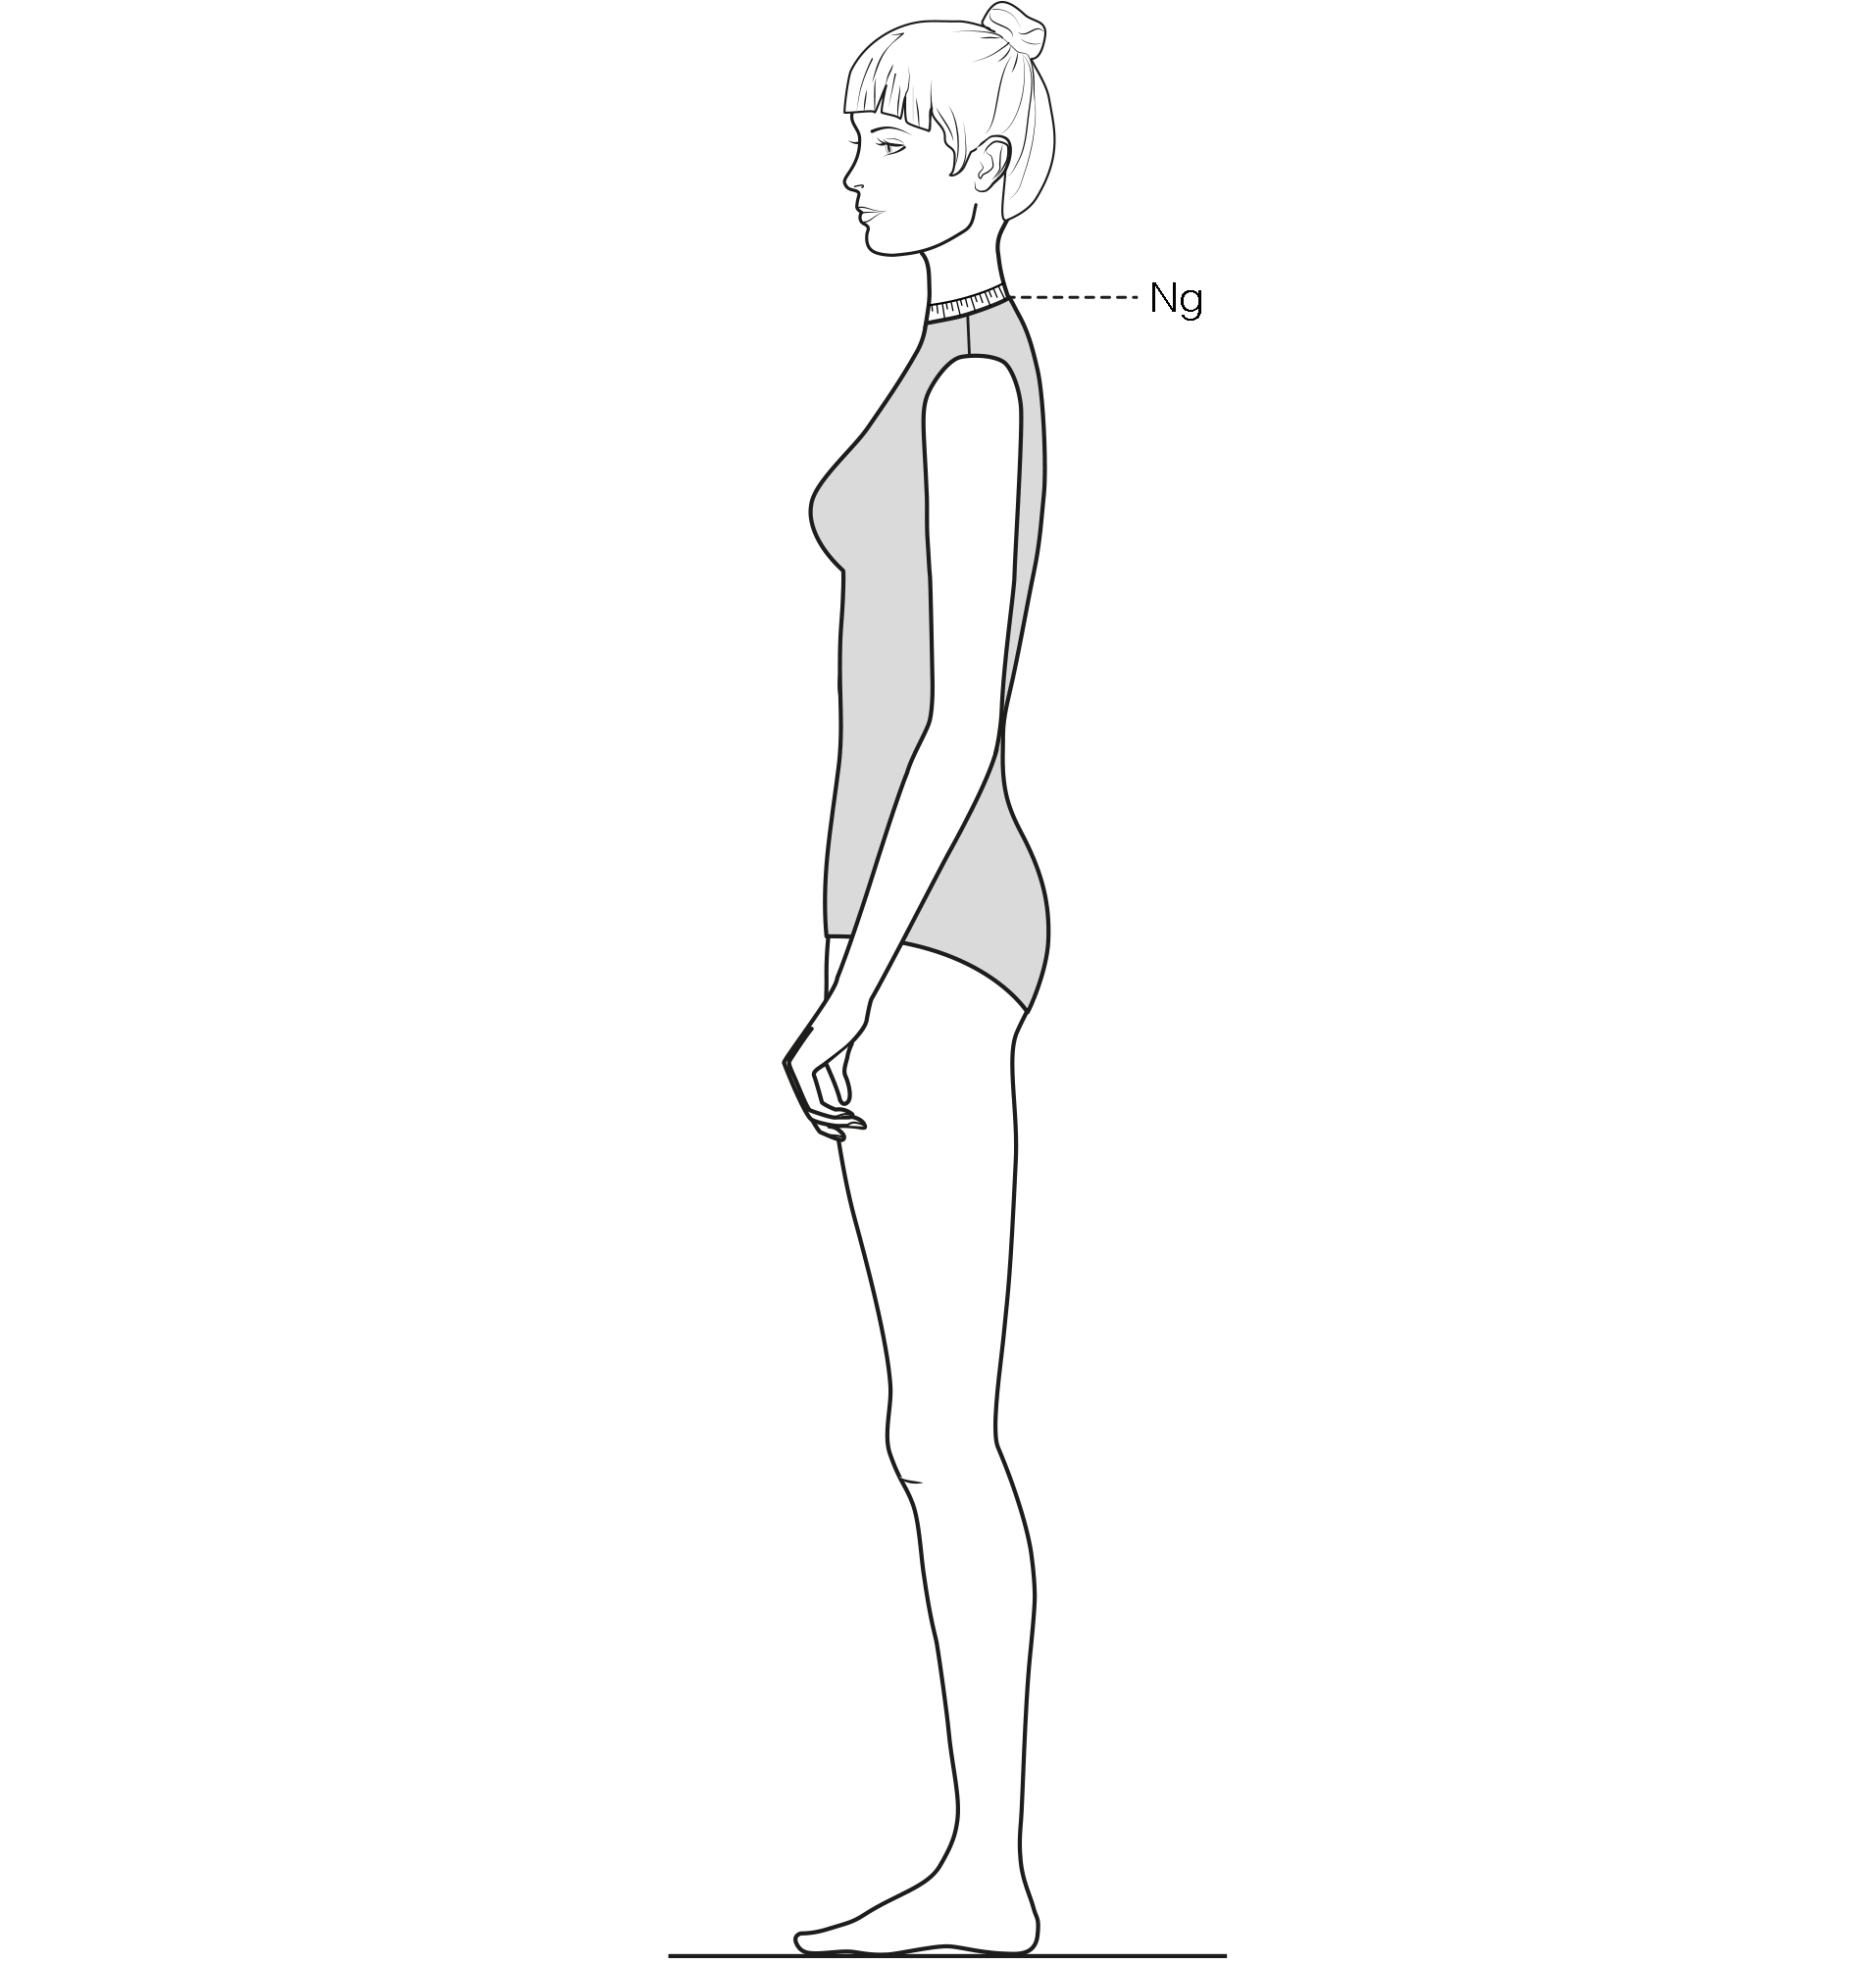
-
Measure the circumference of the neck at the transition to the upper body.
BpBp – Bustpoint distance
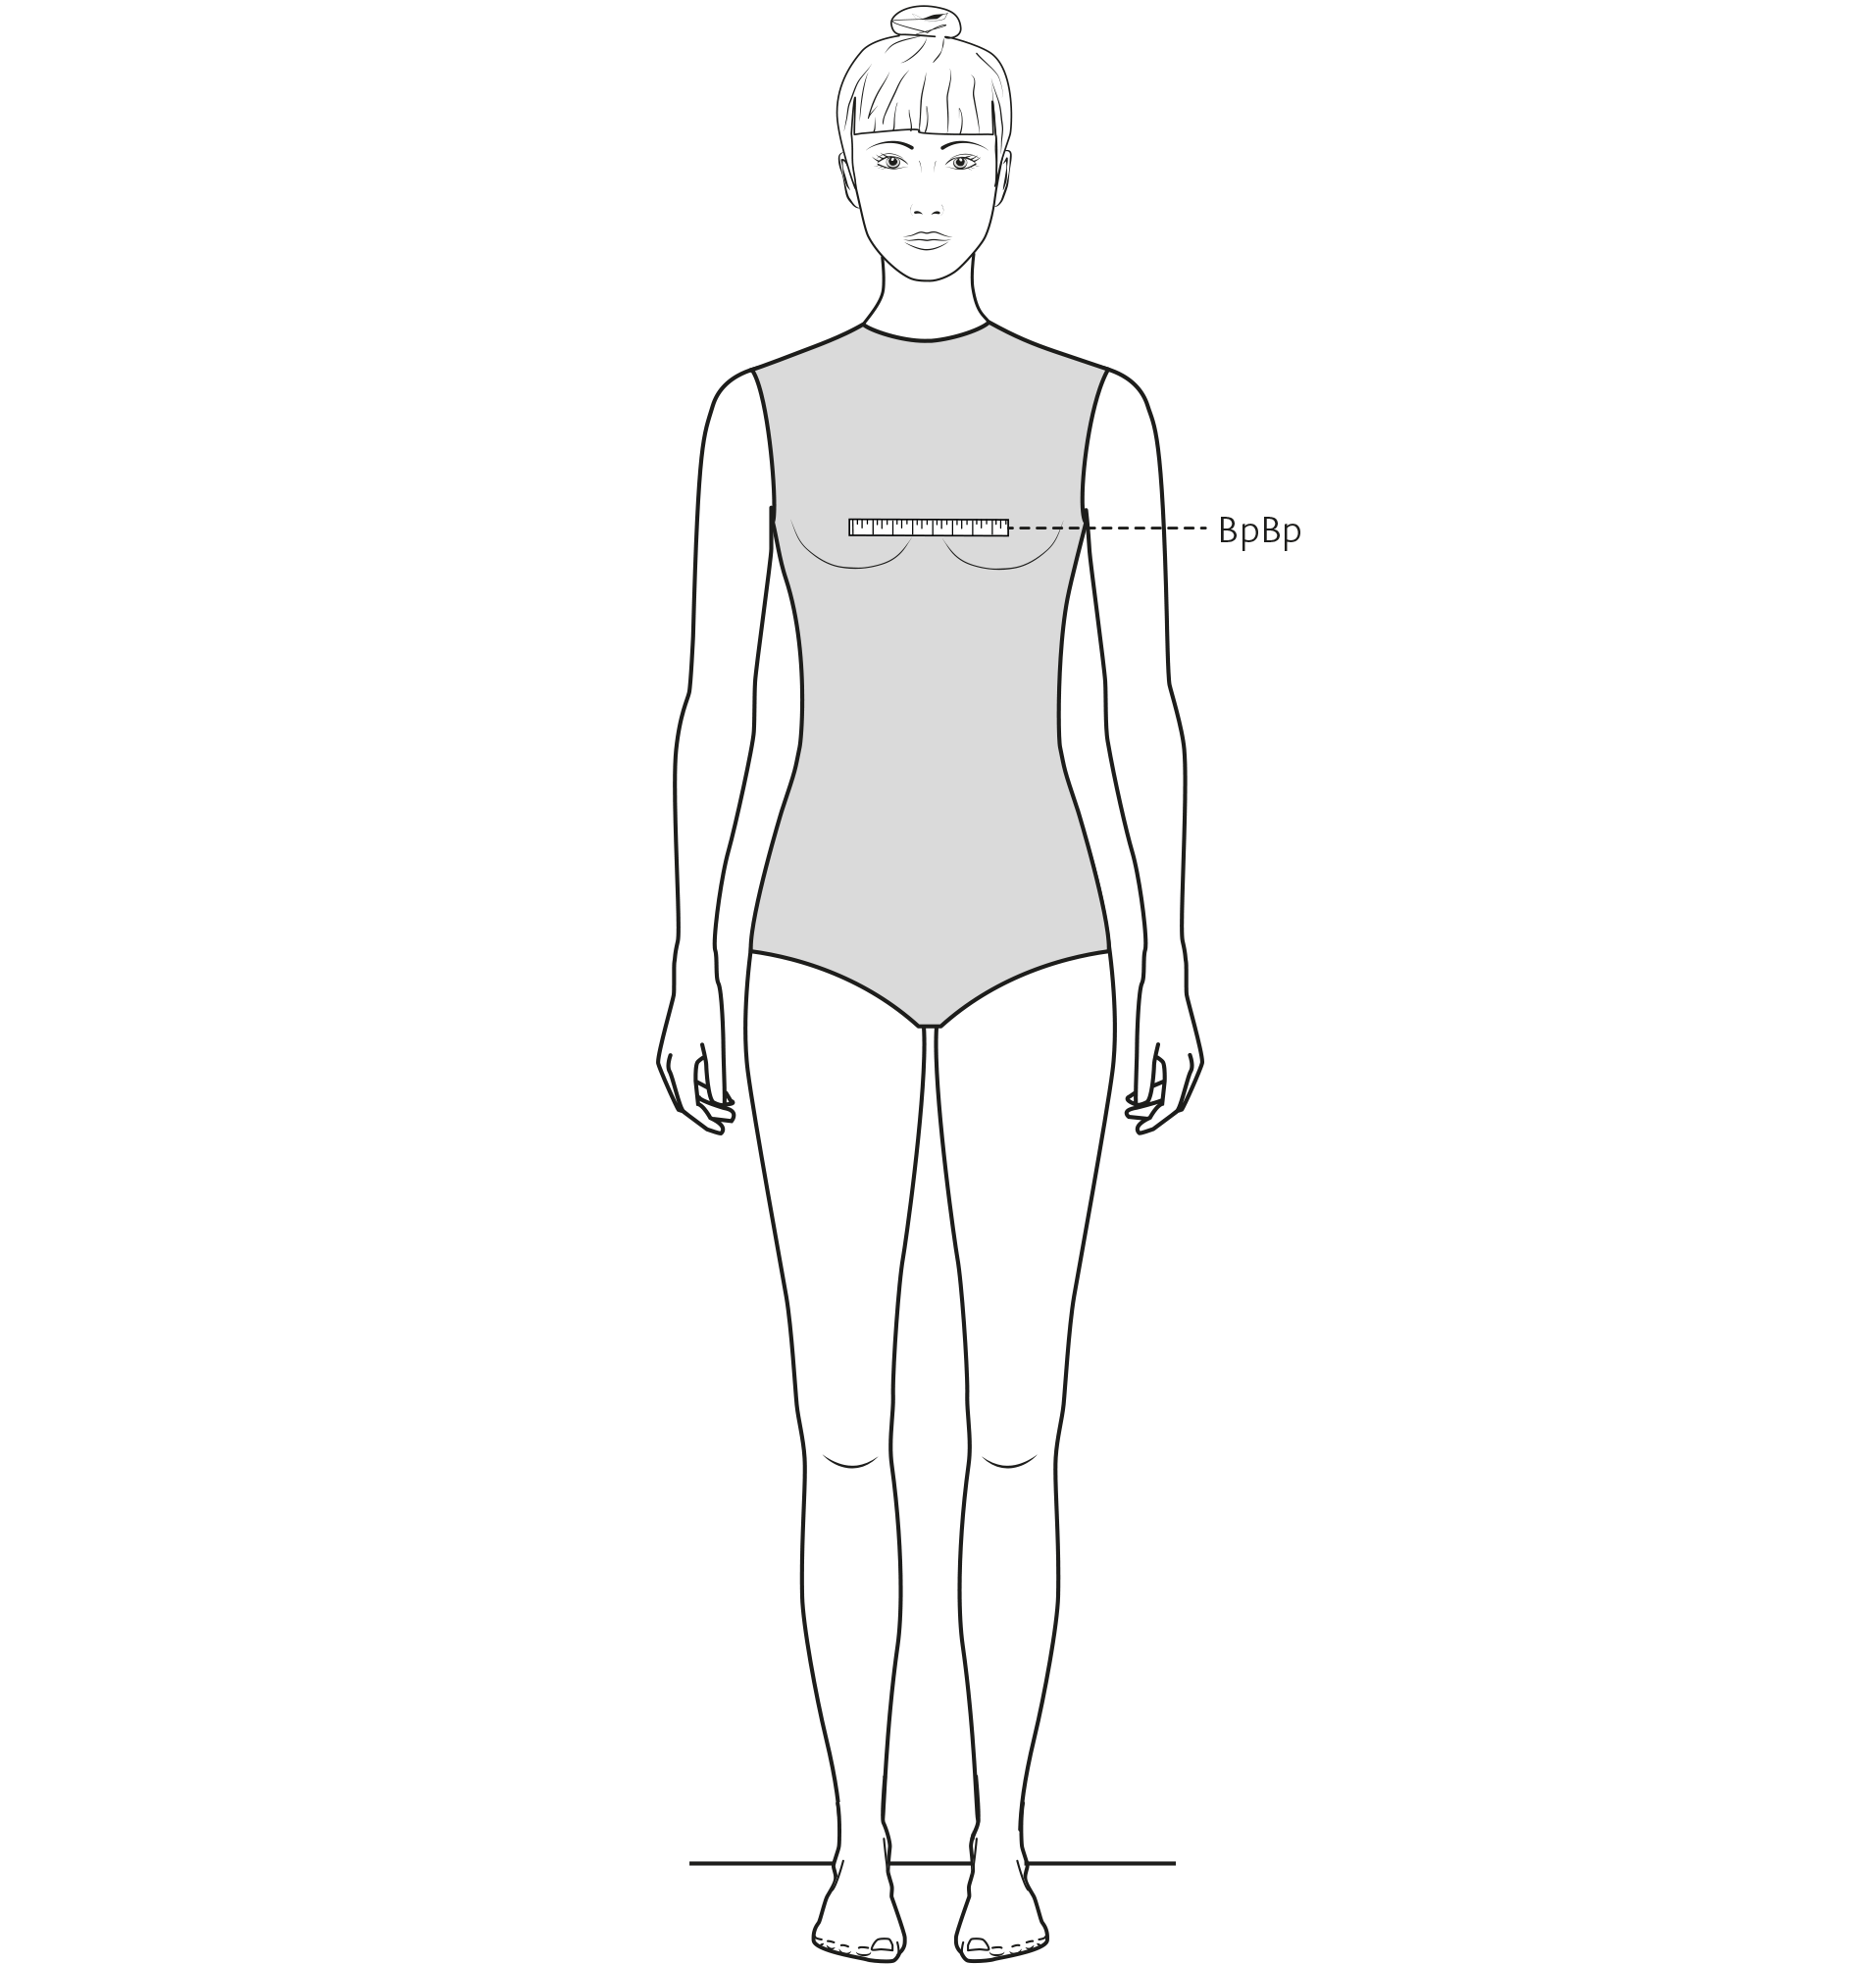
-
Measure horizontally from the left to the right bust point.
Heg – Head girth
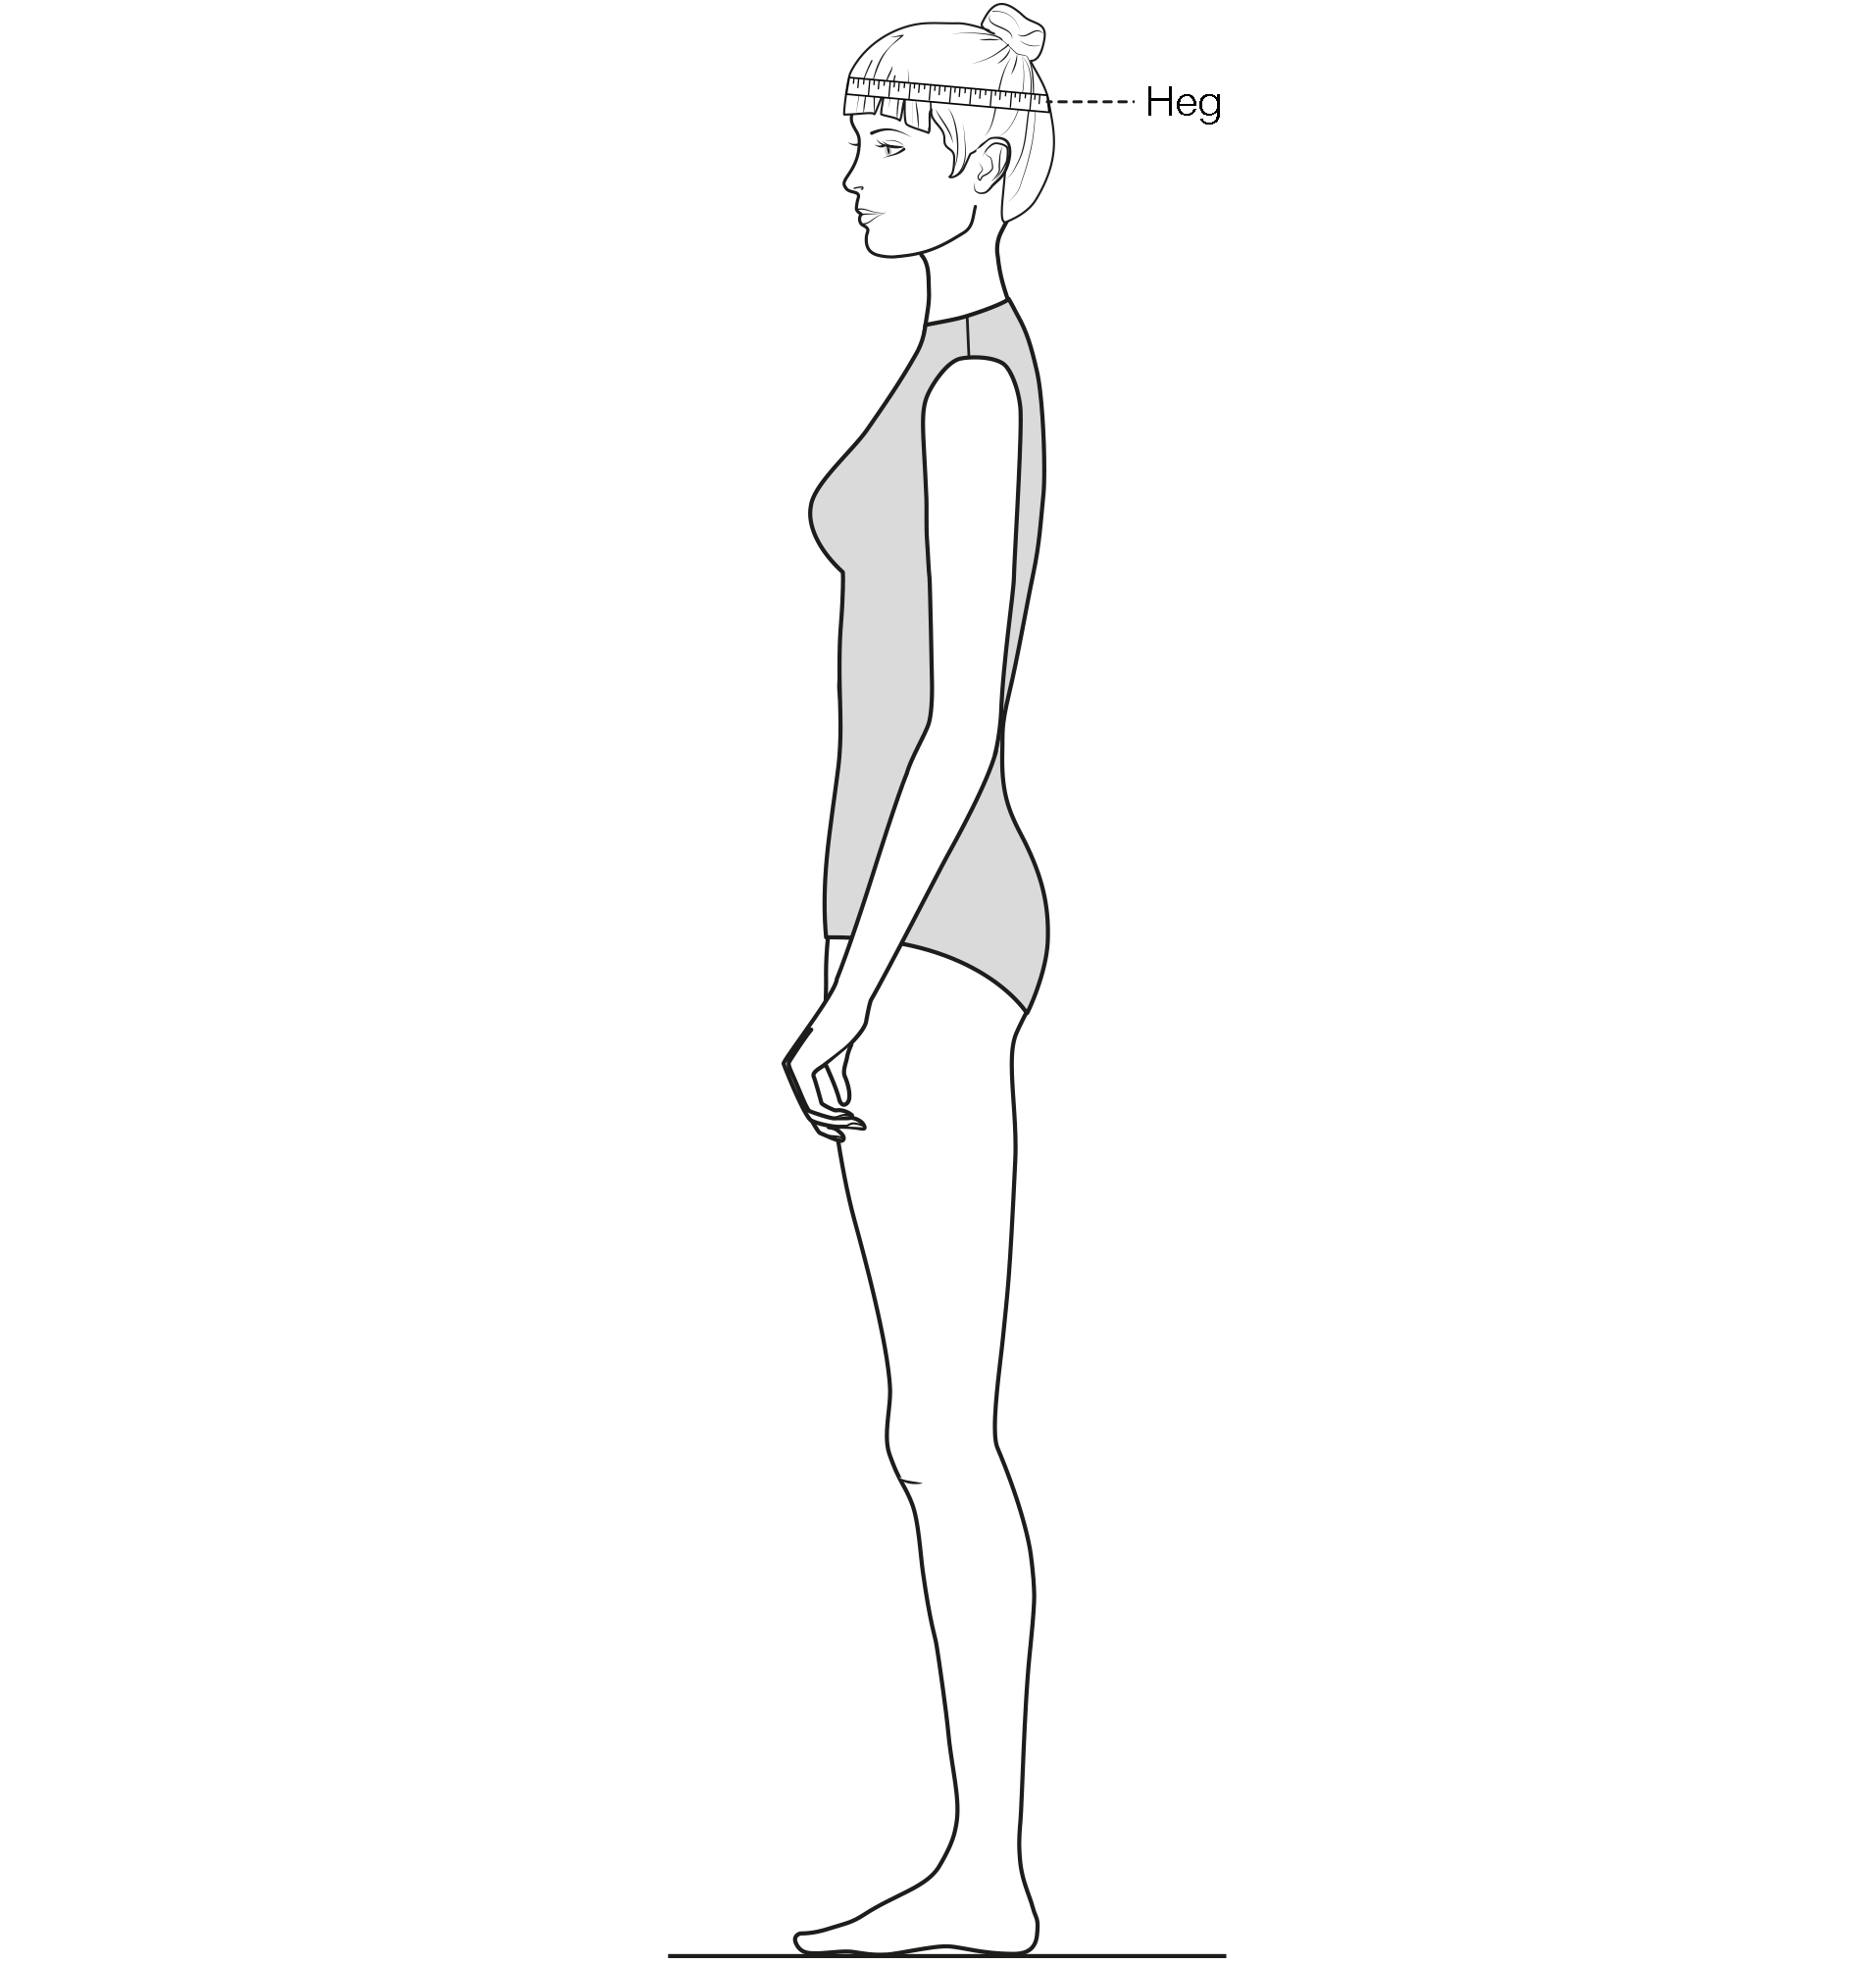
-
Measure the horizontal circumference over the fullest part of the head.
Measuring for trousers and skirts
Overview of the measurements used for the pattern construction of trousers and skirts:
1. Wg – Waist grith:
- Measure the circumference at the narrowest part of the waist. > see above
2. Hg – Hip grith:
- Measure the hip circumference horizontally over the fullest part of the seat and/or the hip. > see abov
Note: For the following length measurements, apply a waist band (a measuring tape with hooks and eyelets).
3. Kl –Knee length:
-
Measure the knee length at the centre front vertically from the waist to the middle of the knee.
4. Fl – Front length:
- Measure at the centre front from the lower edge of the waistband to the floor.
5. Rl – Rear length:
- Measure at the centre back from the lower edge of the waistband to the floor.
6. Sl – Side length:
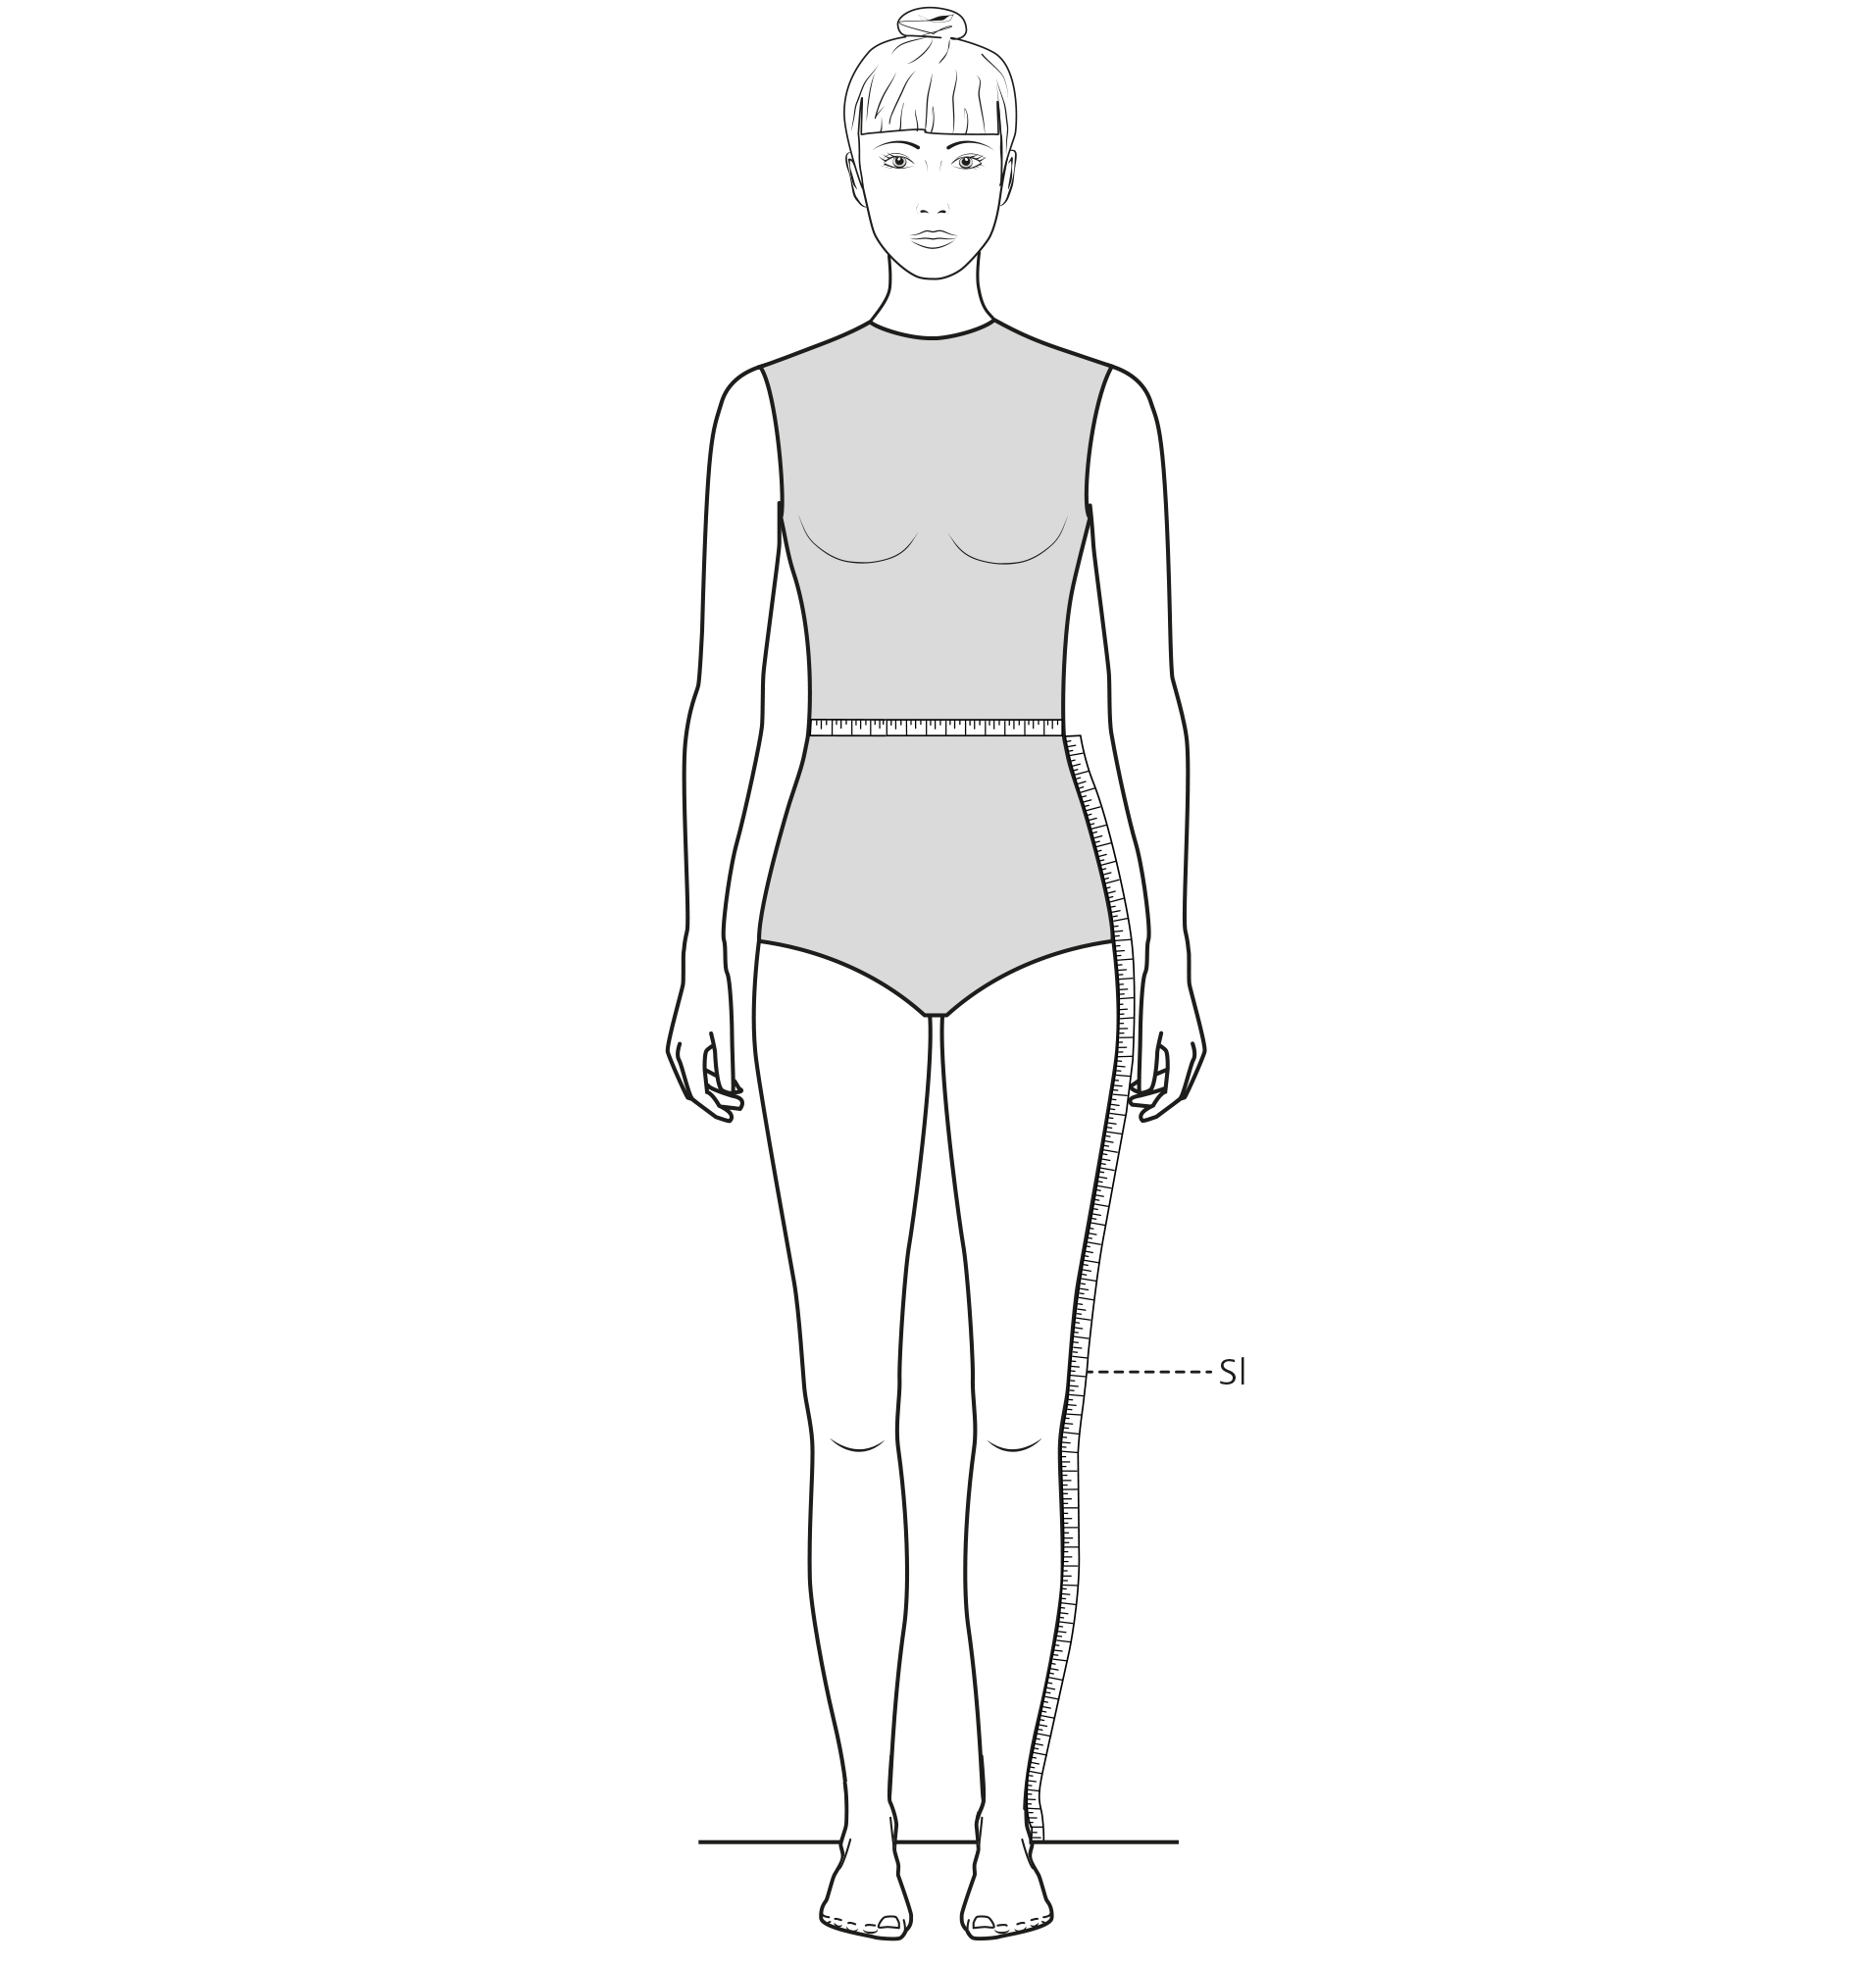
-
Measure vertically along the side from the waist to the floor.
6a. Is – Inseam:
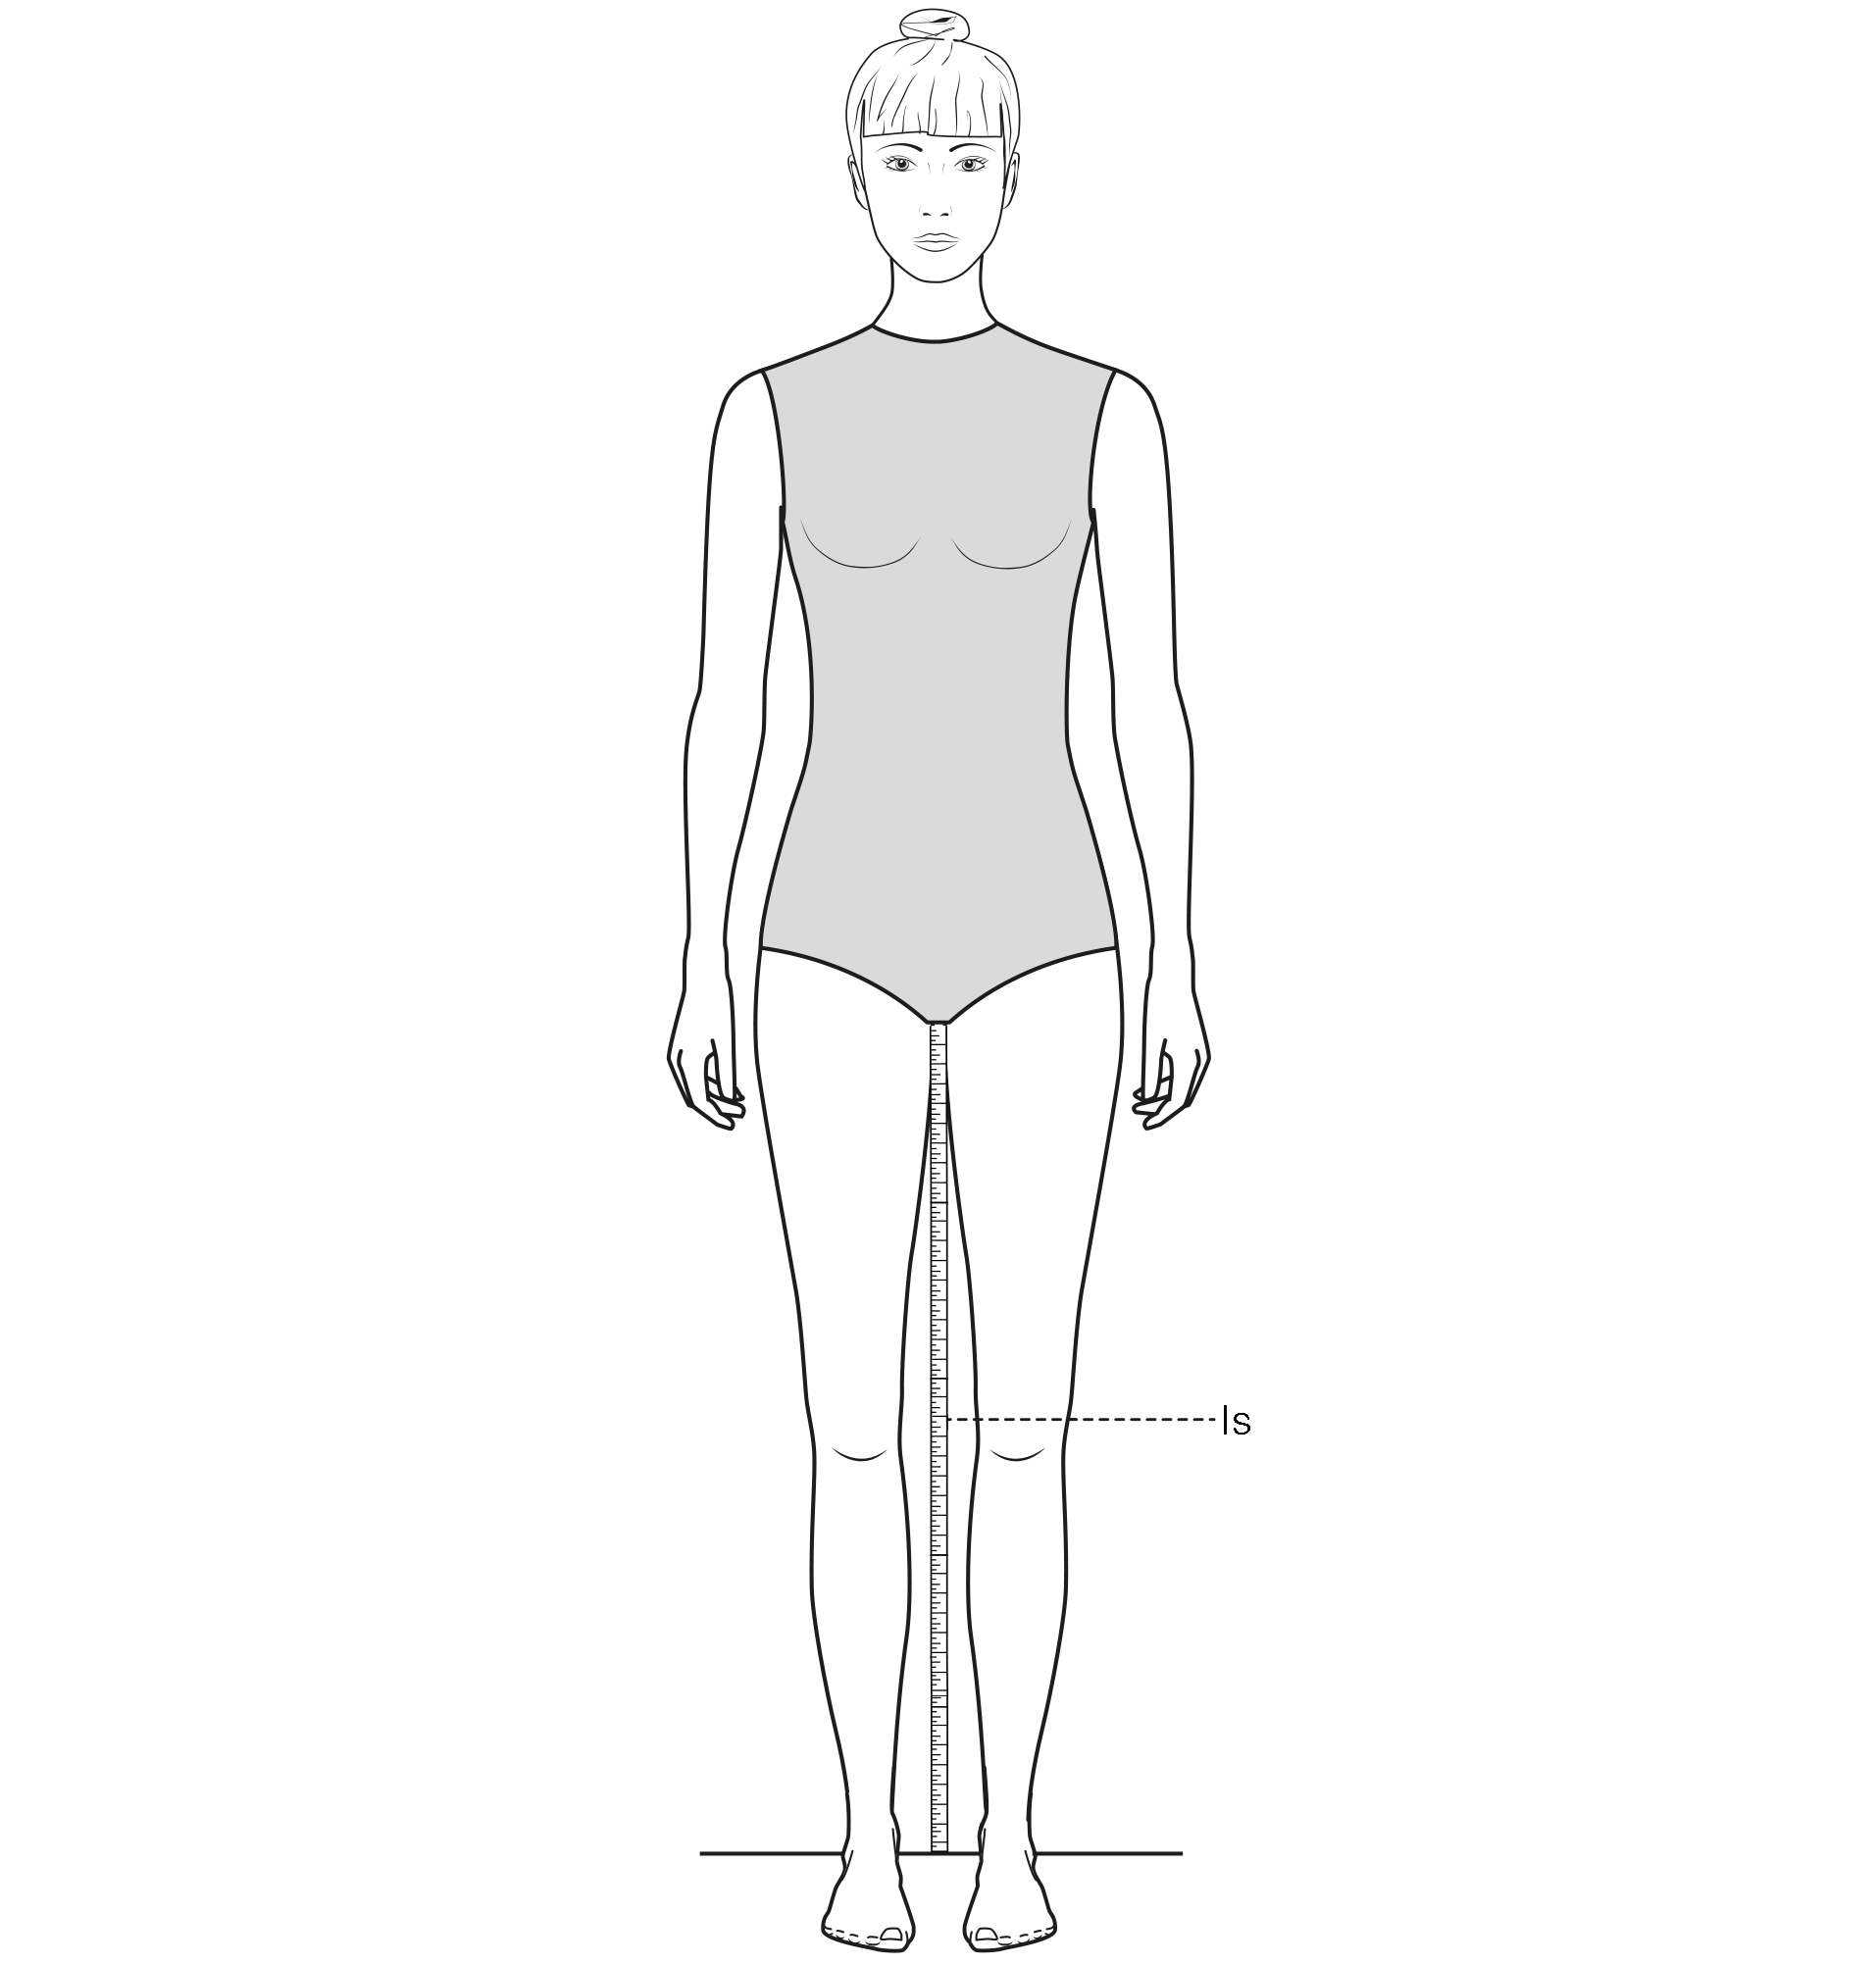
-
Measure vertically from the crotch to the floor. The inseam can also be calculated by subtracting the body rise measurement from the side length.
7. Br – Body rise:
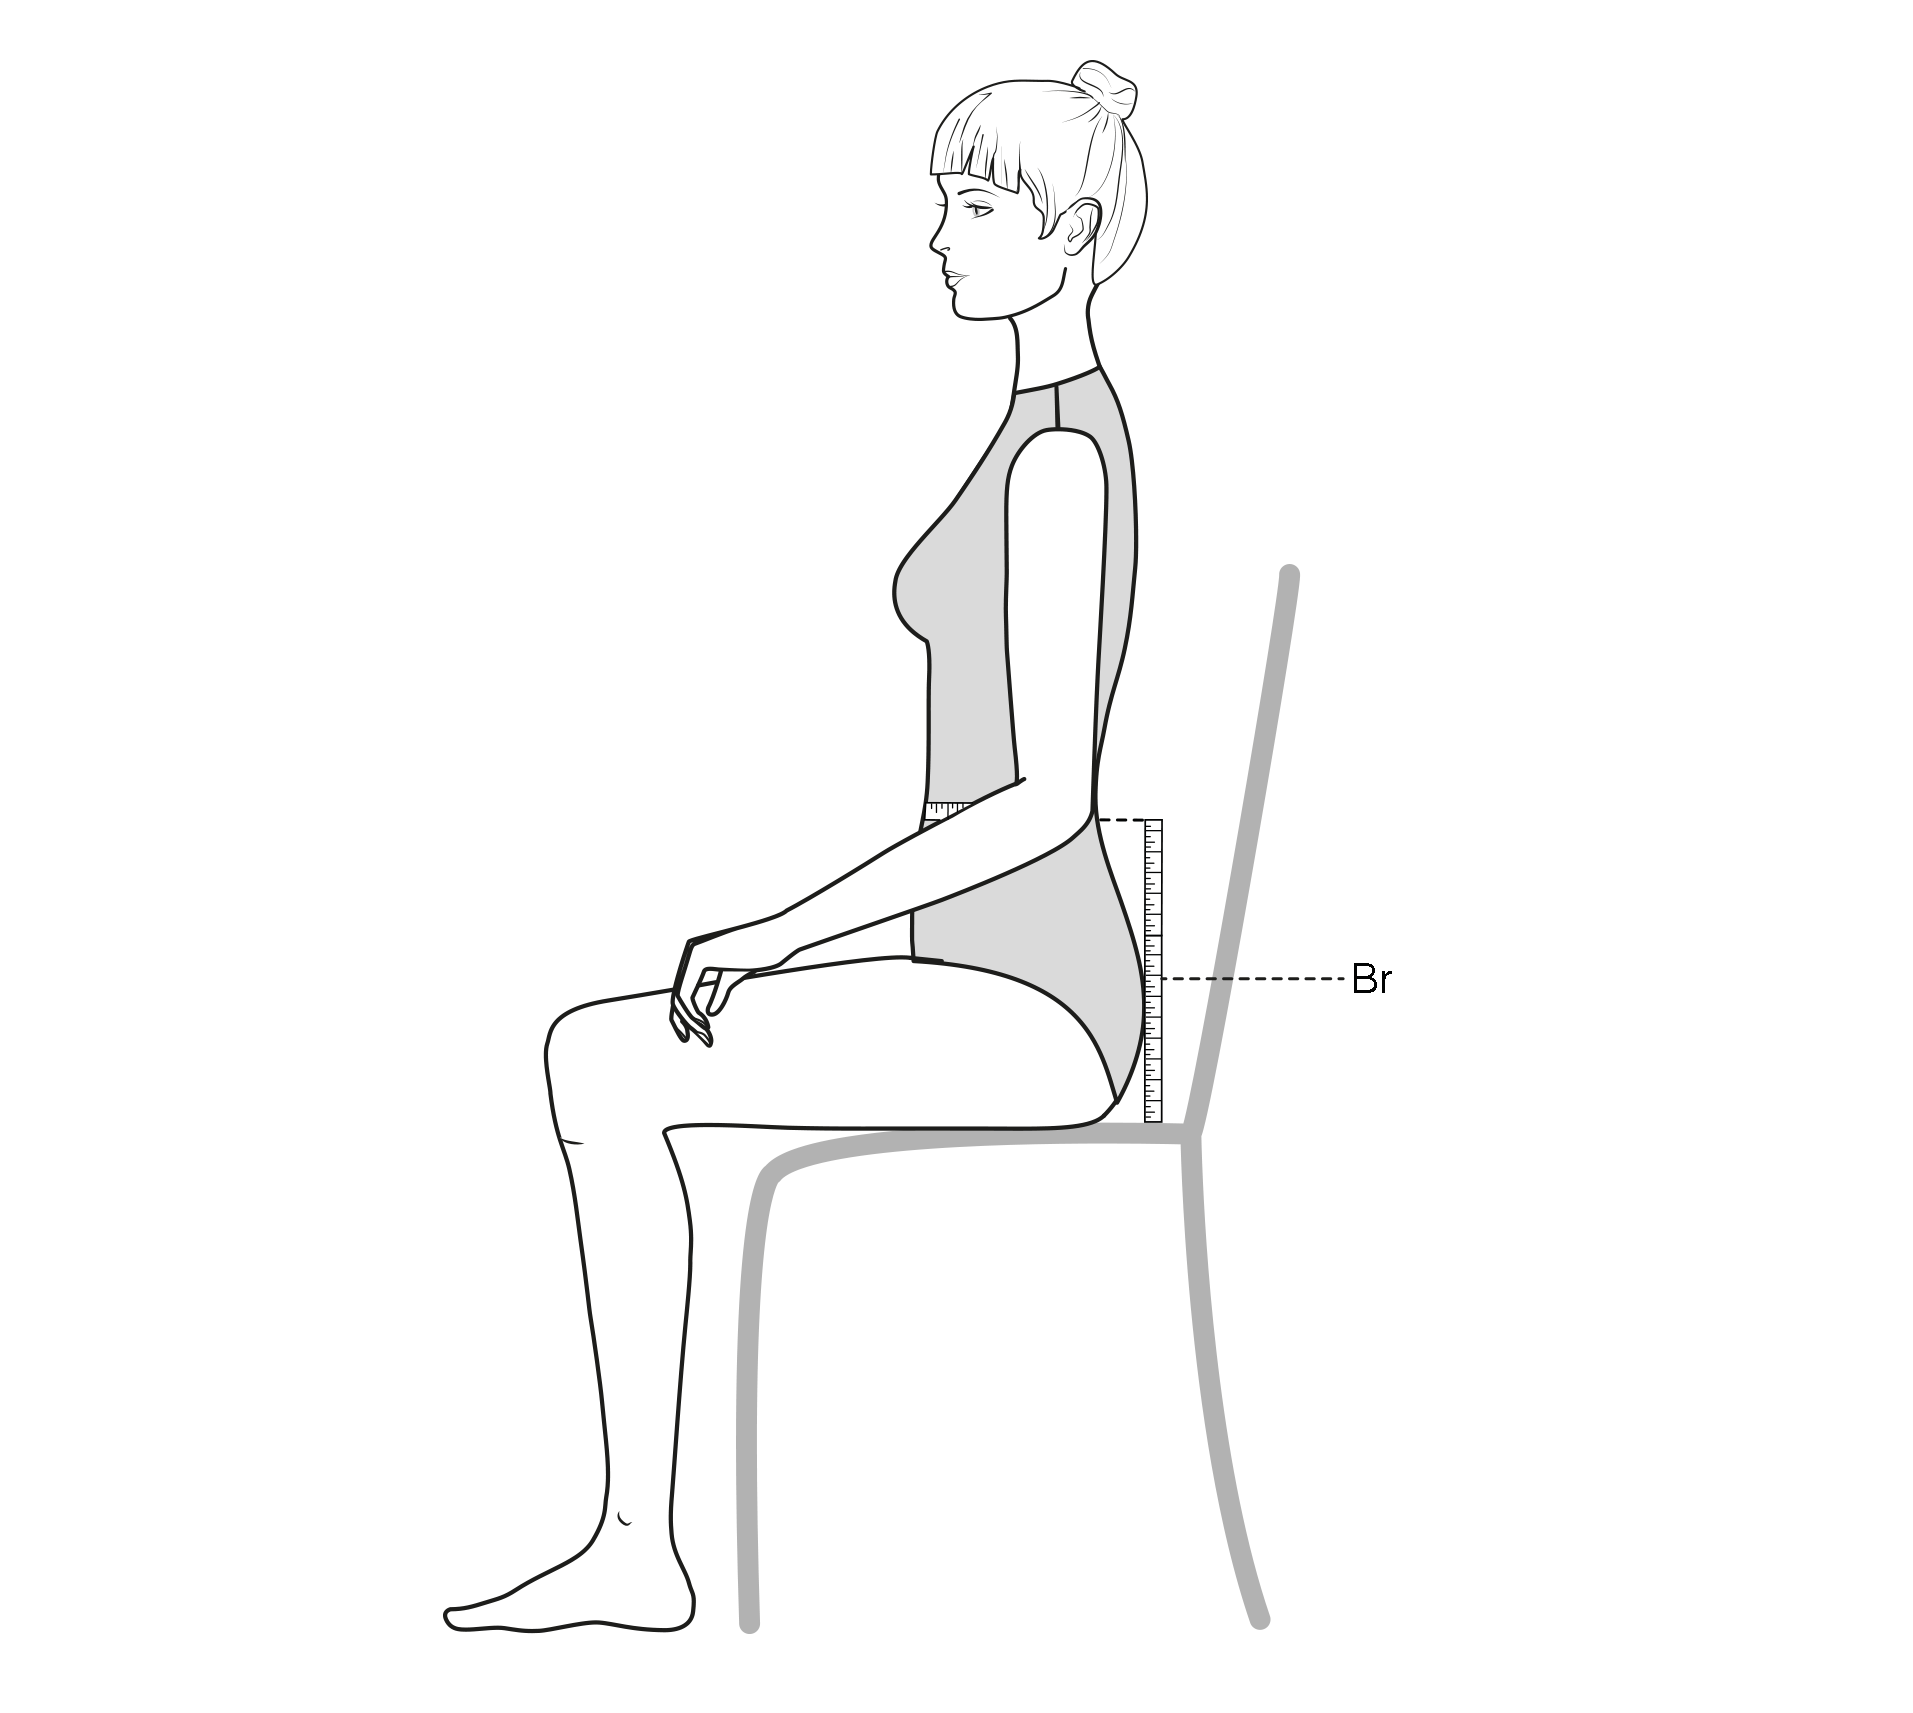
-
Sit the client being measured on a hard chair or stool, and measure along the side from the lower edge of the waist measure tape vertically down wards to the seat of the chair.
7a. WCW – Waist-crotch-waist:
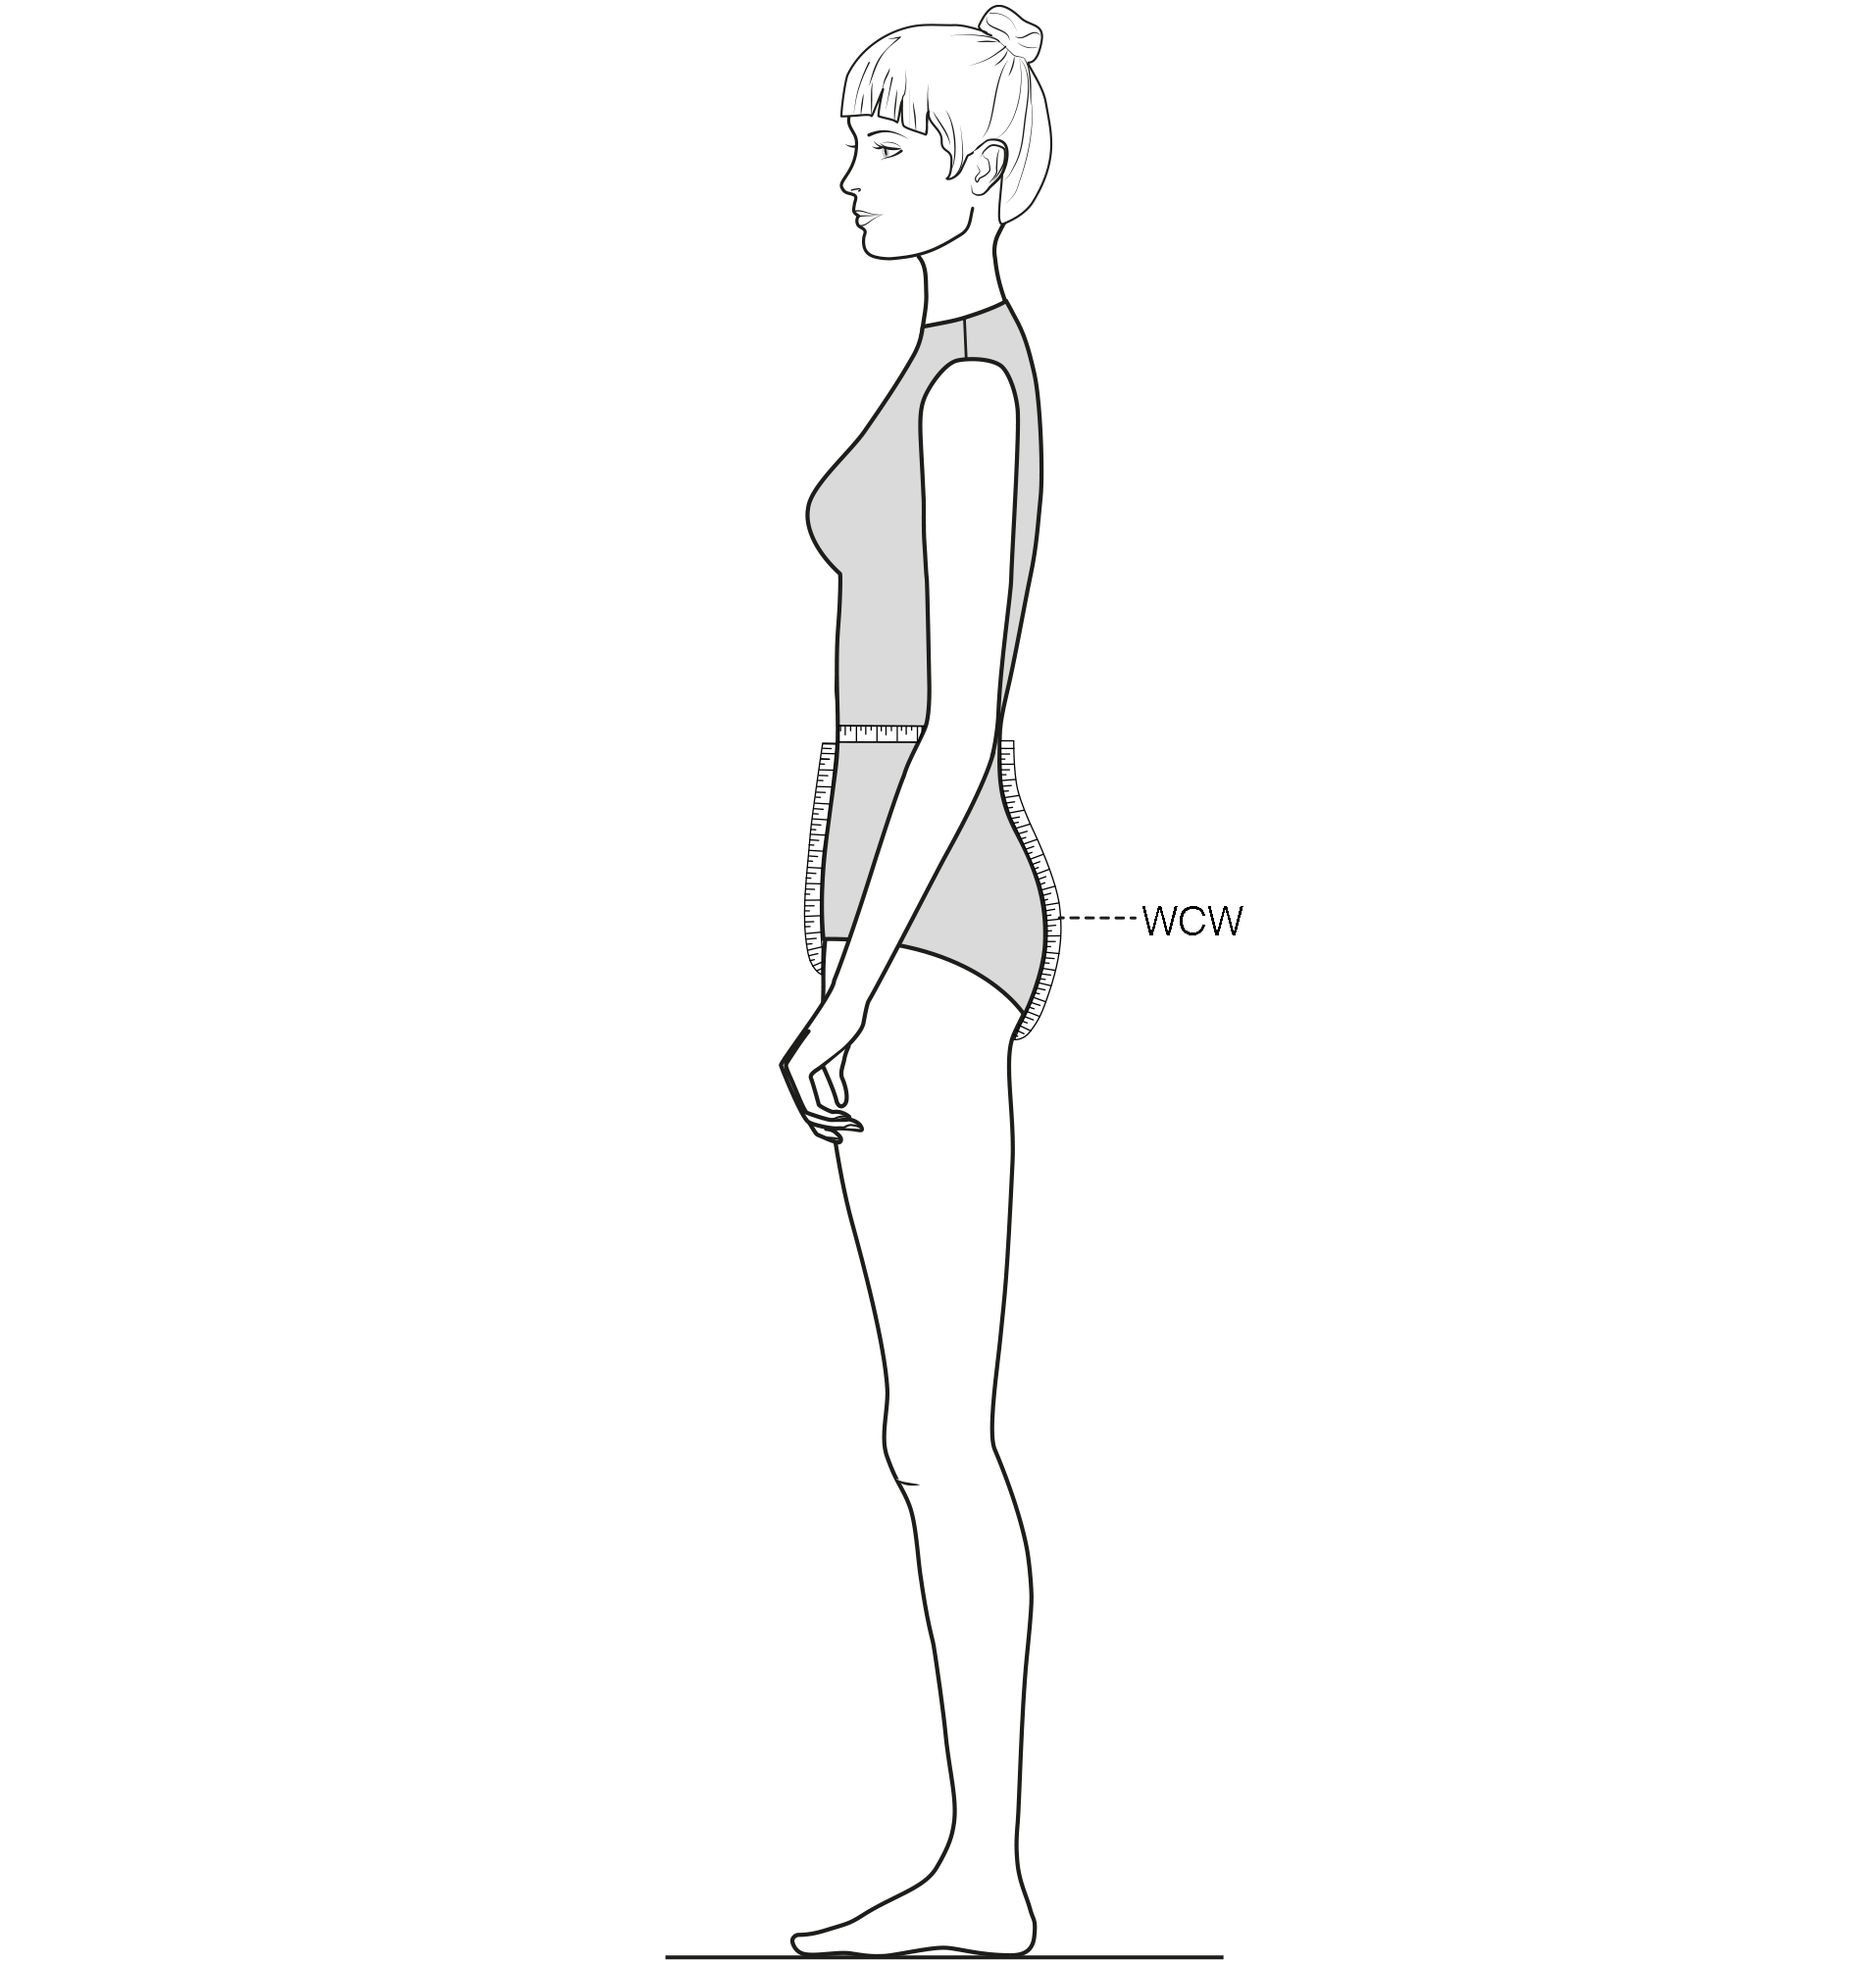
- Measure the crotch length from the front waist to the back waist. This measurement is only needed to verify the correct crotch length and is not needed for the pattern construction.
.
8. Tg – Thigh girth:
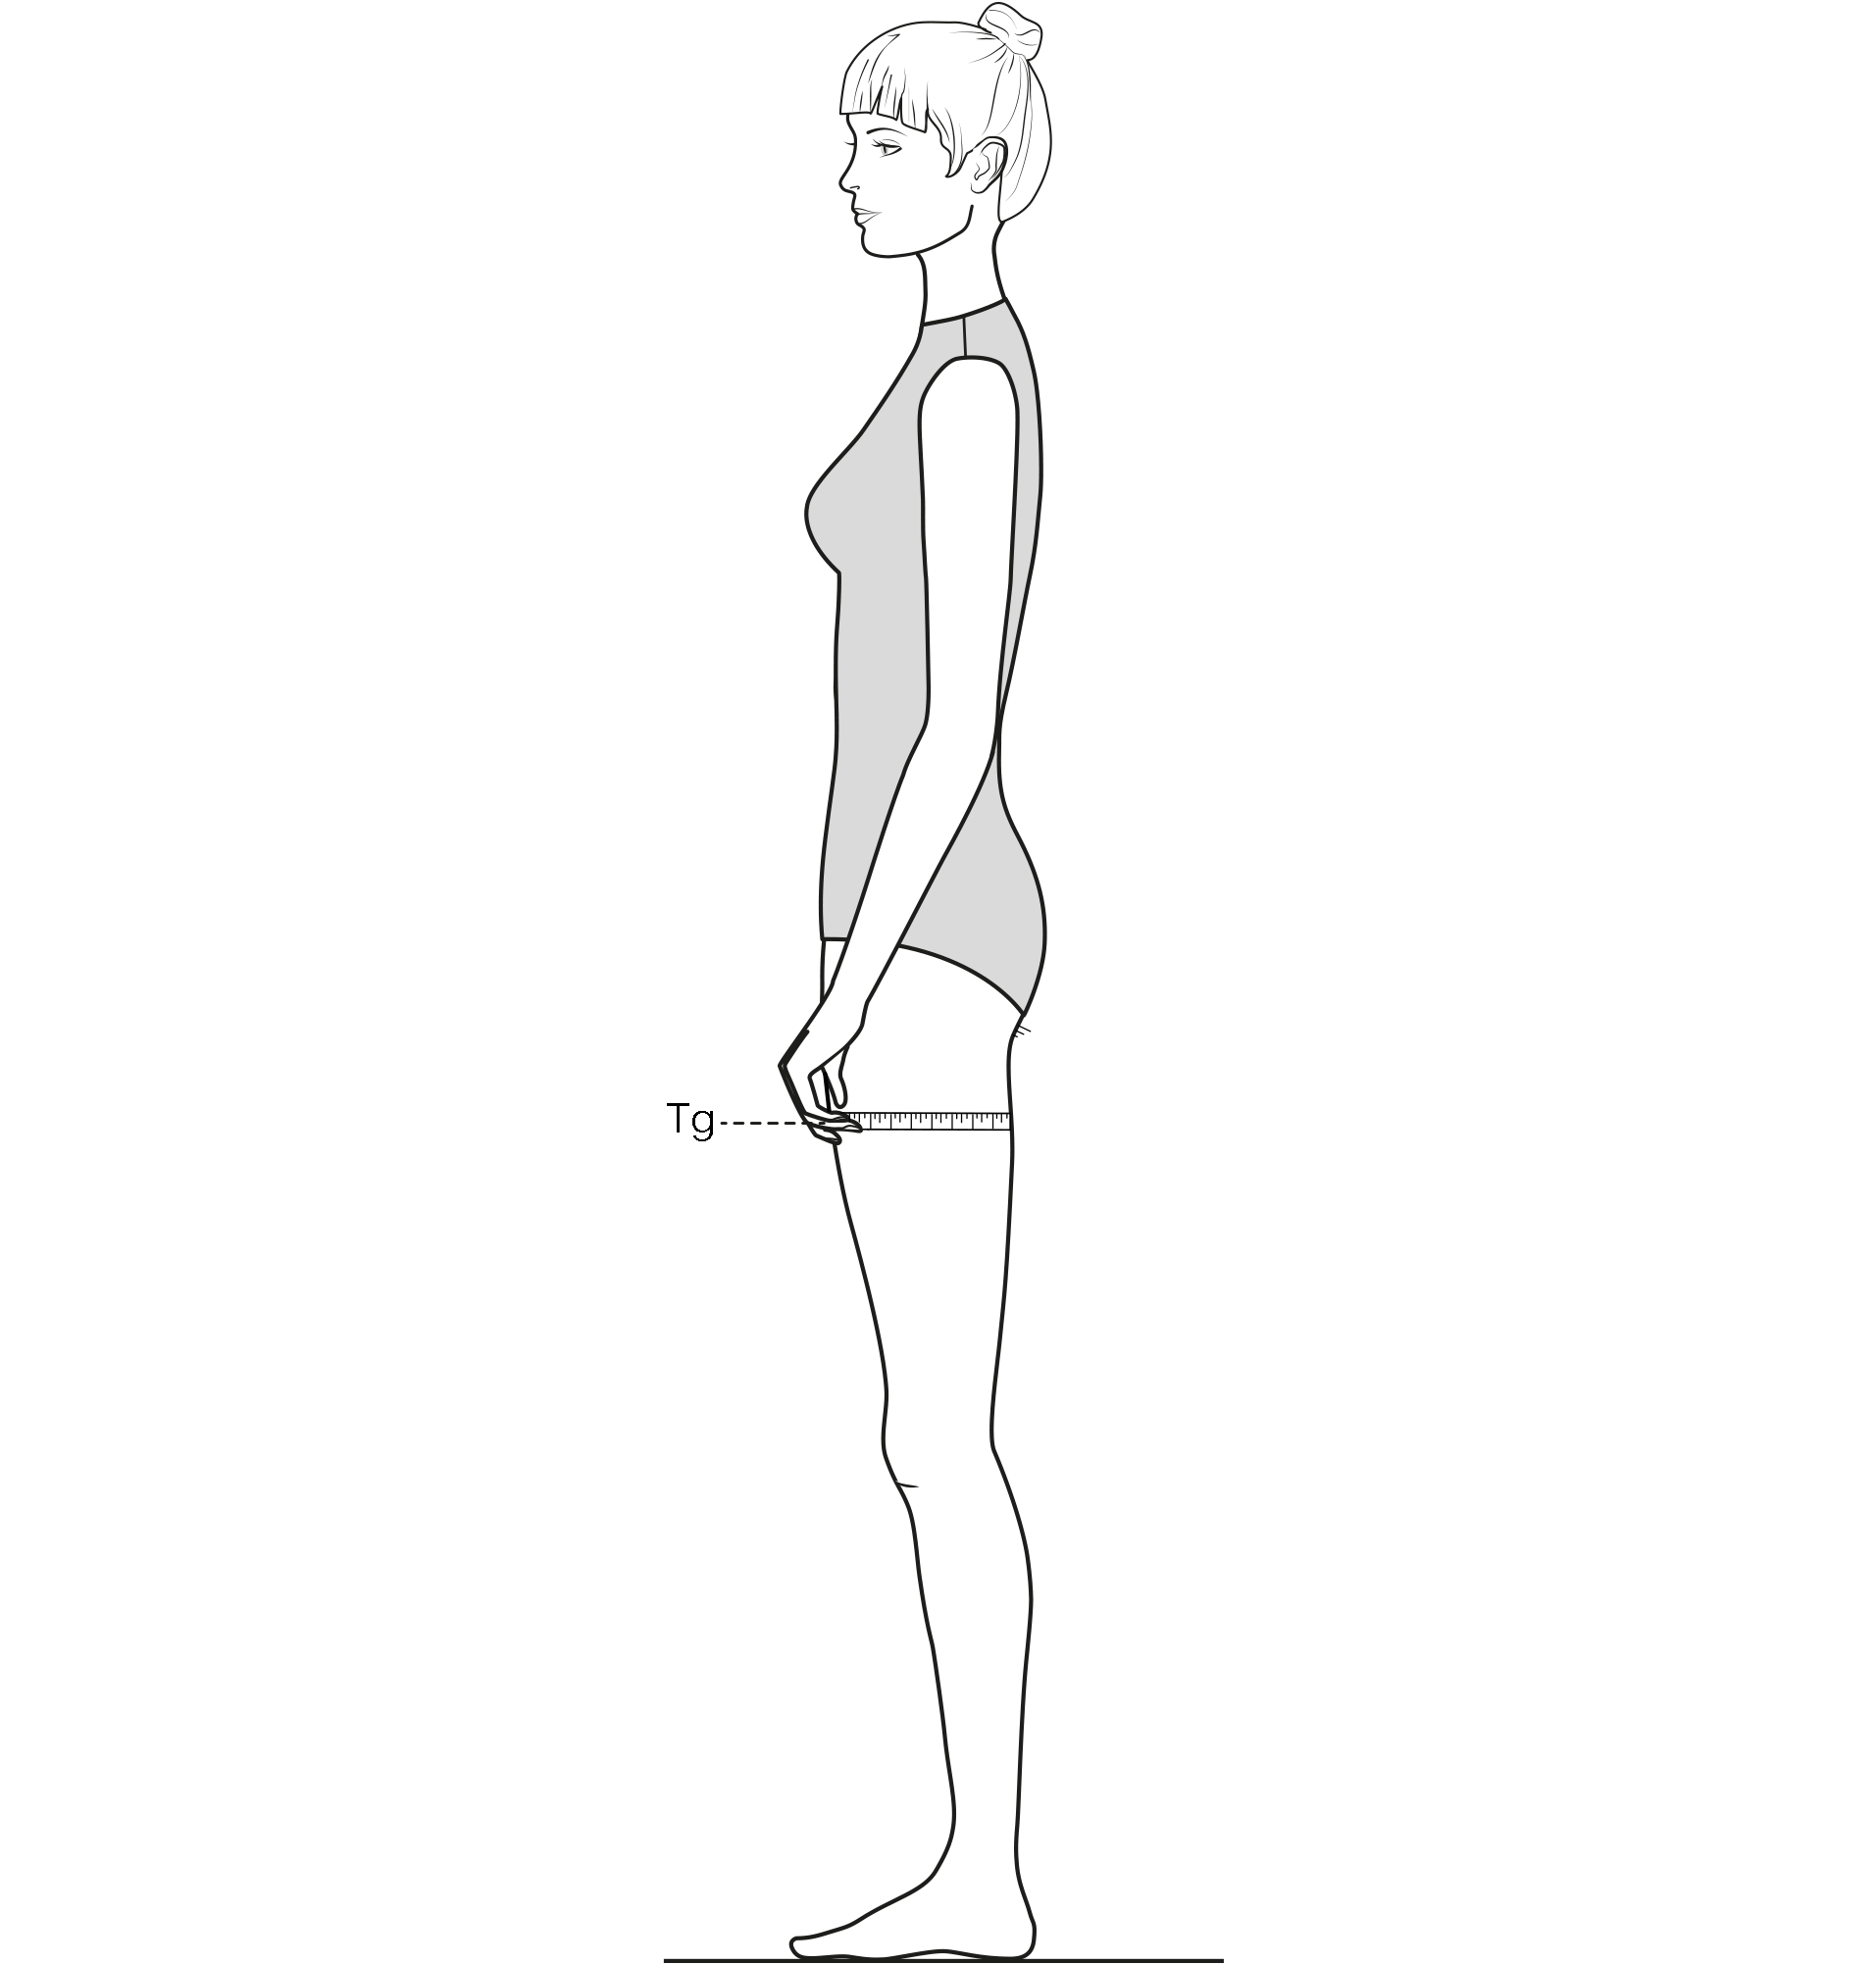
-
Measure the thigh circumference horizontally over the fullest part of the thigh.
9. Kbg – Kneeband girth:

-
Measure the circumference at the narrowest part just below knee.
10. Cag – Calf girth
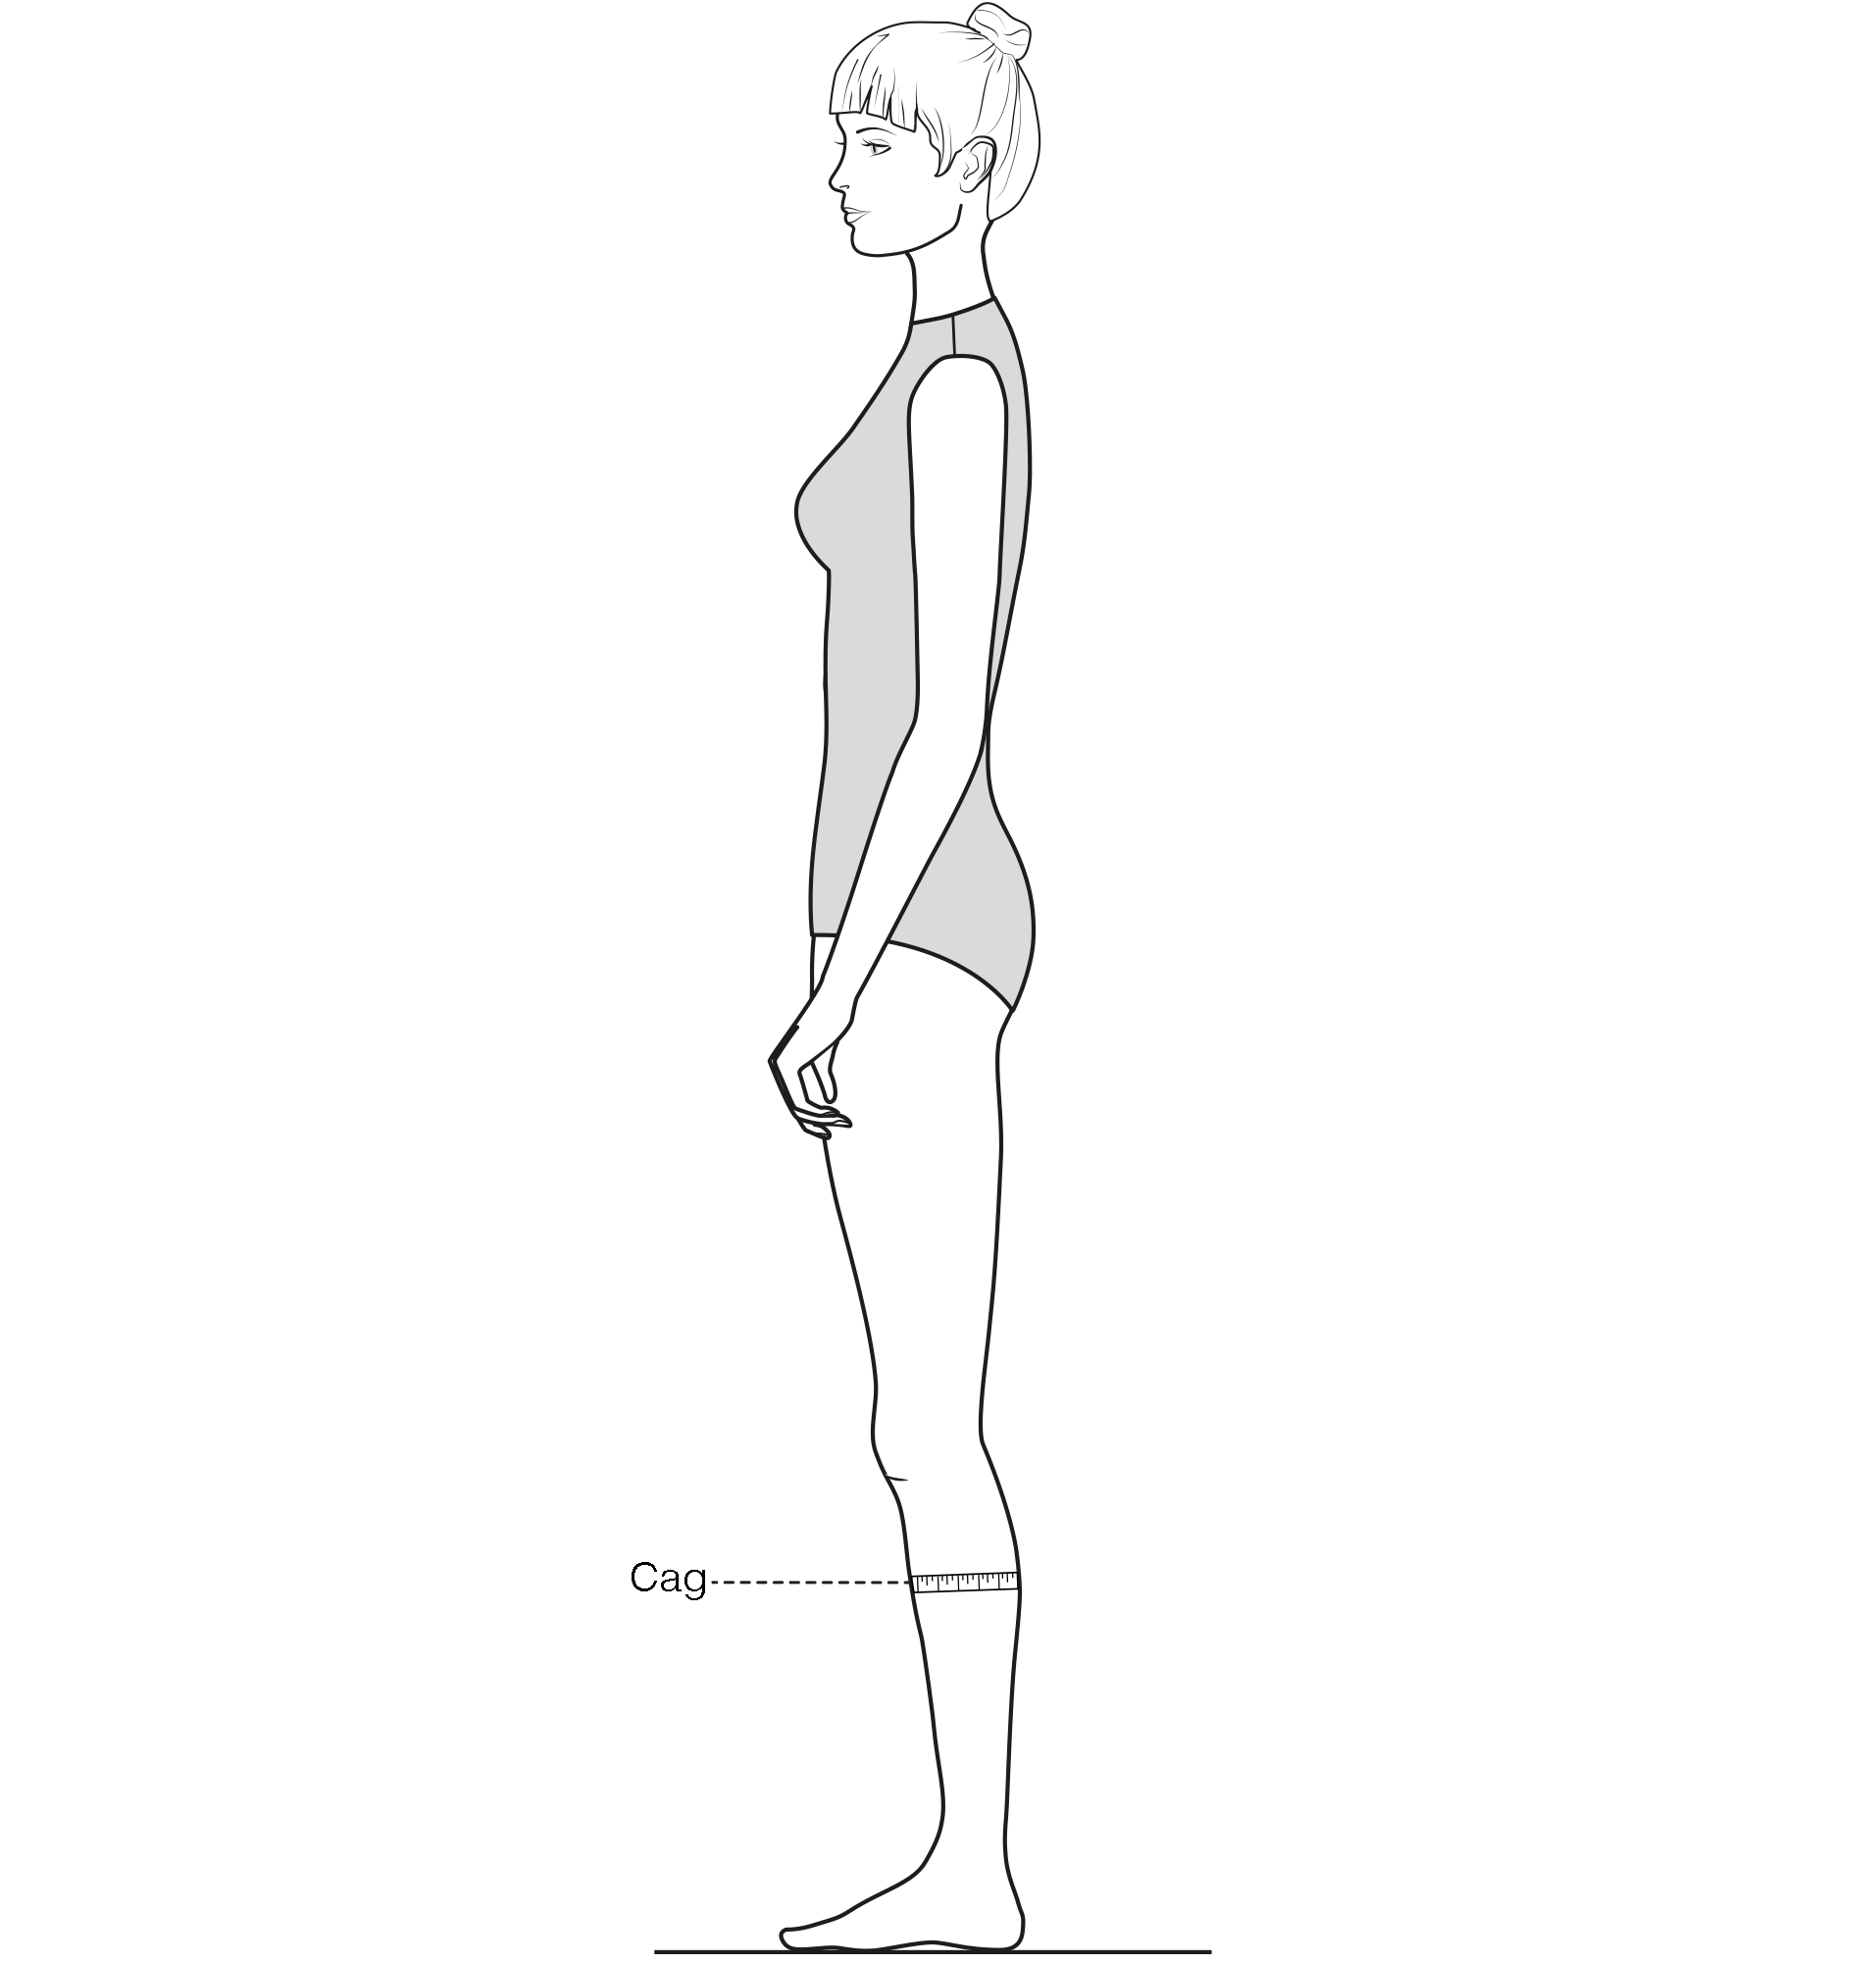
-
Measure the circumference over the fullest part of the calf.
11. Ag – Ankle girth:
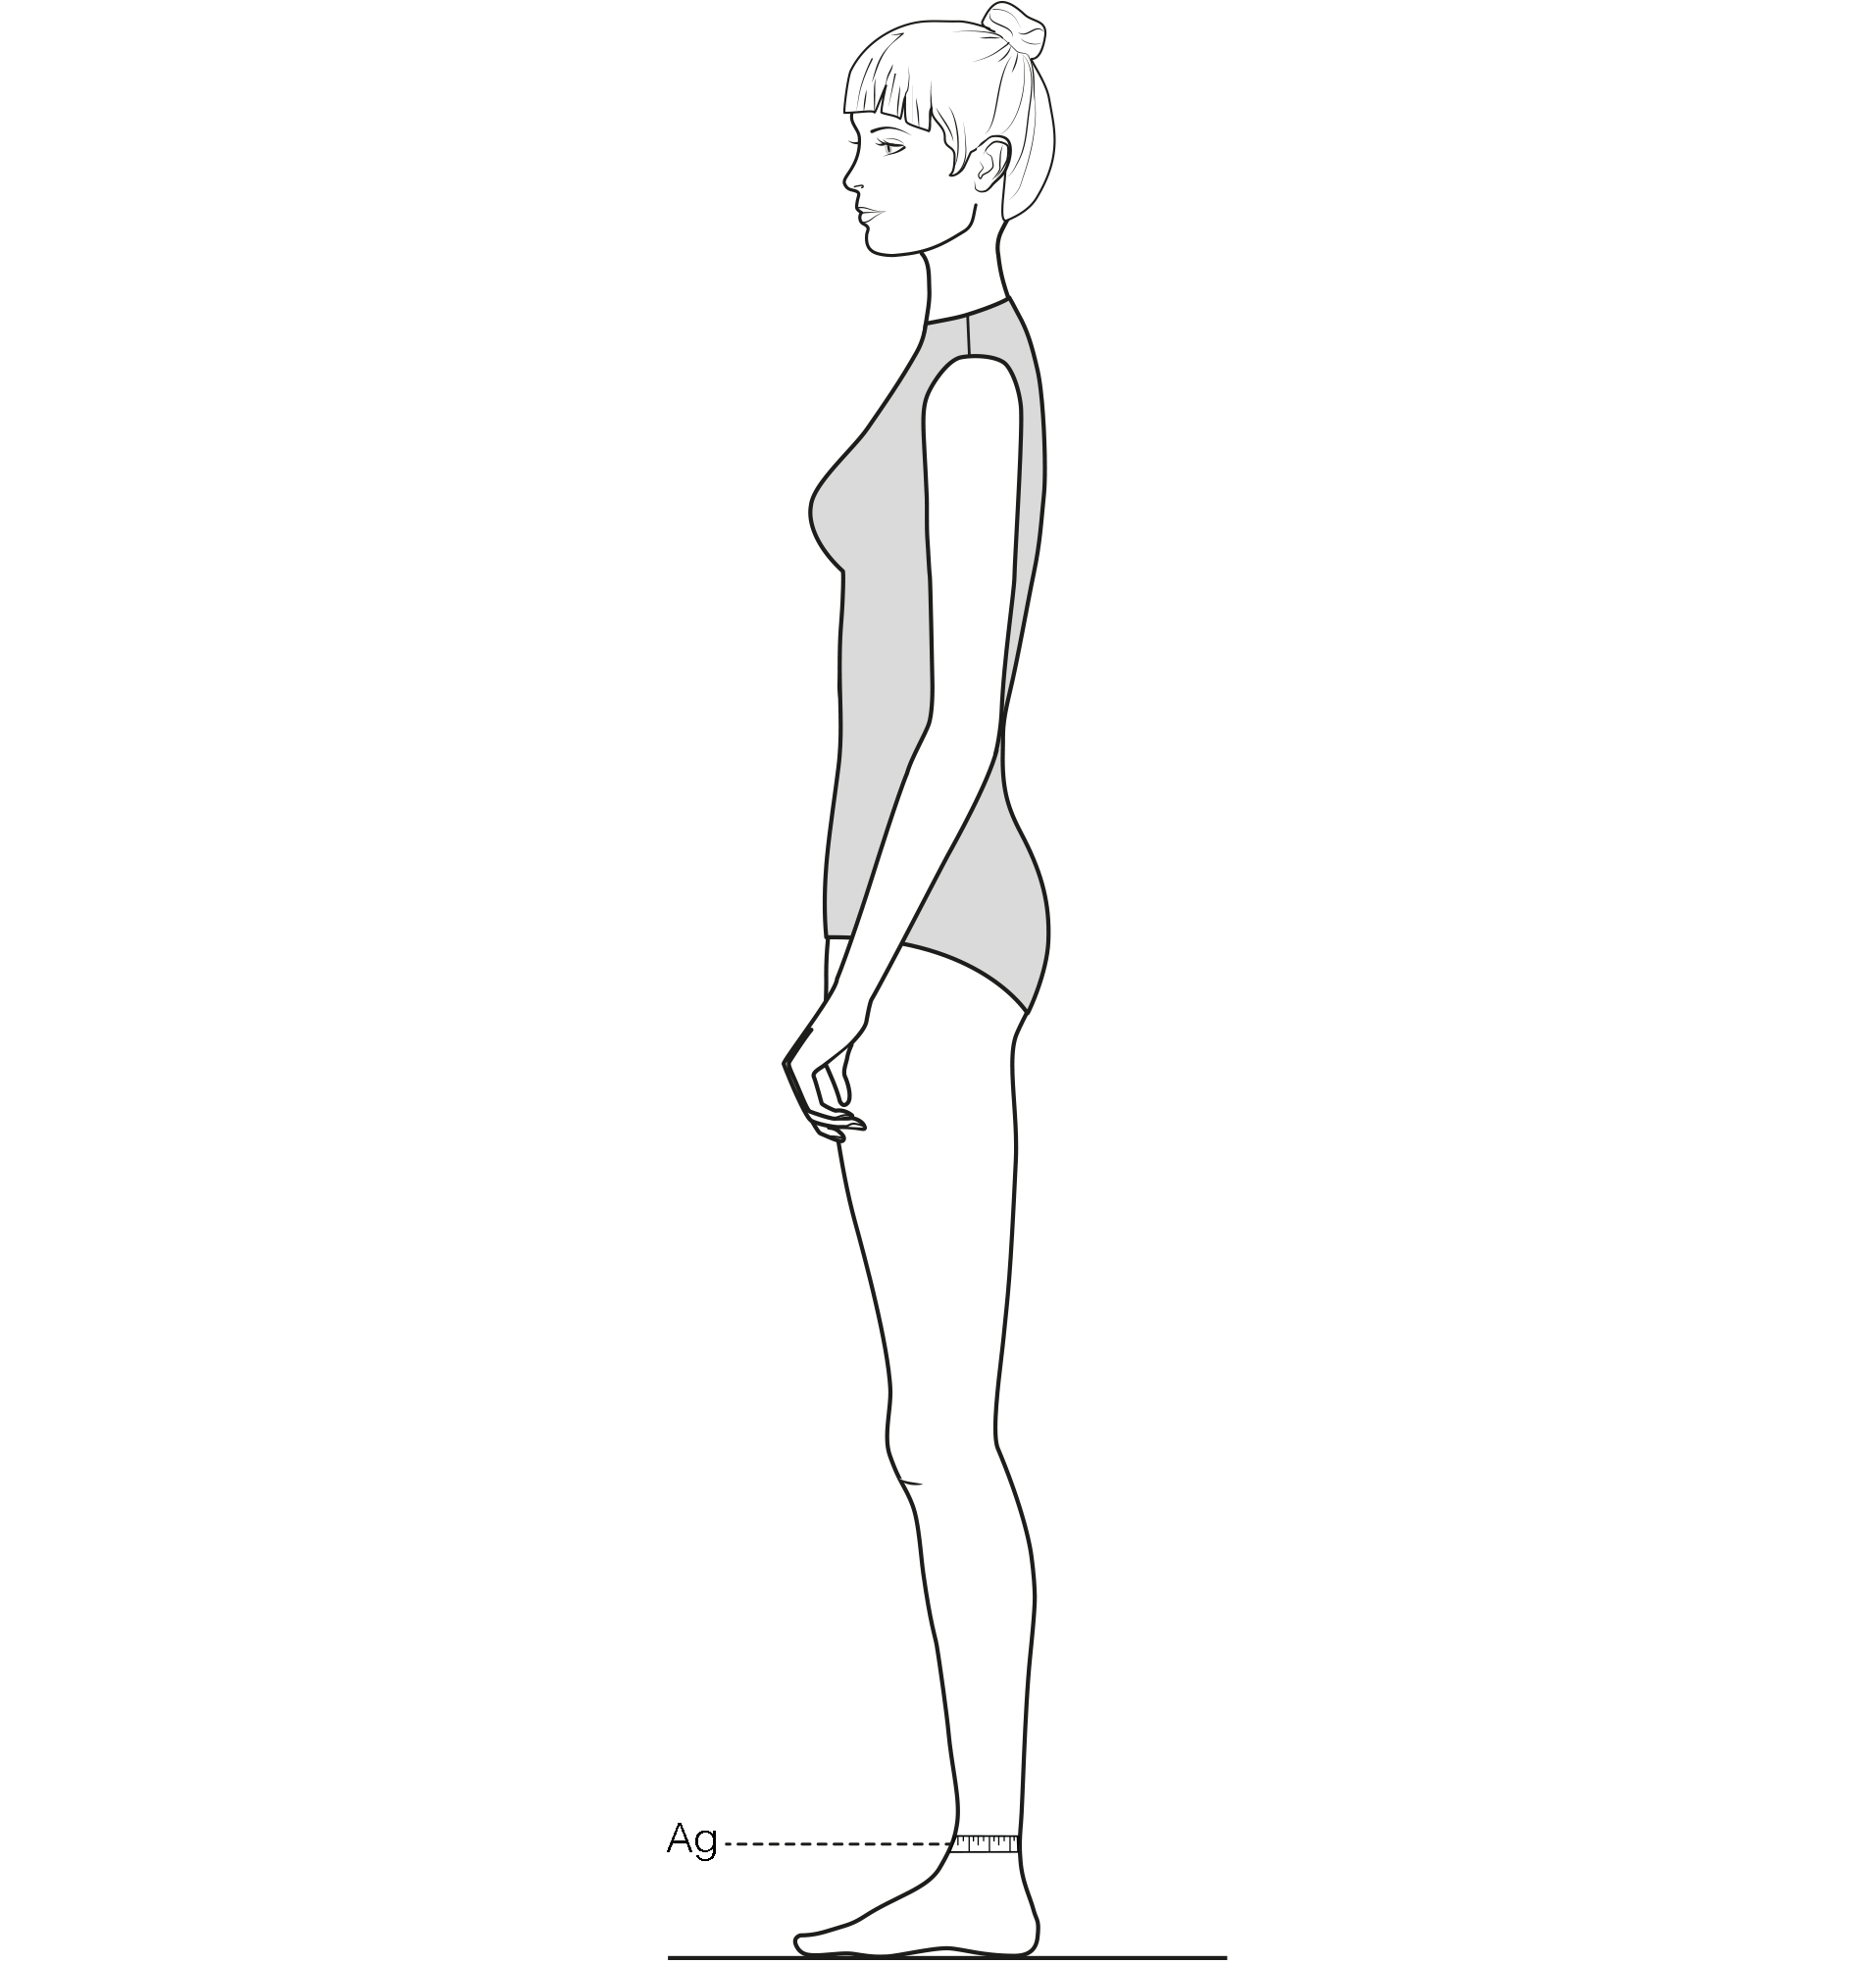
-
Measure the circumference over the fullest part of the ankle.
-